Okta SSO for MCP (Admin Config)
Set up Okta SAML SSO to enable authentication for the Regal MCP integration.
This guide walks through how to configure your Okta organization to enable SSO for the Regal MCP integration.
Before you beginThis setup requires a coordinated exchange between Regal and your team. Regal will initiate the process and send you two values to use in your Okta configuration. Once you've completed your side, you'll send three values back to Regal to finalize the connection. Contact Regal support to continue.
How the Setup Works
SAML federation requires configuration on both sides before either side has all the values it needs. The process happens in three rounds:
- Regal configures first — Regal creates a SAML Identity Provider in their system for your organization and generates two values: an Audience URI and an Assertion Consumer Service (ACS) URL. Regal will share these with you before you begin.
- You configure your Okta — Using those values, you create a SAML 2.0 application in your Okta organization and configure the required attribute statements.
- You send values back to Regal — After saving your application, you share three values from your Okta with Regal, who finalizes the Identity Provider configuration and sets up routing for your organization.
Prerequisites
- Admin access to your Okta organization
- The Audience URI and ACS URL provided by your Regal Customer Success Manager
Step 1: Create a SAML 2.0 Application in Okta
- Log in to your Okta Admin Console.
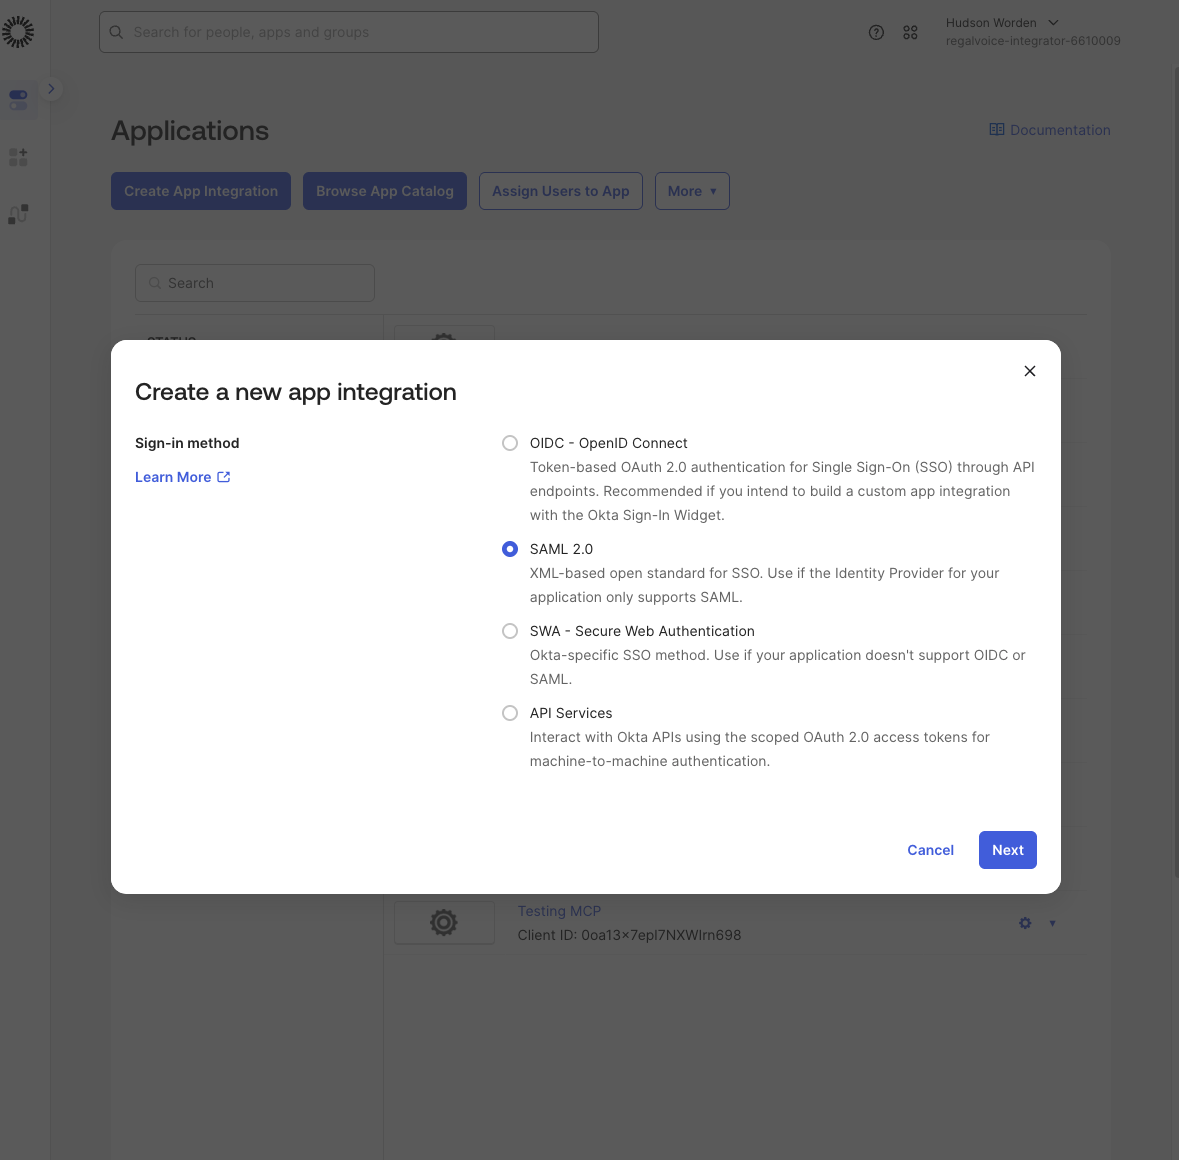
- Navigate to Applications > Applications and click Create App Integration.
- In the dialog, select SAML 2.0 as the sign-in method and click Next.
- Enter a name for the application (e.g.,
Regal MCP) and click Next.
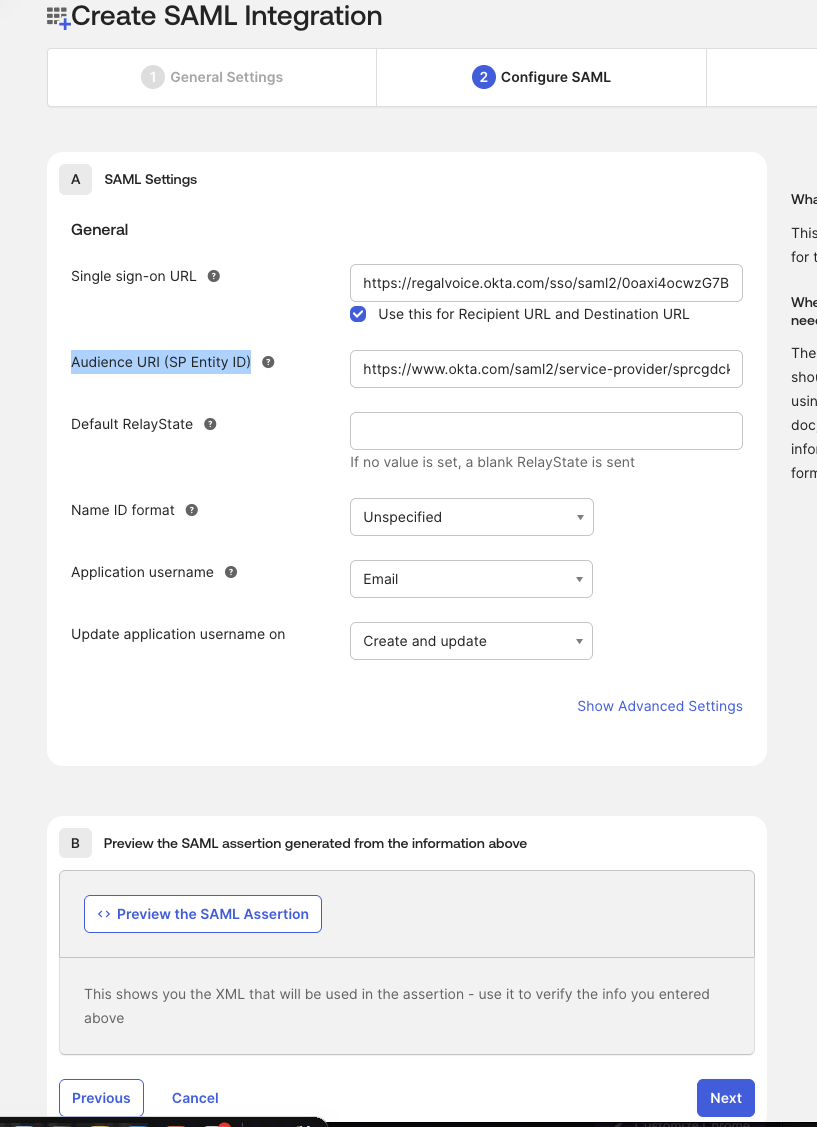
Step 2: Configure SAML Settings
On the Configure SAML step, fill in the following fields using the values provided by Regal:
| Field | Value |
|---|---|
| Single sign-on URL | The ACS URL provided by Regal |
| Audience URI (SP Entity ID) | The Audience URI provided by Regal |
| Application username |
Leave all other fields at their defaults.
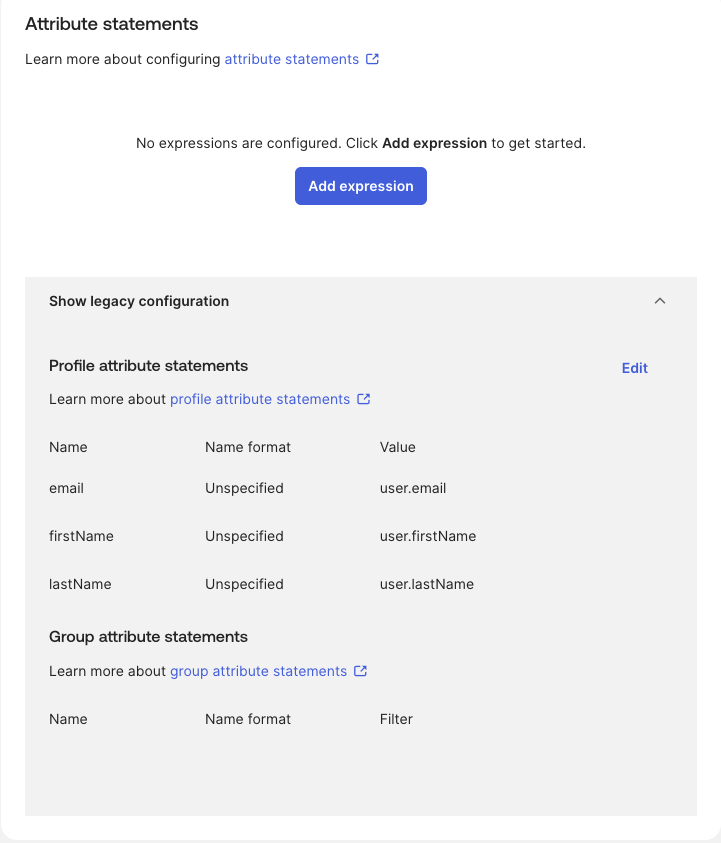
Step 3: Configure Attribute Statements
After saving the application, you need to add attribute statements so Regal can identify your users.
- Navigate to the Sign On tab of your newly created application.
- Click Edit under Settings.
- Scroll down and click Show legacy configuration to expand attribute settings.
- Under Profile attribute statements, confirm or add the following:
| Name | Name format | Value |
|---|---|---|
email | Unspecified | user.email |
firstName | Unspecified | user.firstName |
lastName | Unspecified | user.lastName |
Click Save.
Step 4: Assign Users
Navigate to the Assignments tab and assign the users or groups who should be able to authenticate with Regal MCP.
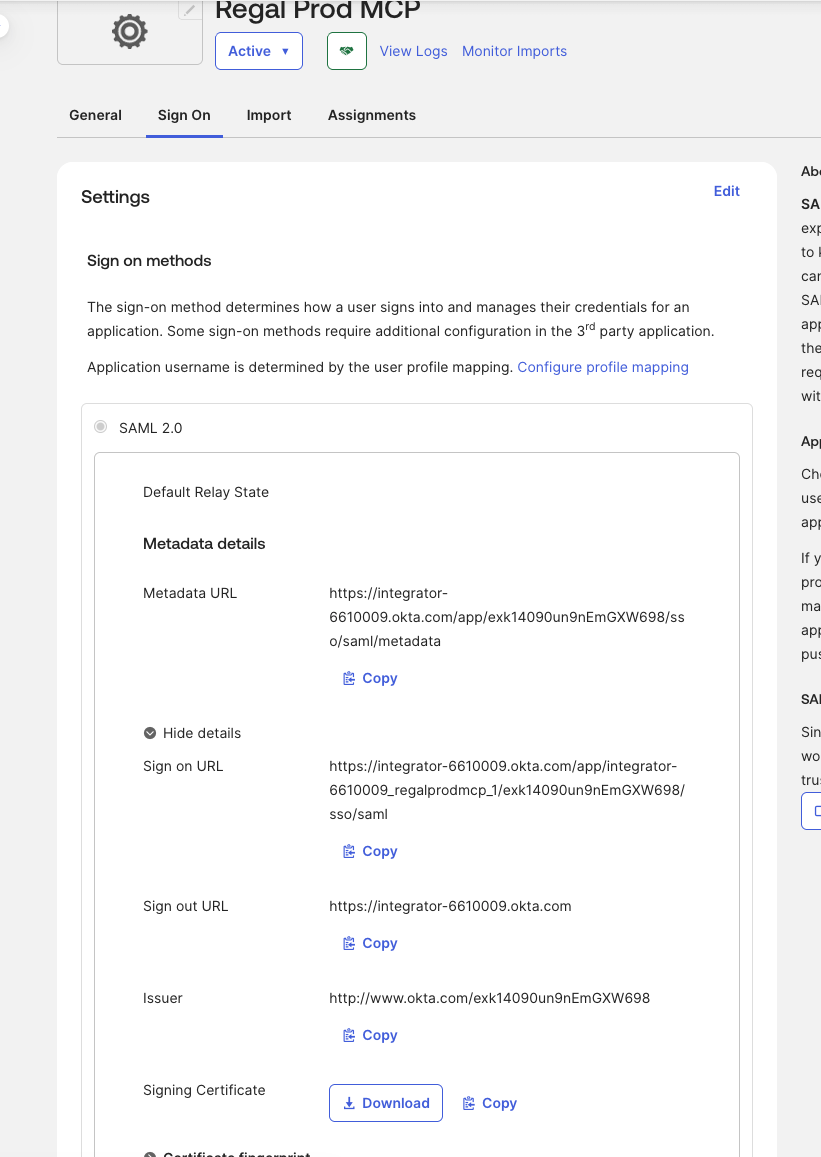
Step 5: Send Configuration Values to Regal
Navigate to the Sign On tab and expand the SAML 2.0 section. Share the following three values with your Regal Customer Success Manager:
| Field | Where to find it |
|---|---|
| IdP Issuer URI | Labeled Issuer in the Sign On tab |
| IdP Single Sign-On URL | Labeled Sign on URL in the Sign On tab |
| IdP Signing Certificate | Click Download next to Signing Certificate — ensure the file extension is .crt before sending |
Regal will update the Identity Provider configuration with your values and set up routing so that authentication requests from your domain are directed to your Okta.
Confirming setup is completeRegal will notify you when routing is configured and SSO is active. Once confirmed, add the Regal MCP server to your AI client — see Regal MCP for how to set up.
Updated about 1 month ago