Outbound Call Routing
Routing your outbound calls to the right AI Agent requires configuring a routing rule.
If you are using:
- Regal's journey builder and dialer to place the outbound call, then you should create your routing rule in the "Outbound Routing Rules" (see steps below).
- A different CCaaS to dial the outbound call then SIP connect to Regal, then you'll need to treat it like an inbound call in Regal (since that's how it will appear to Regal), and follow these steps for Inbound Call Routing.
Set Up a Routing Rule for Outbound Calls Using Regal Dialer
PrerequisitesBefore you set up an outbound call routing rule, we recommend first following the steps to create outbound calls by following the Triggered Outbound Calls guide or the Batch Dialing.
To route an outbound call to your AI Agent:
- Navigate to Settings > Task Routing > Outbound Call Ruleset
- Click new rule and name it
For example, let's call our Routing rule Payments b/c it's for a payment collection agent.
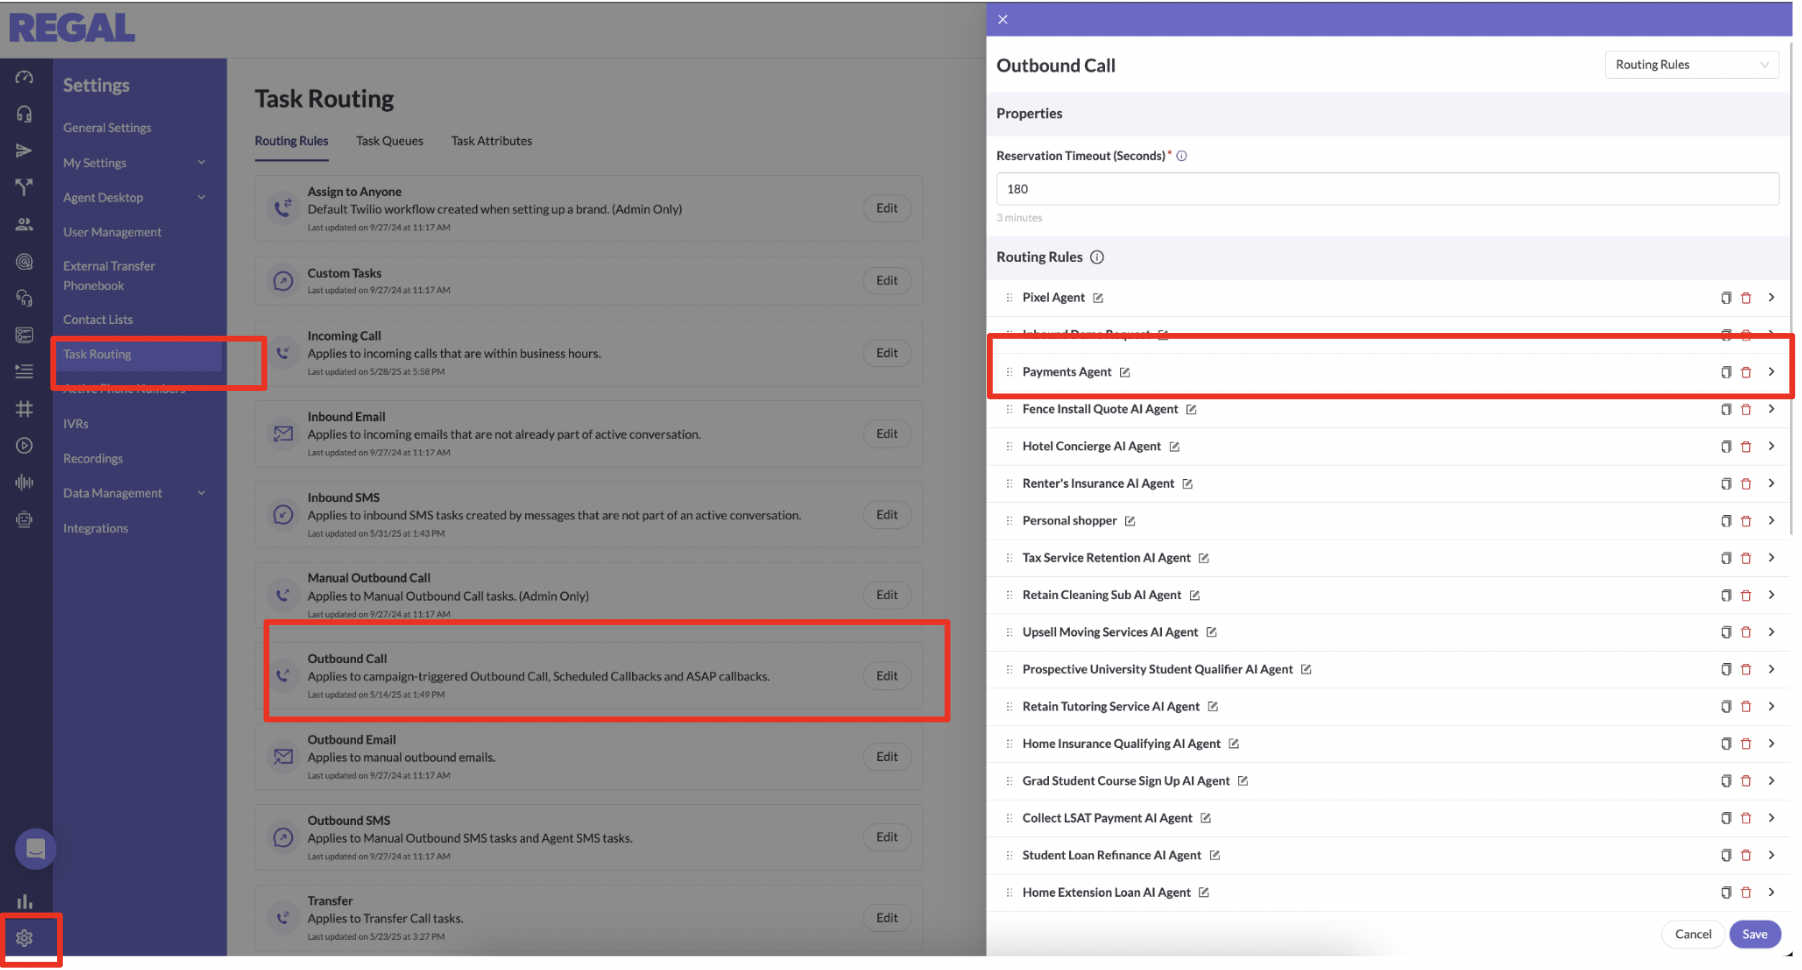
- Configure your routing rule
The easiest way to route outbound calls is to match the friendly id of the campaign to the email of the agent you want to handle those calls.
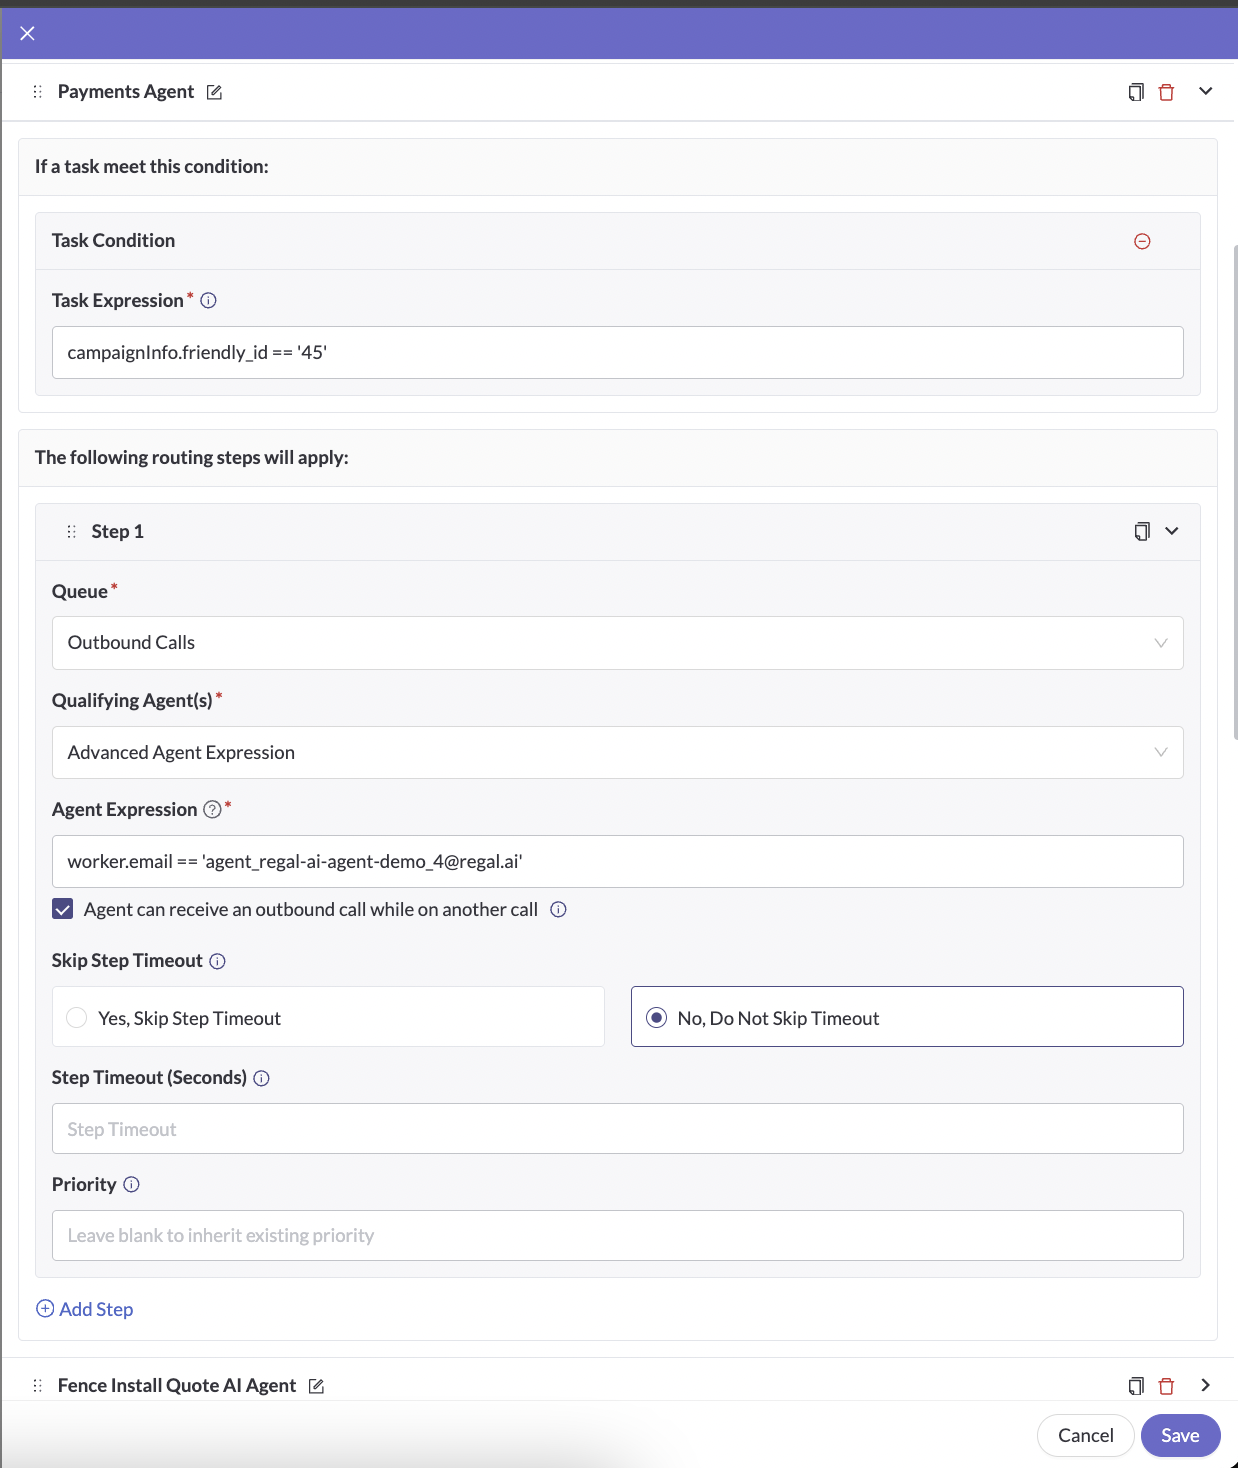
Example 1: To Route to the existing AI Agents queue, but specify a single AI agent to serve each call to, you would create a new rule for each agent that looks like the following (Let's assume your campaign ID is 45. And the email of your agent is [email protected])
- Task Expression:
campaignInfo.friendly_id == '45' - Queue: AI Agents
- Qualifying Agents: Advanced Agent Expression
- Agent Expression:
worker.email == [email protected] - ✅ Agent can receive an outbound call while on another call
- Skip Step Timeout: No, Do Not Skip Timeout
- (leave rest blank)
Example 2: Route Multiple Call Campaigns to an Agent
If you have a journey with multiple calls attempts and you're using separate call campaigns for each attempt for example, you can just modify your task expression to something like the follow:
- Task Expression:
campaignInfo.friendly_id IN ['45', '46]
Each AI agent has a max capacity of 50 concurrent calls. If you need more capacity for a single use case, you can dupe your AI agent w/ the exact same prompt. And then modify your agent expression.
Example 2: To route to the existing AI Agents queue, but specify a few agents within that queue who can receive those calls, you can just modify your agent expression as follows:
- Agent Expression:
worker.email IN ['[email protected]', '[email protected]']
Splitting calls between multiple agentsWhen calls are routed by a rule that is allowed to go to multiple agents, calls are distributed on a round robin basis, leading to a roughly even split.
If you have still more than a few agents for each use case, you can also separate your agents into teams.
Example 3: Route to an Agent Team
- To create an Agent Team, navigate to: Settings > User Management > Teams > New Team
- Name your team and then assign your agents to the team. For example, you could name your team 'Welcome Agents' for your welcome campaign
- Then your agent expression will look like:
Agent Expression:worker.teams HAS 'Welcome Agents'
Routing RulesRouting rules are evaluated from top to bottom. The first rule that matches your task will route it. The syntax is particular you can refer to this Routing Rule Syntax Guide for different use cases.
Turn Your Agent to 'Available'
- Navigate to Agents > Select Your Agent > Set their Status to 'Available' (When an AI agent is created we default it to Offline.)

Your outbound agent is now ready to handle calls. Trigger an outbound call to your phone number and talk to your agent!
Updated 3 months ago