Azure SSO
Enable your agents to login to Regal through Azure SSO
This guide describes how to set up Azure SSO for the Regal app.
Requirements:
- To complete setup, you must be an administrator in Azure with permissions to add/configure new applications to your workspace. The email address stored on your Azure users (user.mail) must match the Regal user email.
- You will need your Regal account slug - please contact your assigned Implementation Manager or email us at [email protected] for this value
Create a Regal.io application in Azure
In Azure, follow these steps:
-
Select Enterprise Applications >+ New application >+ Create your own application
-
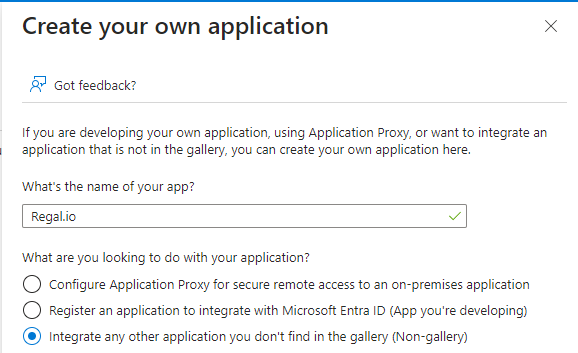
Name the application (however you would prefer the application to display in your workspace, i.e. Regal.io)
-
Ensure that "Integrate any other application you don't find in the gallery (Non-gallery) is selected
-
Select Create
-
Select Set up single sign on below the Getting Started menu
- Select the option card for SAML
-
Edit the Basic SAML Configuration options
-
Enter a unique name for your workspace as the Identifier (Entity ID) - i.e. "regal_azure_sso"
-
Enter your Reply URL (Assertion Consumer Service URL): <https://api.rv-apps.io/sso/YOUR-BRAND-SLUG/saml2>
-
The your-brand-slug value will be provided by your Implementation Manager/Regal support upon request
-
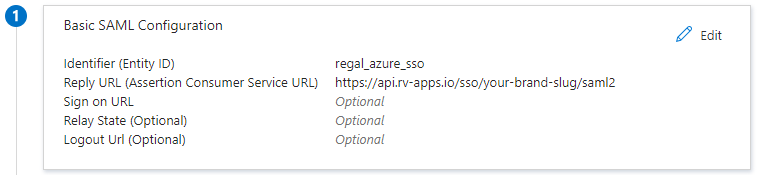
Select Save
-
-
-
Edit the Attributes & Claims options
-
Any required claims from your workspace can remain as-is
-
Below Additional Claims, add the following five claims (be sure to remove any values for Namespace that may be auto-populated):
Name: email
Source Attribute: user.mailName: firstName
Source Attribute: user.givennameName: lastName
Source Attribute: user.surnameName: name
Source Attribute: user.principalnameName: userType
Source Attribute: "agent"
Note: this attribute must be hardcoded to a value of "agent" and not pull from an existing source attribute within your workspace, the access level for the user within the Regal app will be set/controlled from inside the Regal application itself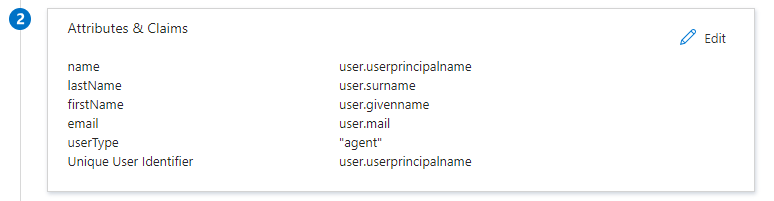
-
-
Supply Regal with your Azure application's certificate & ID/URL
-
Email the Regal Support team ([email protected]) the certificate, Login URL, and Microsoft Entra Identifier for your new Azure application built above
- From the 3. SAML Certificates configuration box in Azure, download and save the Certificate (Base64) file locally.
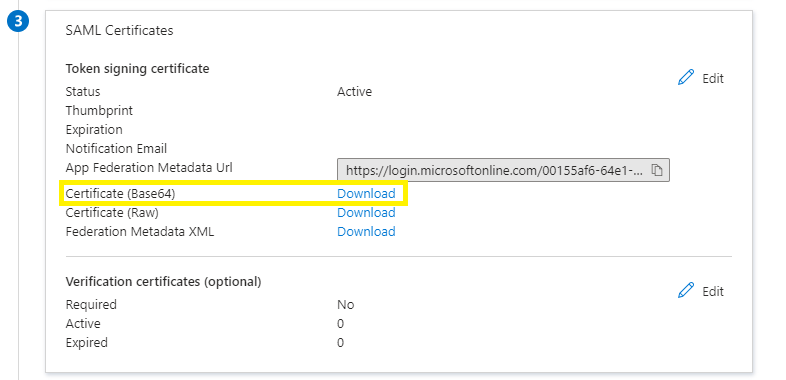
- From the 4. Set Up "Application Name" configuration box in Azure, copy the Login URL and Microsoft Entra Identifier
Add the Regal Application to users and test your Azure <> Regal SSO connection
- After the Regal support team is supplied with the certificate, Login URL, and Microsoft Entra Identifier they will complete the configuration for your account to enable SSO authentication
- From the Regal application you have configured in Azure, you can add specific users in your workspace by navigating to Users and groups, then select + Add user/group
- Reminder: user emails will need to match exactly with the email used to provision the login in Regal
- Once you have received confirmation from the Regal support team that the SSO configuration is complete, you can test the application by navigating to https://myapplications.microsoft.com/ from an assigned user and attempting to login
Updated 3 months ago