Marketo
Send contact and event data between Marketo and Regal
DATA IN
This section describes how to use Marketo to send data to Regal. It discusses how to set up Marketo to create contacts and send track events to Regal.
Marketo Admin Account RequiredThe following steps require admin privileges in your Marketo instance.
Sending Data from Marketo to Regal
While Marketo does not have a way to pass through all user and event data automatically to a 3rd party, you can set up Smart Campaigns that are triggered when new contacts are created, important profile fields are updated or important events occur, and send that data to Regal through webhooks.
Creating New Contacts & Sending Events
Create a Smart Campaign that webhooks out to Regal every time a new contact is created in Marketo to be available for calls and texts in Regal.
Below is a recommended smart campaign for how to accomplish this, though the logic for the trigger of your workflow may differ depending on what constitutes a relevant contact for your company to send to Regal.
Step 1: Create a new Webhook titled "Send New Contact to Regal"
Step 2: Configure your Webhook
-
URL: https//events.regalvoice.com/events
-
Request Type: POST
-
Template (i.e. body): Input custom json following the format from: https://developer.regalvoice.com/#tag/Regal-Voice-API/paths/~1events/post. Note, You are able to customize the data you send Regal by customizing the Template by add additional Marketo tokens
- Example:
{ "traits": { "phones": { {{lead.Phone Number}}: { "voiceOptIn": { "subscribed": true, "source": {{lead.Source}} }, "smsOptIn": { "subscribed": true, "source": {{lead.Source}} } } }, "emails": { {{lead.Email Address}}: { "subscribed": true, "source": {{lead.Source}} } }, "firstName": {{lead.First name}}, "lastName": {{lead.First name}}, "customProperty1": {{lead.Property1}}, "customProperty2": {{lead.Property2}} }, "name": "Marketo Form Submitted", "properties": { "leadSource": {{lead.Source}} } } -
Response Format: None
-
Basic Auth: Leave blank
-
Add a Customer Header:
- Authorization : Enter your Regal API key
-
Click "Create"
Email [email protected] to get your API key
Step 3: Create a new Smart Campaign titled "Create New Contact for Regal"
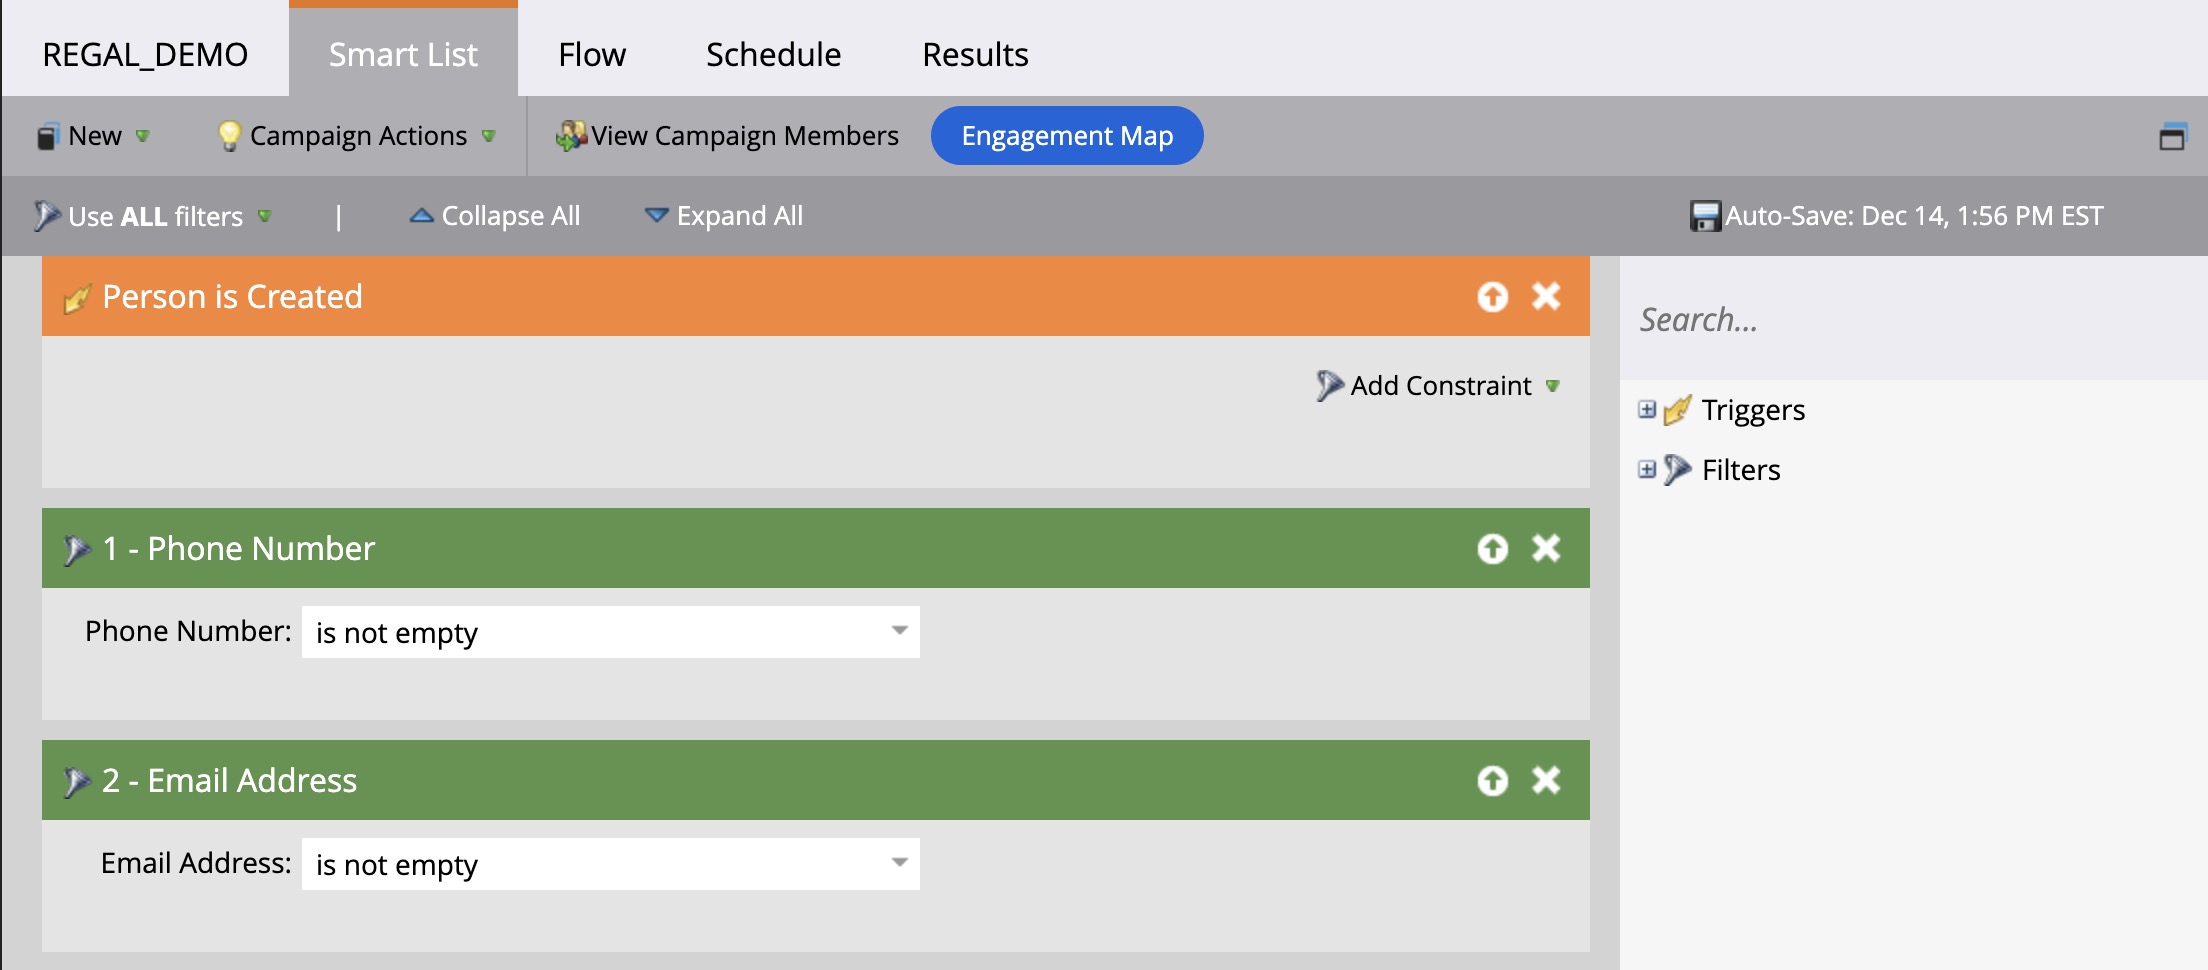
Step 4: Configure the Smart List when a "Person is Created" in Marketo and add a filter to make sure their phone and or email are not empty. Note, this logic can be customized to fit your use case and Marketo set up.
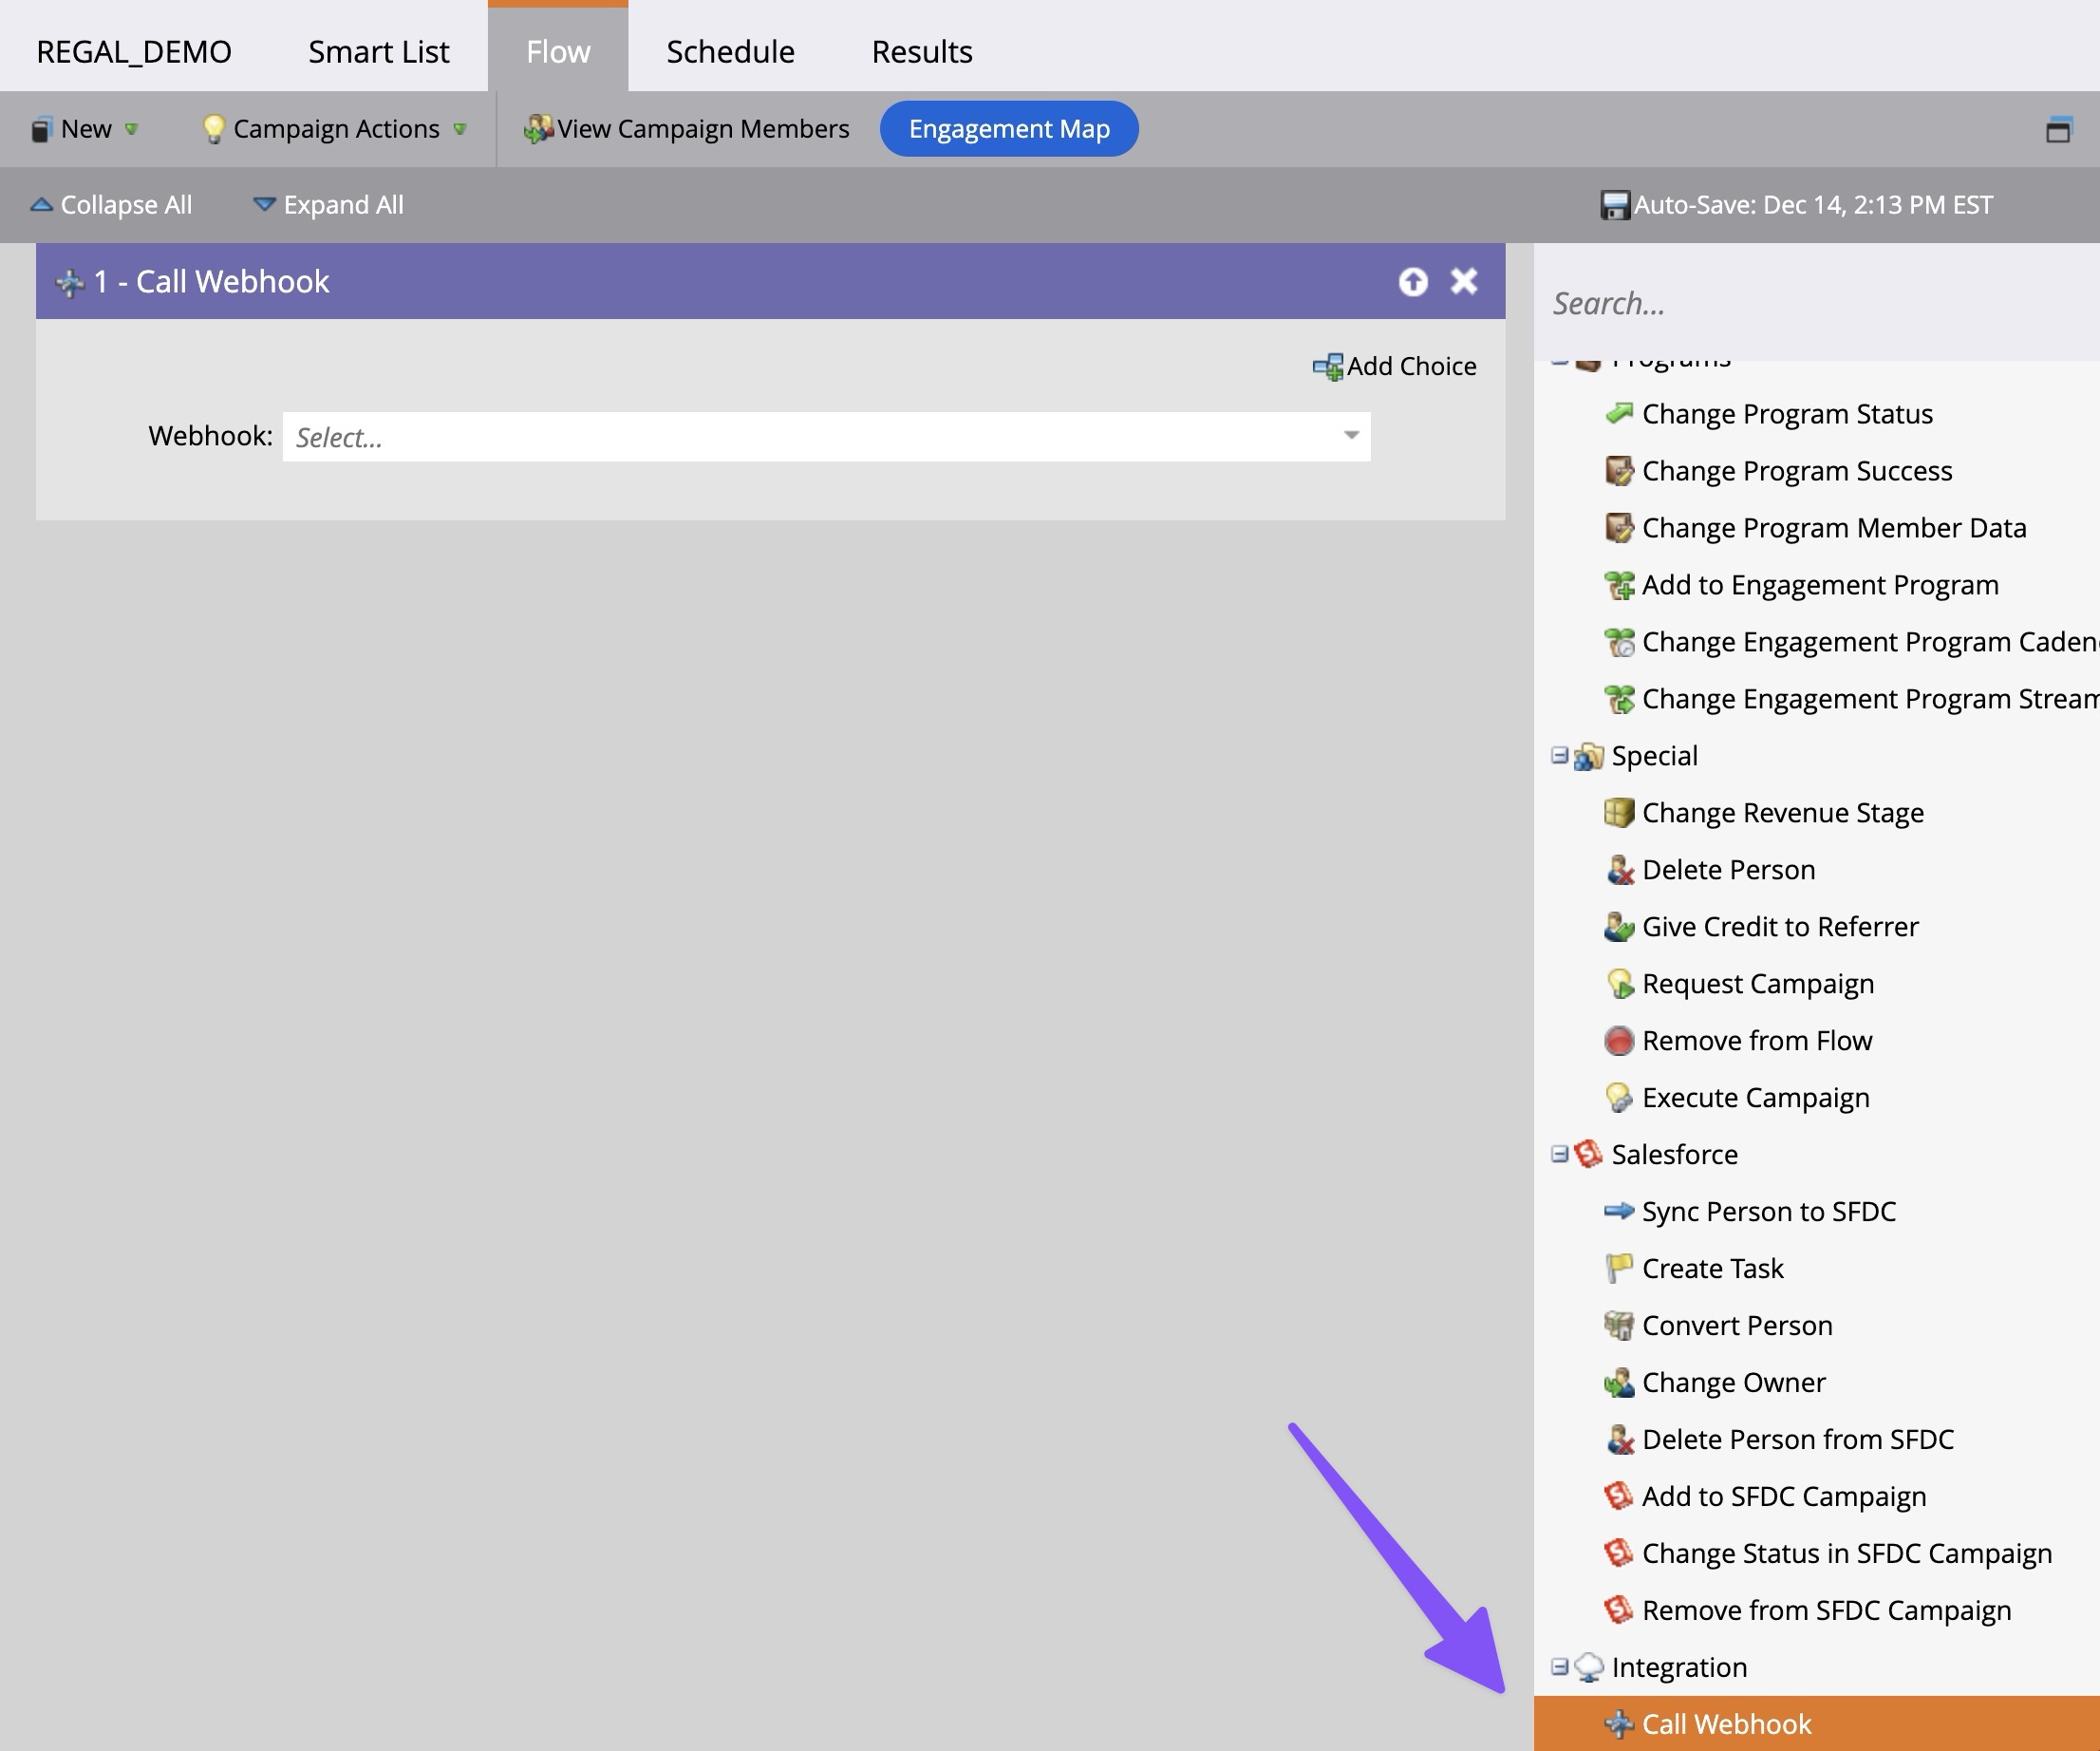
Step 4: Click on "Flow" and drag the "Call Webhook" flow action in the canvas and select the webhook you created
DATA OUT
This section walks through how to Trigger an Email campaign in Marketo by using Regal Journey Webhoks and Marketo Static Lists.
Marketo Admin Account RequiredThe following steps require admin privileges in your Marketo instance.
Sending Data from Regal to Marketo
While Regal does not have a way to pass through all user and event data automatically to Marketo, you can set up Journey Webhooks that are triggered when new phone contacts are created, important profile fields are updated or important events occur, and send that data to Marketo through campaign webhooks.
Create New Marketo API User Role
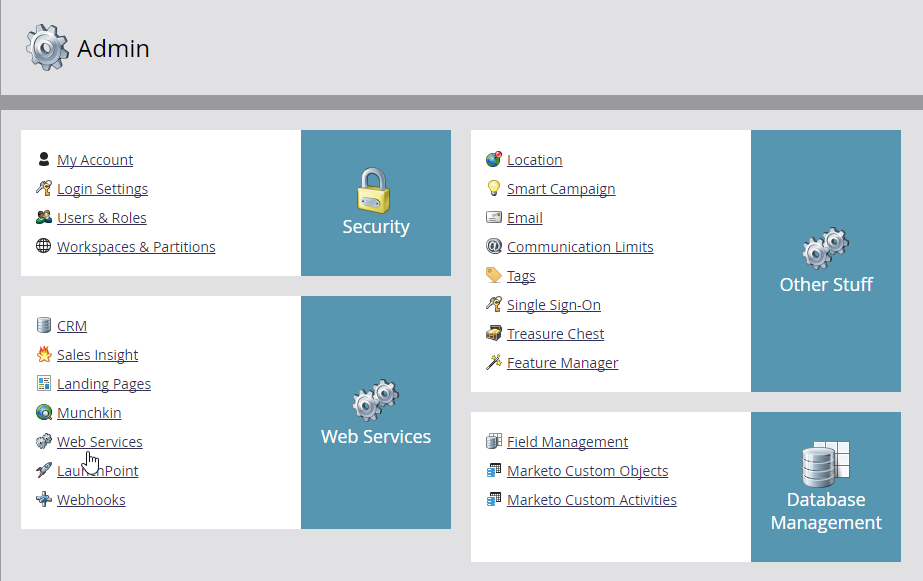
Step 1: Login to your Marketo instance and go to the Admin menu, then to Users and Roles.

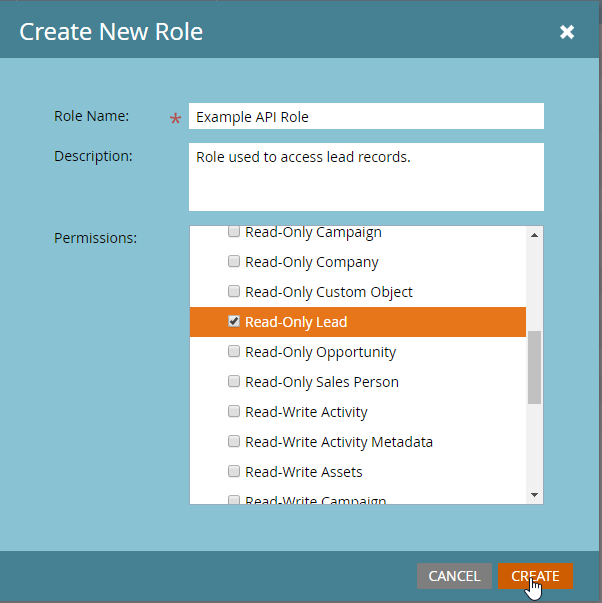
Step 2: Click on the Roles tab, and then New Role and assign at least the “Read-Write Lead” permission to the role in the Access API group. Be sure to give it a descriptive name and click on Create.
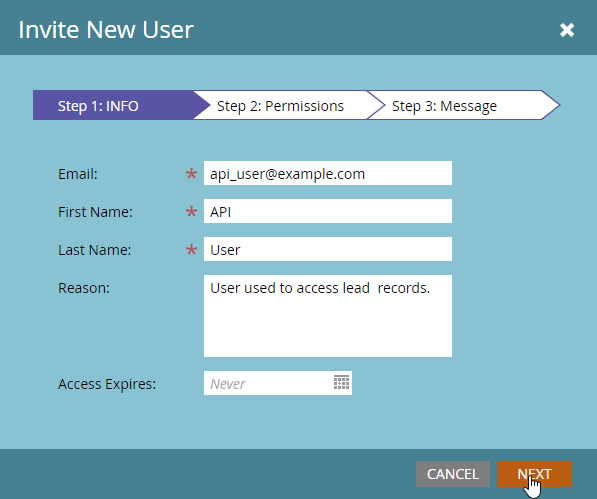
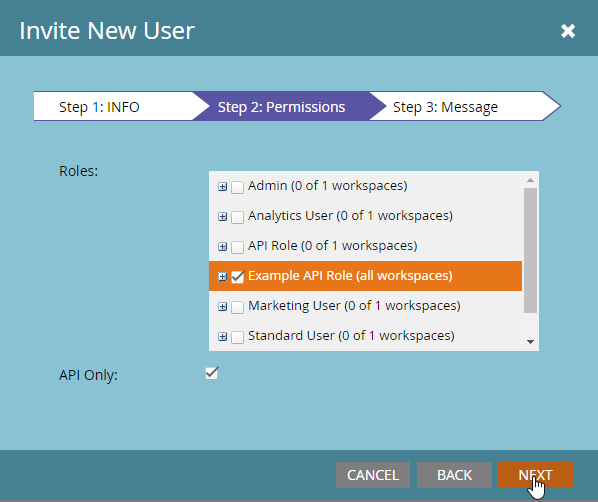
Step 3: Now back to the Users tab and click on Invite New User. Give your user a descriptive name that indicates that it is an API user, as well as an Email Address, and click on Next.
Step 4: Then, check the API Only option and award your user the API role that you just created and click on Next.
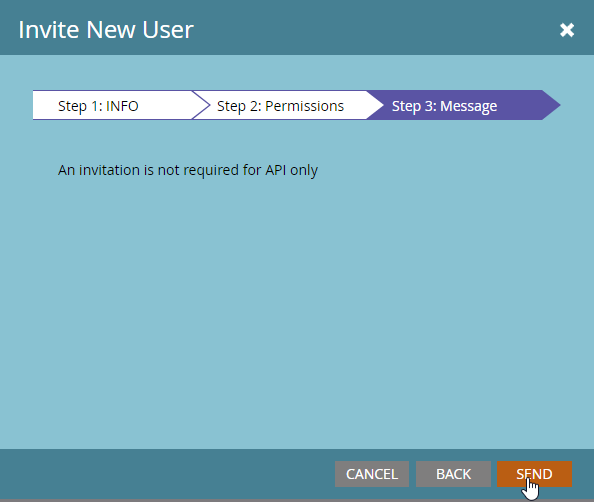
Step 5: To complete the user creation process, click on Send.
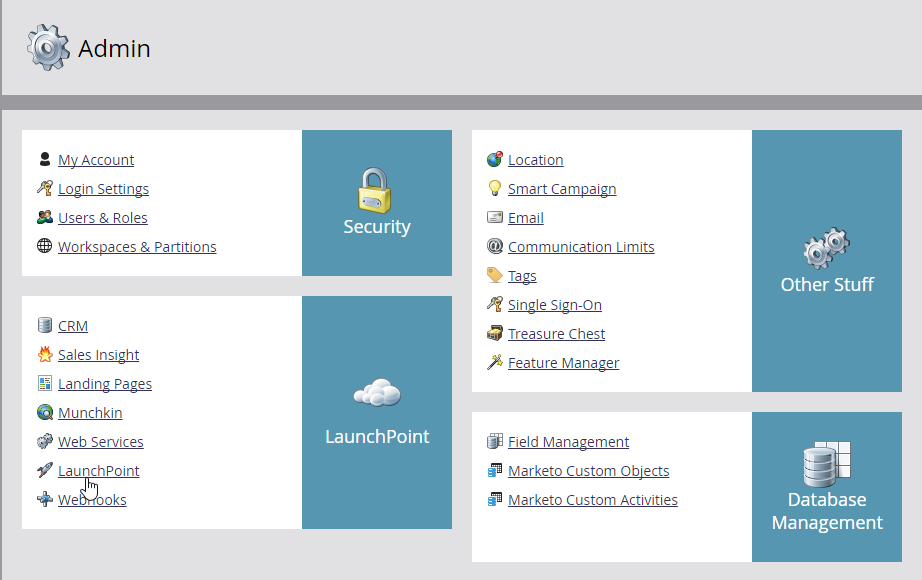
Step 6: Next, go to the Admin menu, then to LaunchPoint.
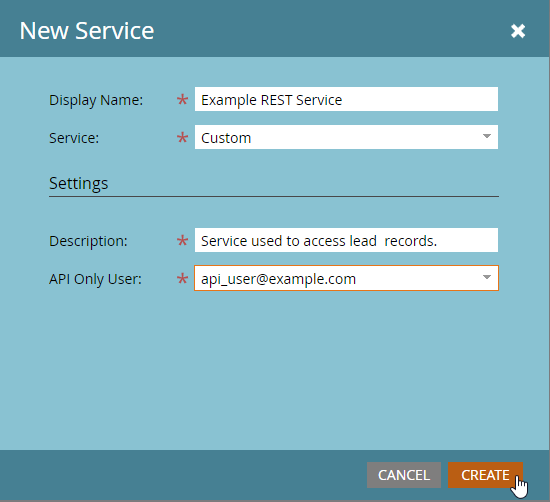
Step 7: Click on the New menu and select New Service. Give your service a descriptive name and select Custom from the Service dropdown menu. Give it a description, then select your new user from the API Only User dropdown menu and click on Create.
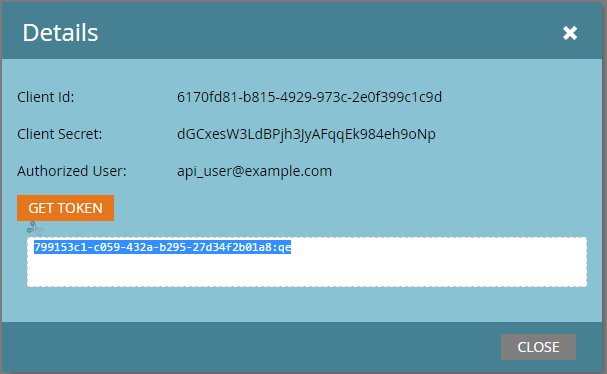
**Step 8:**Click on View Details for your new service to access the Client ID and Client Secret. For now you can click the Get Token button to generate an access token which will be valid for one hour. Save the token in a note for now.
**Step 9:**Next, go to the Admin menu, then to Web Services.
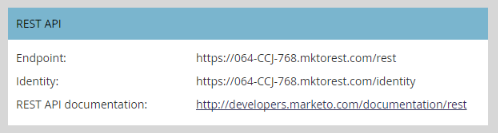
**Step 10:**Find the Endpoint in the REST API box and save in a note for now.
Create New Marketo Static List (Optional)
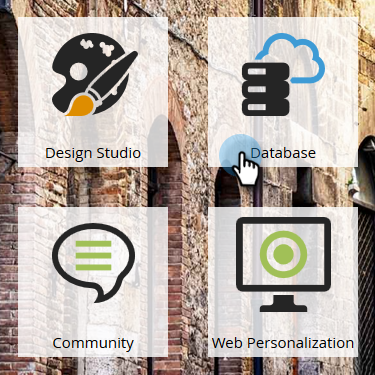
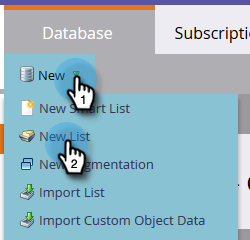
Step 2: Go to Database.
Step 3: Click the New drop-down and select New List.
Step 4: Choose a destination folder, give your new list a name, then click Create.
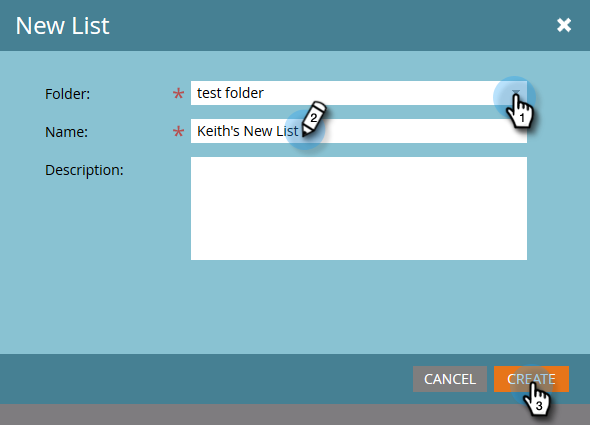
Step 5: Open the list you just created and copy the list ID at the end of the Url for use in Regal (e.g. ST1188A1)
Adding Contacts to Marketo List in Regal Journey
Create a Smart Campaign that is triggered when a contact is added to an existing or new static list in Regal
Below is a recommended Regal journey which adds contacts to a Static List in Marketo in order to enroll them into an email campaign. The logic for the trigger of your journey may differ depending on what constitutes a relevant event for your company to send to Marketo.
Step 1: Log into Regal as an Admin
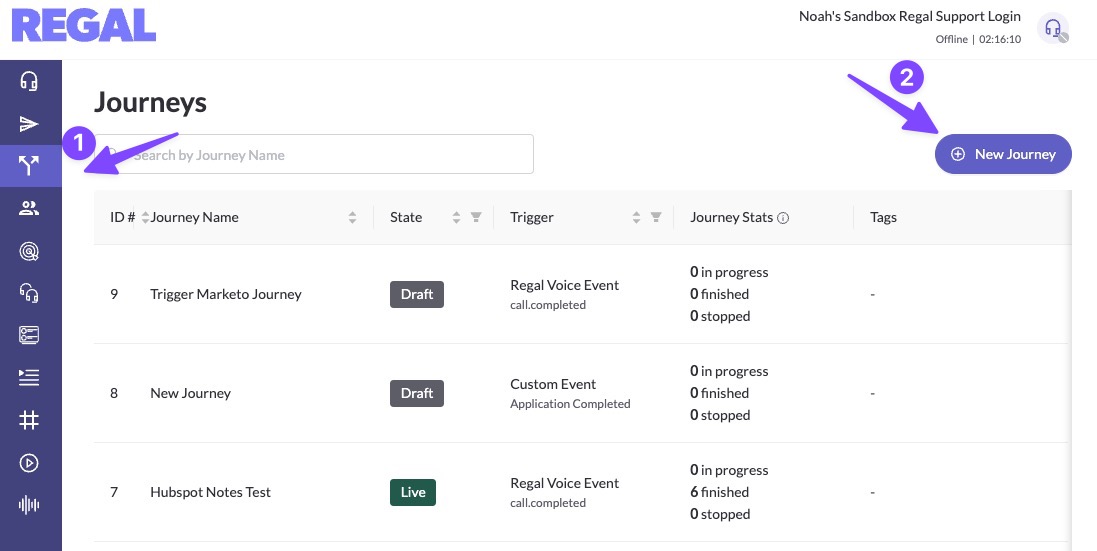
Step 2: Navigate to journeys tab
Step 3: Click “Create new journey”
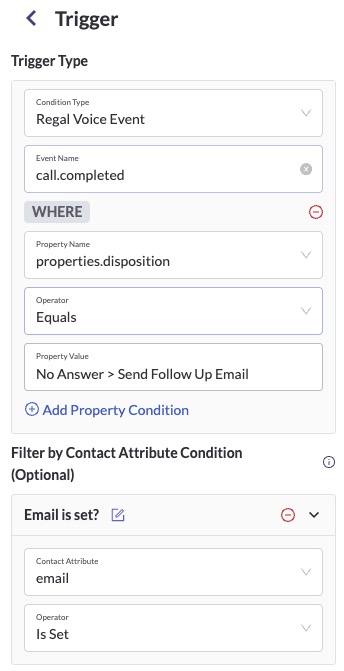
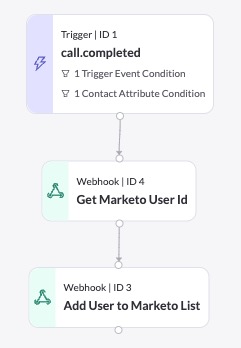
Step 4: Create trigger, which can be whatever Regal or custom event you’d like to use to Trigger contact into this journey. In this example, we’ll use a Regal event called call.completed and we’ll filter for when the disposition is “No Answer > Send Follow Up Email”
Step 5: Configure Journey Webhook 1 - This journey webhook is only needed if the contact does not currently have the Marketo User Id present on their contact in Regal. This webhook will send the email of the contact in Regal and Marketo will return the Marketo User Id to then be used in a later journey webhook to trigger the Smart Campaign.
-
Name of Webhook: GET Marketo User Id
-
Method: GET
-
Endpoint URL:
<Your Endpoint URL>/rest/v1/leads.json?access_token=<Your Access Token>&filterType=email&filterValues={{contact.email}} -
Example Response:
{
   "requestId":"c493#1511ca2b184",
   "result":[
      {
          "id":1,
          "updatedAt":"2015-08-24T20:17:23Z",
          "lastName":"Elkington",
          "email":"[email protected]",
          "createdAt":"2013-02-19T23:17:04Z",
          "firstName":"Kenneth"
       }
   ],
   "success":true
Step 6: Configure Journey Webhook 2 - This journey webhook will Add user to list in Marketo
-
Name of Webhook: Add User to Marketo List
-
Method: POST
-
Custom Headers:
- Authorization: Bearer
-
Endpoint URL:
<Your Endpoint URL>/rest/v1/lists/{listId}/leads.json?id={{webhook_X.id}} -
Body:
{}
Updated 3 months ago