Five9
Trigger outbound calls in Five9 using Regal's Journey Builder
This integration enables real-time synchronization between Five9 and Regal, allowing you to automatically trigger personalized customer journeys based on call center interactions. By connecting Five9 call data with Regal's journey orchestration platform, you can create sophisticated follow-up sequences, automate SMS/email communications based on call outcomes, and deliver timely customer engagement without manual intervention. This powerful combination helps improve response rates, reduce manual tasks, and create more meaningful customer interactions.
DATA IN
Create Five9 Call Connector
Five9 Connectors send data to Regal in real-time to be used to trigger journeys in Regal.
- Log Into the Five9 Admin Console
- Navigate to "Connectors"
- Click "Create" in the top left

- Name your Connector "Regal Integration - Call Disposition"
- Select "Classic Connector" if you are in the desktop admin
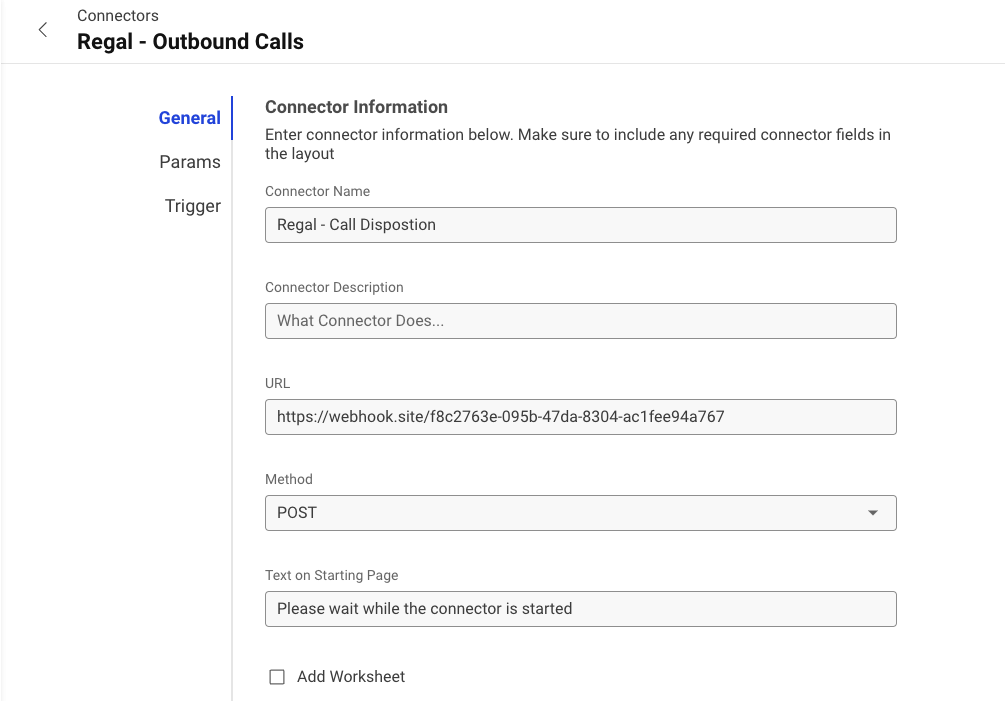
- Configure the Connector with the below information:
- URL: Reach out to your Regal Implementation Manager or Support for your unique URL
- Method: POST
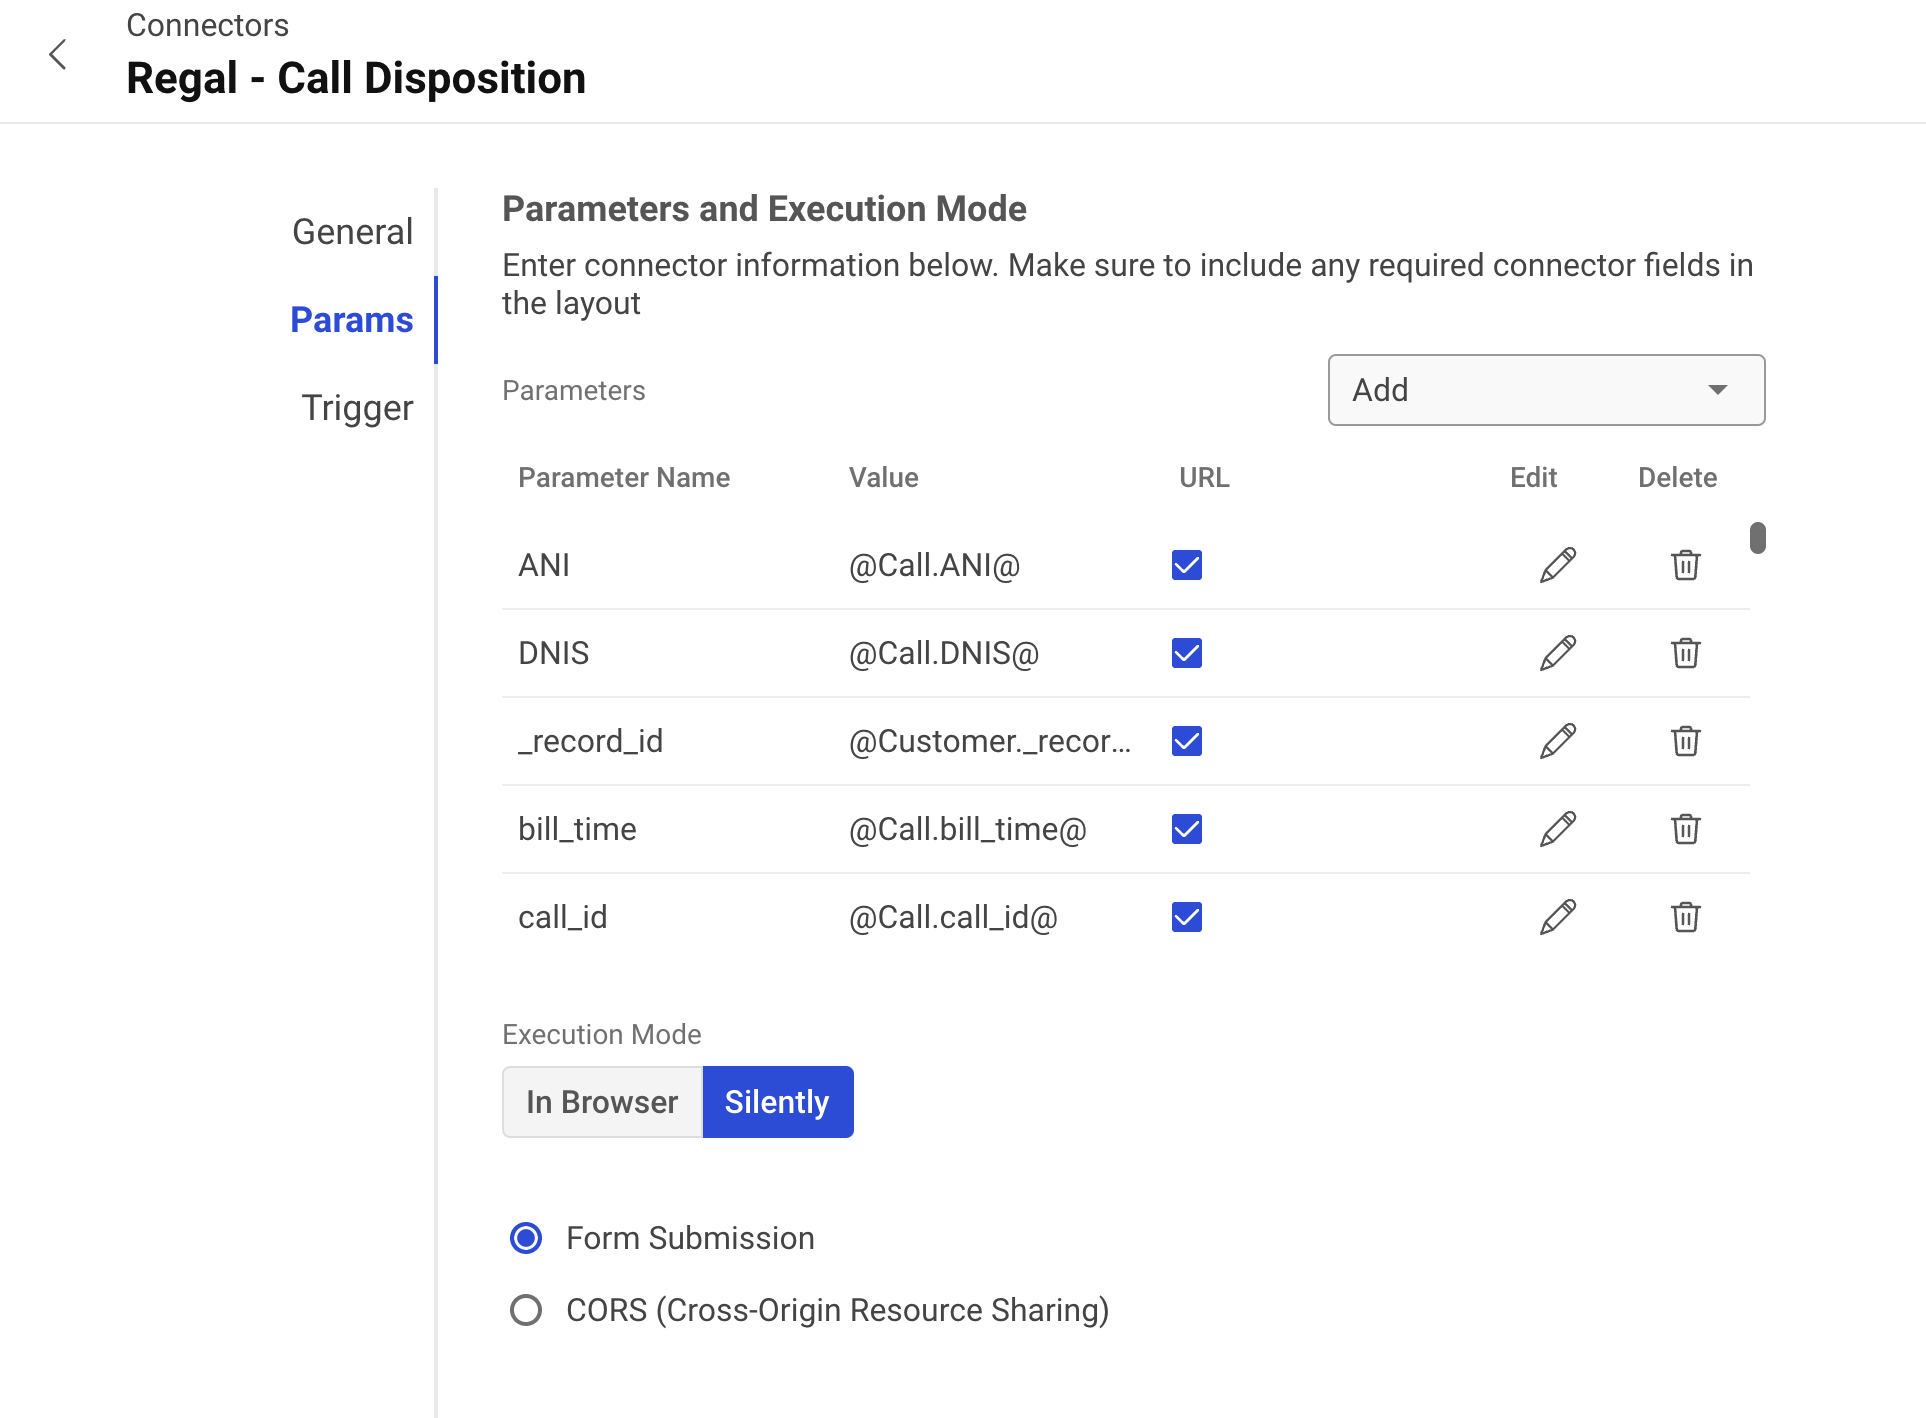
- Select the all the Parameters by clicking "Add Field", and holding "shift" to highlight them all (If using web admin hit "Next" to configure the Params)
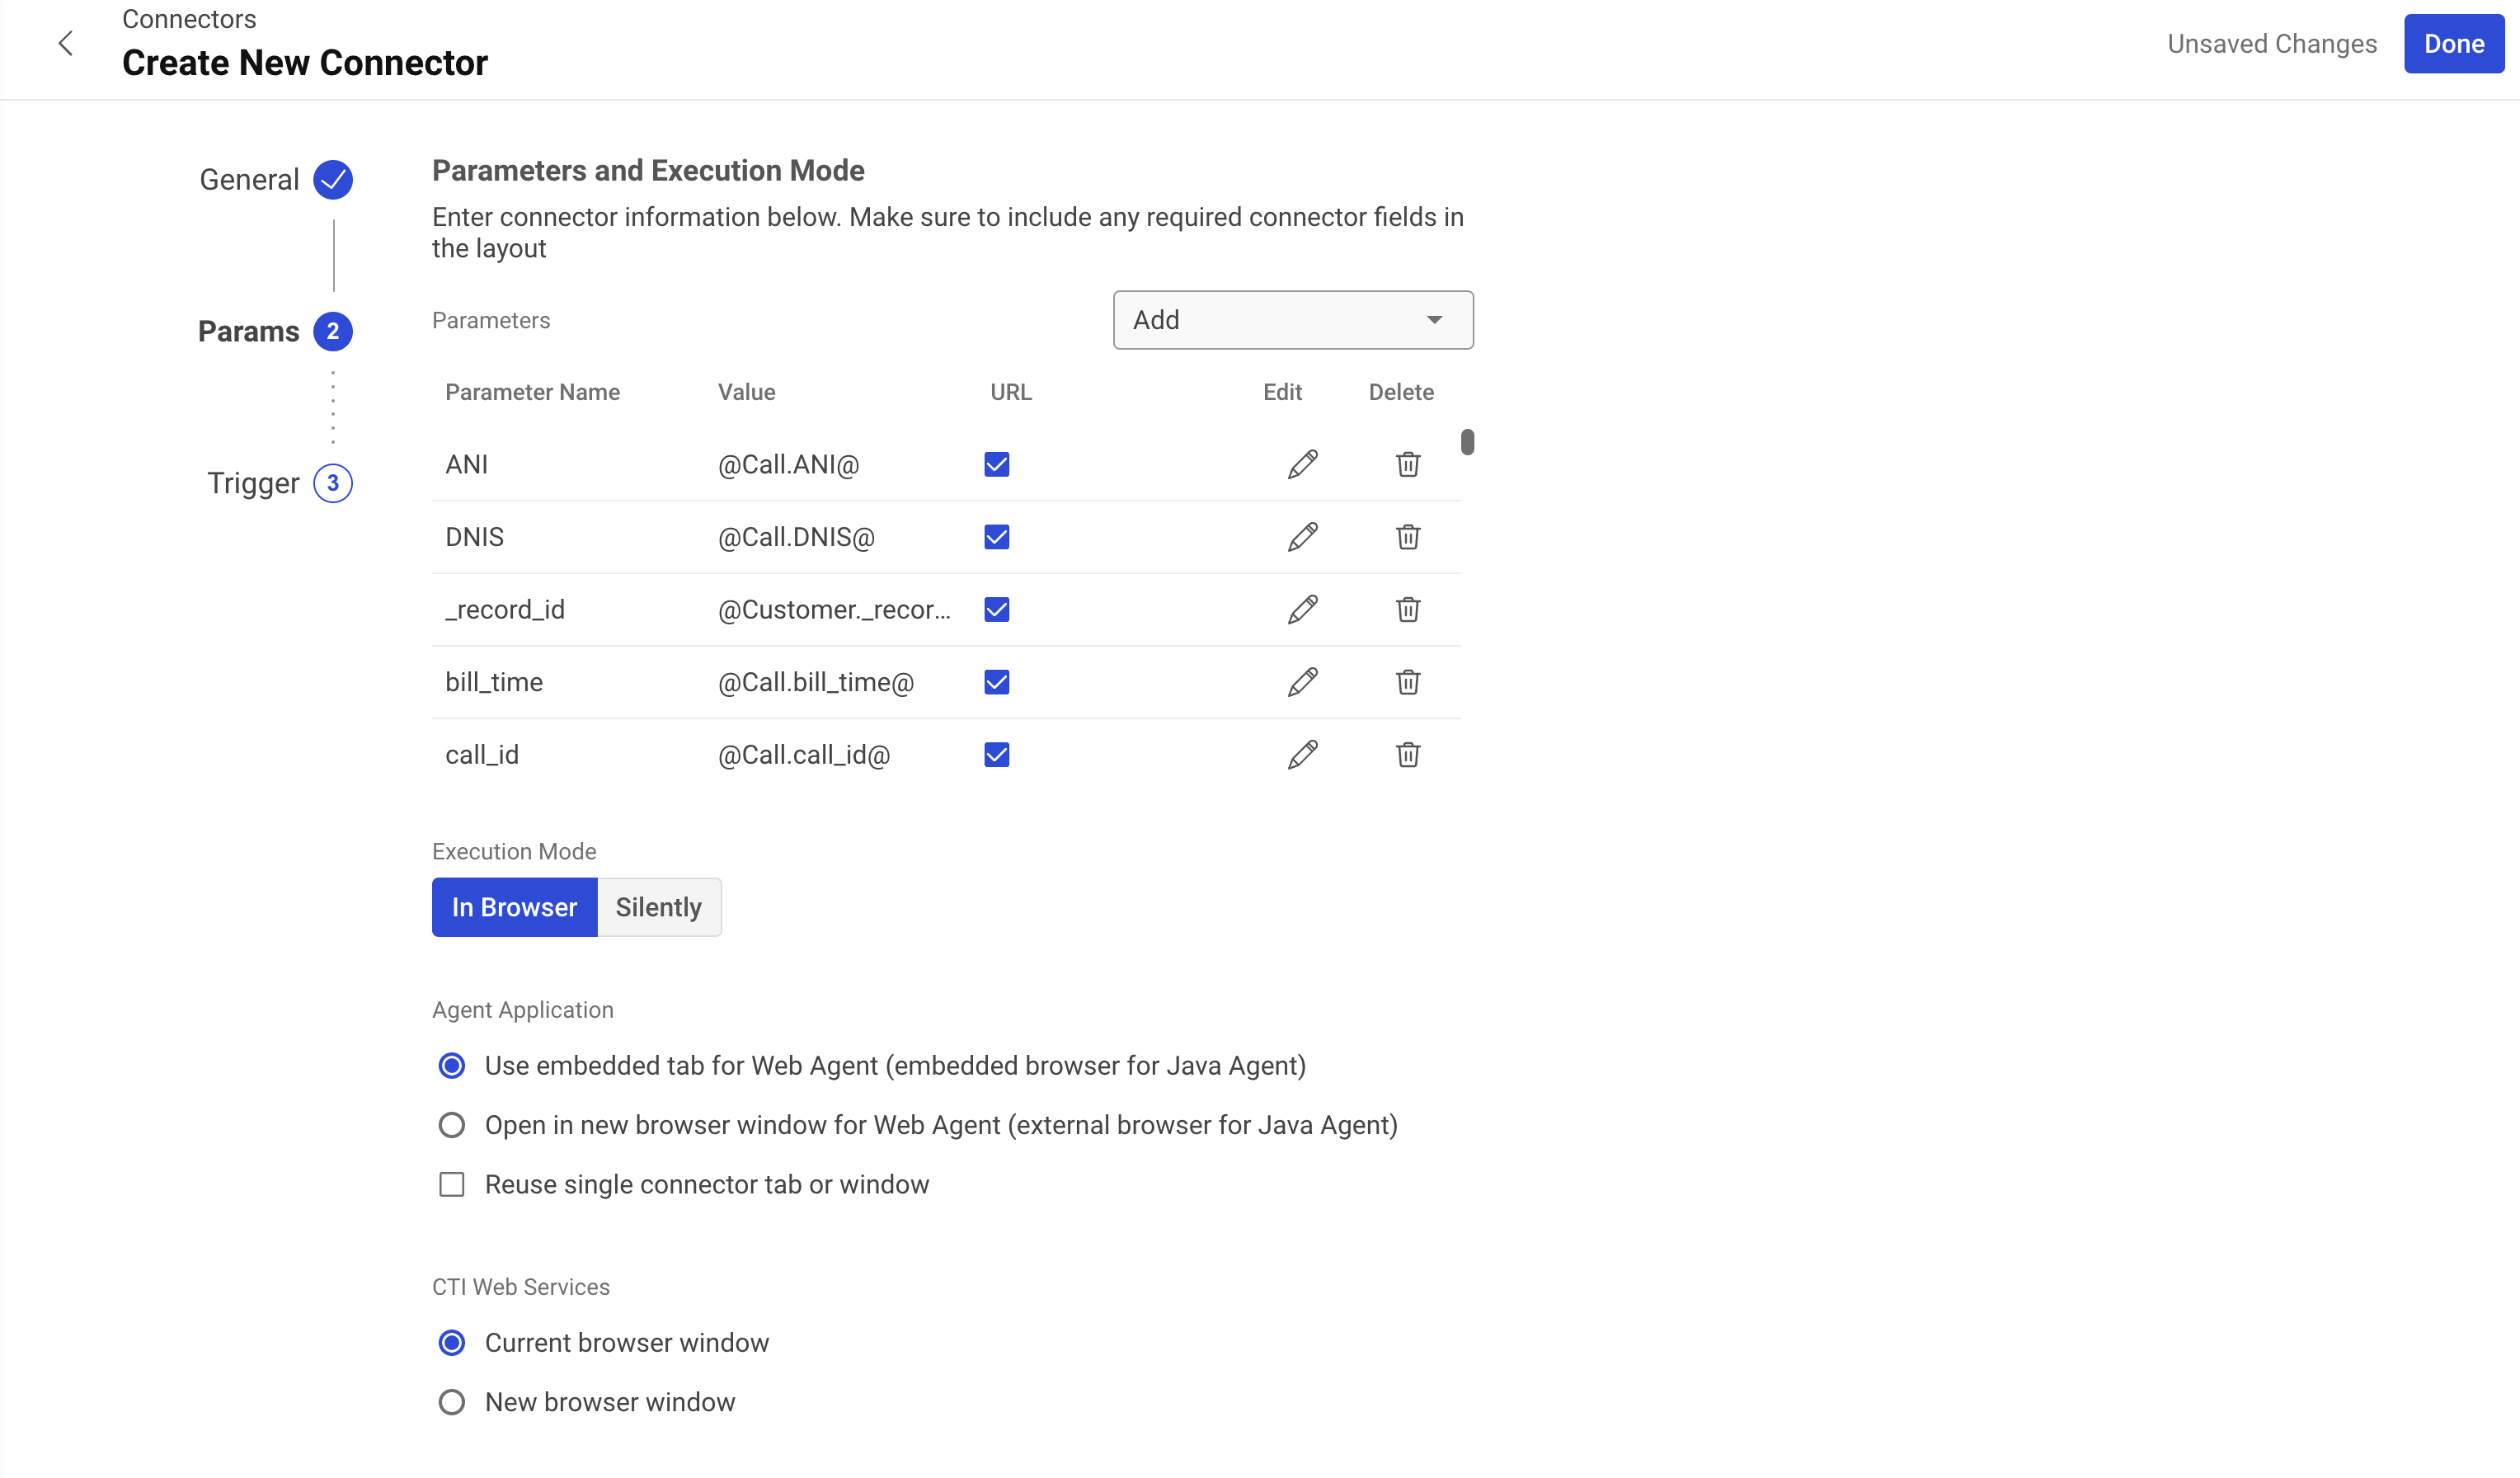
- Ensure the Execution mode is set to "Silently" or else a new window will open up after every call
- Click on the "Trigger" tab and select both:
- "On Call Disposition" - For completed calls
- Add the a dispositions available
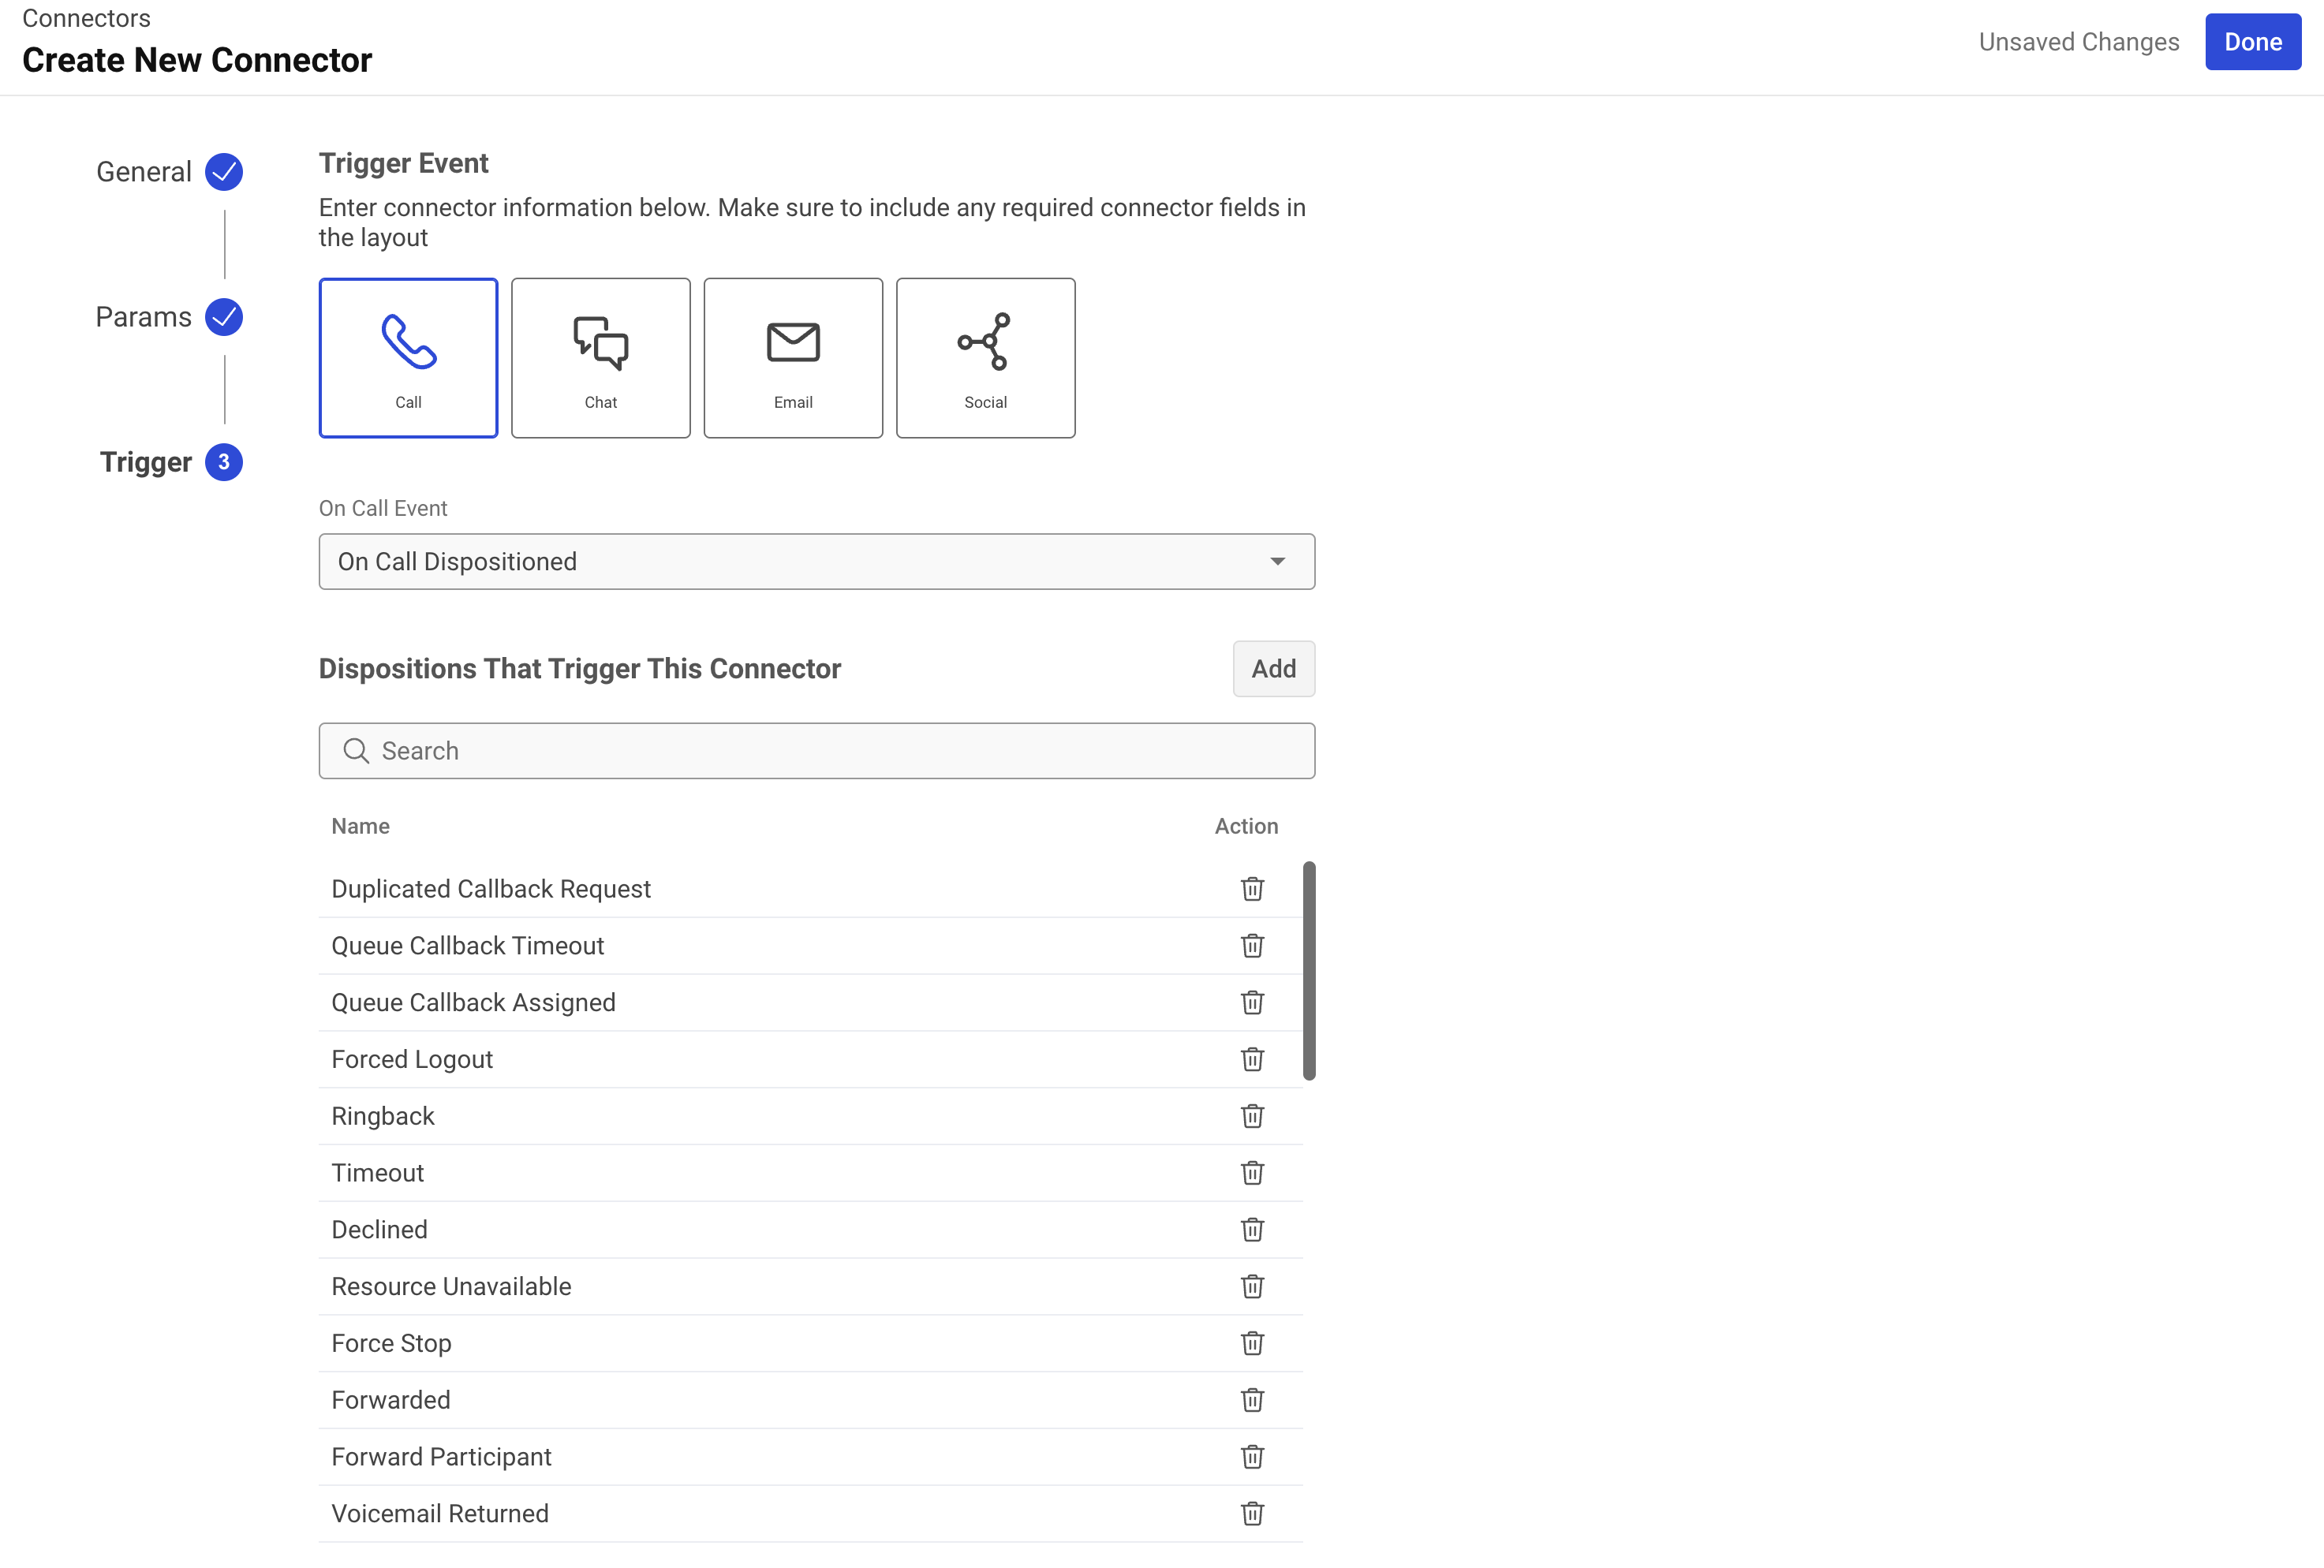
- Click "Save" or "Done"
Add Call Connector to Campaign(s)
In order to send campaign data to Regal in real-time, you will need to add the above connector to every existing and new campaign you create.
- Once you have created the connector(s), you'll need to add them to the relevant campaigns
- Within the Five9 Admin console, navigate to "Campaigns"
- Select the campaign you want to add the connector to
- Click on the "Connectors" tab
- Click "Add Connector"
- Select the "Regal Integration" connector from the dropdown
- Click "Save"
- Repeat steps 3-7 for each campaign that needs to send data to Regal
Verify Data Flow
To ensure the integration is working properly:
- Make a test call through one of the configured campaigns
- Log into your Regal dashboard
- Navigate to "Data Sources" > "Events"
- Look for events with the source "five9"
- Verify that the call data includes:
- Call disposition
- Agent information
- Campaign details
- Customer contact information
- Call duration and timestamp
Troubleshooting
Common Issues:
- If events aren't appearing in Regal, verify:
- The connector URL is correct
- The connector is properly added to the campaign
- All required parameters are selected in the connector configuration
- The triggers for both completed and failed calls are enabled
Need Help?
Contact Regal support if you encounter any issues with:
- Connector configuration
- Missing data
- Real-time data flow
- Journey triggering
Best Practices
- Test the integration with a sample campaign before rolling out to all campaigns
- Monitor the data flow regularly to ensure consistent operation
- Keep a record of which campaigns have the connector enabled
- Update connector configurations whenever new Five9 parameters become available
DATA OUT
The purpose of these next steps is to use Regal's Journey Builder to add contacts to Five9 Call Lists, enabling you to orchestrate follow-up calls, SMS, and much more.
Enable e.164 Number Format in Five9
- Contact your designated Five9 account manager
- Request activation of E.164 number format support for your account
- Wait for confirmation that the feature has been enabled
Create Regal API User
To allow Regal's Journeys to interact with Five9, you'll need to create a new API User in Five9 and share the login information with your Regal point of contact.
- Log into the Five9 admin portal and navigate to "Users."
- Click "Create" in the top right to create a new user.
- Fill in the user information:
- First Name: Regal
- Last Name: API
- Username: regal_api
- Email: [your-brand-name][email protected]
- Hit "Save."
- Click into the newly created user and go to the "Permissions" section.
- Add the "Access Web2CampaignAPI" permission.
- Navigate to the "Security" tab and then to the "Password" section.
- Select "System Generated" under "Password Change."
- Save the username and password for use in the next section.
- Click "Done."
Refer to Five9's documentation for more information
Adding Journey Webhooks using Web2Campaign
This section covers configuring a Regal Journey Webhook to add contacts from Regal to Five9 lists, facilitating outbound call orchestration.
-
Log into Regal as an Admin.
-
Navigate to the "Journeys" page.
-
Click "New Journey" or select an existing one.
-
Once your journey is defined and ready to add a contact to a list in Five9, drag the "Webhook" action node onto your canvas.
-
Configure your webhook as follows:
- Name: Add Contact to Five9 List - [List Name]
- Endpoint URL: Construct the URL using the following format:
https://api.five9.com/web2campaign/AddToList?F9domain=[Five9 Domain]&F9list=[ListName]&number1=[PhoneNumber]&[additional parameters]- Use Regal dynamic handle bars to set the parameter
- Required Parameters:
- F9domain: Your Five9 domain name
- F9list: The name of the list you want to send leads to
- number1: The contact's phone number
- Additional parameters can include custom fields defined in your Five9 account, such as
firstName,lastName, andemail. - Example URL:
-
https://api.five9.com/web2campaign/AddToList?F9domain=Regal.io-%20Developer%20Domain&F9list=test_call_list&number1={{contact.contactPhone}}&first_name={{contact.firstName}}&last_name={{contact.lastName}}&F9UpdateCrm=true&F9key=number1
- Method: GET
- Custom Headers:
- Authorization: Basic [encoded credentials using the API user info created above]
-
Additional Configuration:
- Ensure that any custom fields used in your Five9 campaign are included in the URL as parameters.
- Validate that all parameter names match those expected by your Five9 configuration.
Refer to Five9's documentation for more information
Final Steps
- Test the webhook configuration by sending test data through Regal and verifying that it appears correctly in Five9.
- Monitor both systems for any errors or issues during data transfer.
Updated 3 months ago