Deploy Inbound Voice Agent
Get your AI Voice Agent live and handling inbound calls
There are 2 ways to deploy an inbound voice agent. With both options, you can always PSTN- or SIP- transfer the call to your human agents in your CCaaS, if you need the AI agent to escalate the call.
Options for Deploying Inbound Voice Agents
Here are the options for getting Regal AI voice agent to receive inbound calls:
- Calls comes directly into a Regal provisioned phone number leveraging Regal's telephony (built on Twilio)
- ✅ Pros: Simple solution requiring no integration
- ❌ Cons: Does't leverage your existing phone numbers or IVR set up if you want the customer to first go through your IVR, doesn't leverage your call analytics provider (e.g., Ringba, Invoca) if you have one
Note: Regal does have an IVR as well, if you need.
- Call comes into a phone number provisioned through your existing CCaaS (e.g., Five9, NICE) or call analytics provider (e.g., Ringba, Invoca), then you SIP transfer the call to Regal:
- ✅ Pros: Leverages your existing phone numbers / IVR set up and any current call analytics provider (e.g., Ringba, Invoca) if you have one; Let's you control the split of traffic to send to Regal
- ❌ Cons: Requires your CCaaS to configure SIP trunk (this is not hard, but legacy CCaaS tend to charge you for the implementation hours)
Steps for Option 1: Regal Numbers/Telephony
To deploy your inbound voice agent and start receiving calls leveraging Regal's phone numbers:
Step 1: Name the phone number and connect it to an IVR
Every account starts with a simple IVR that just sends the call directly to your agents
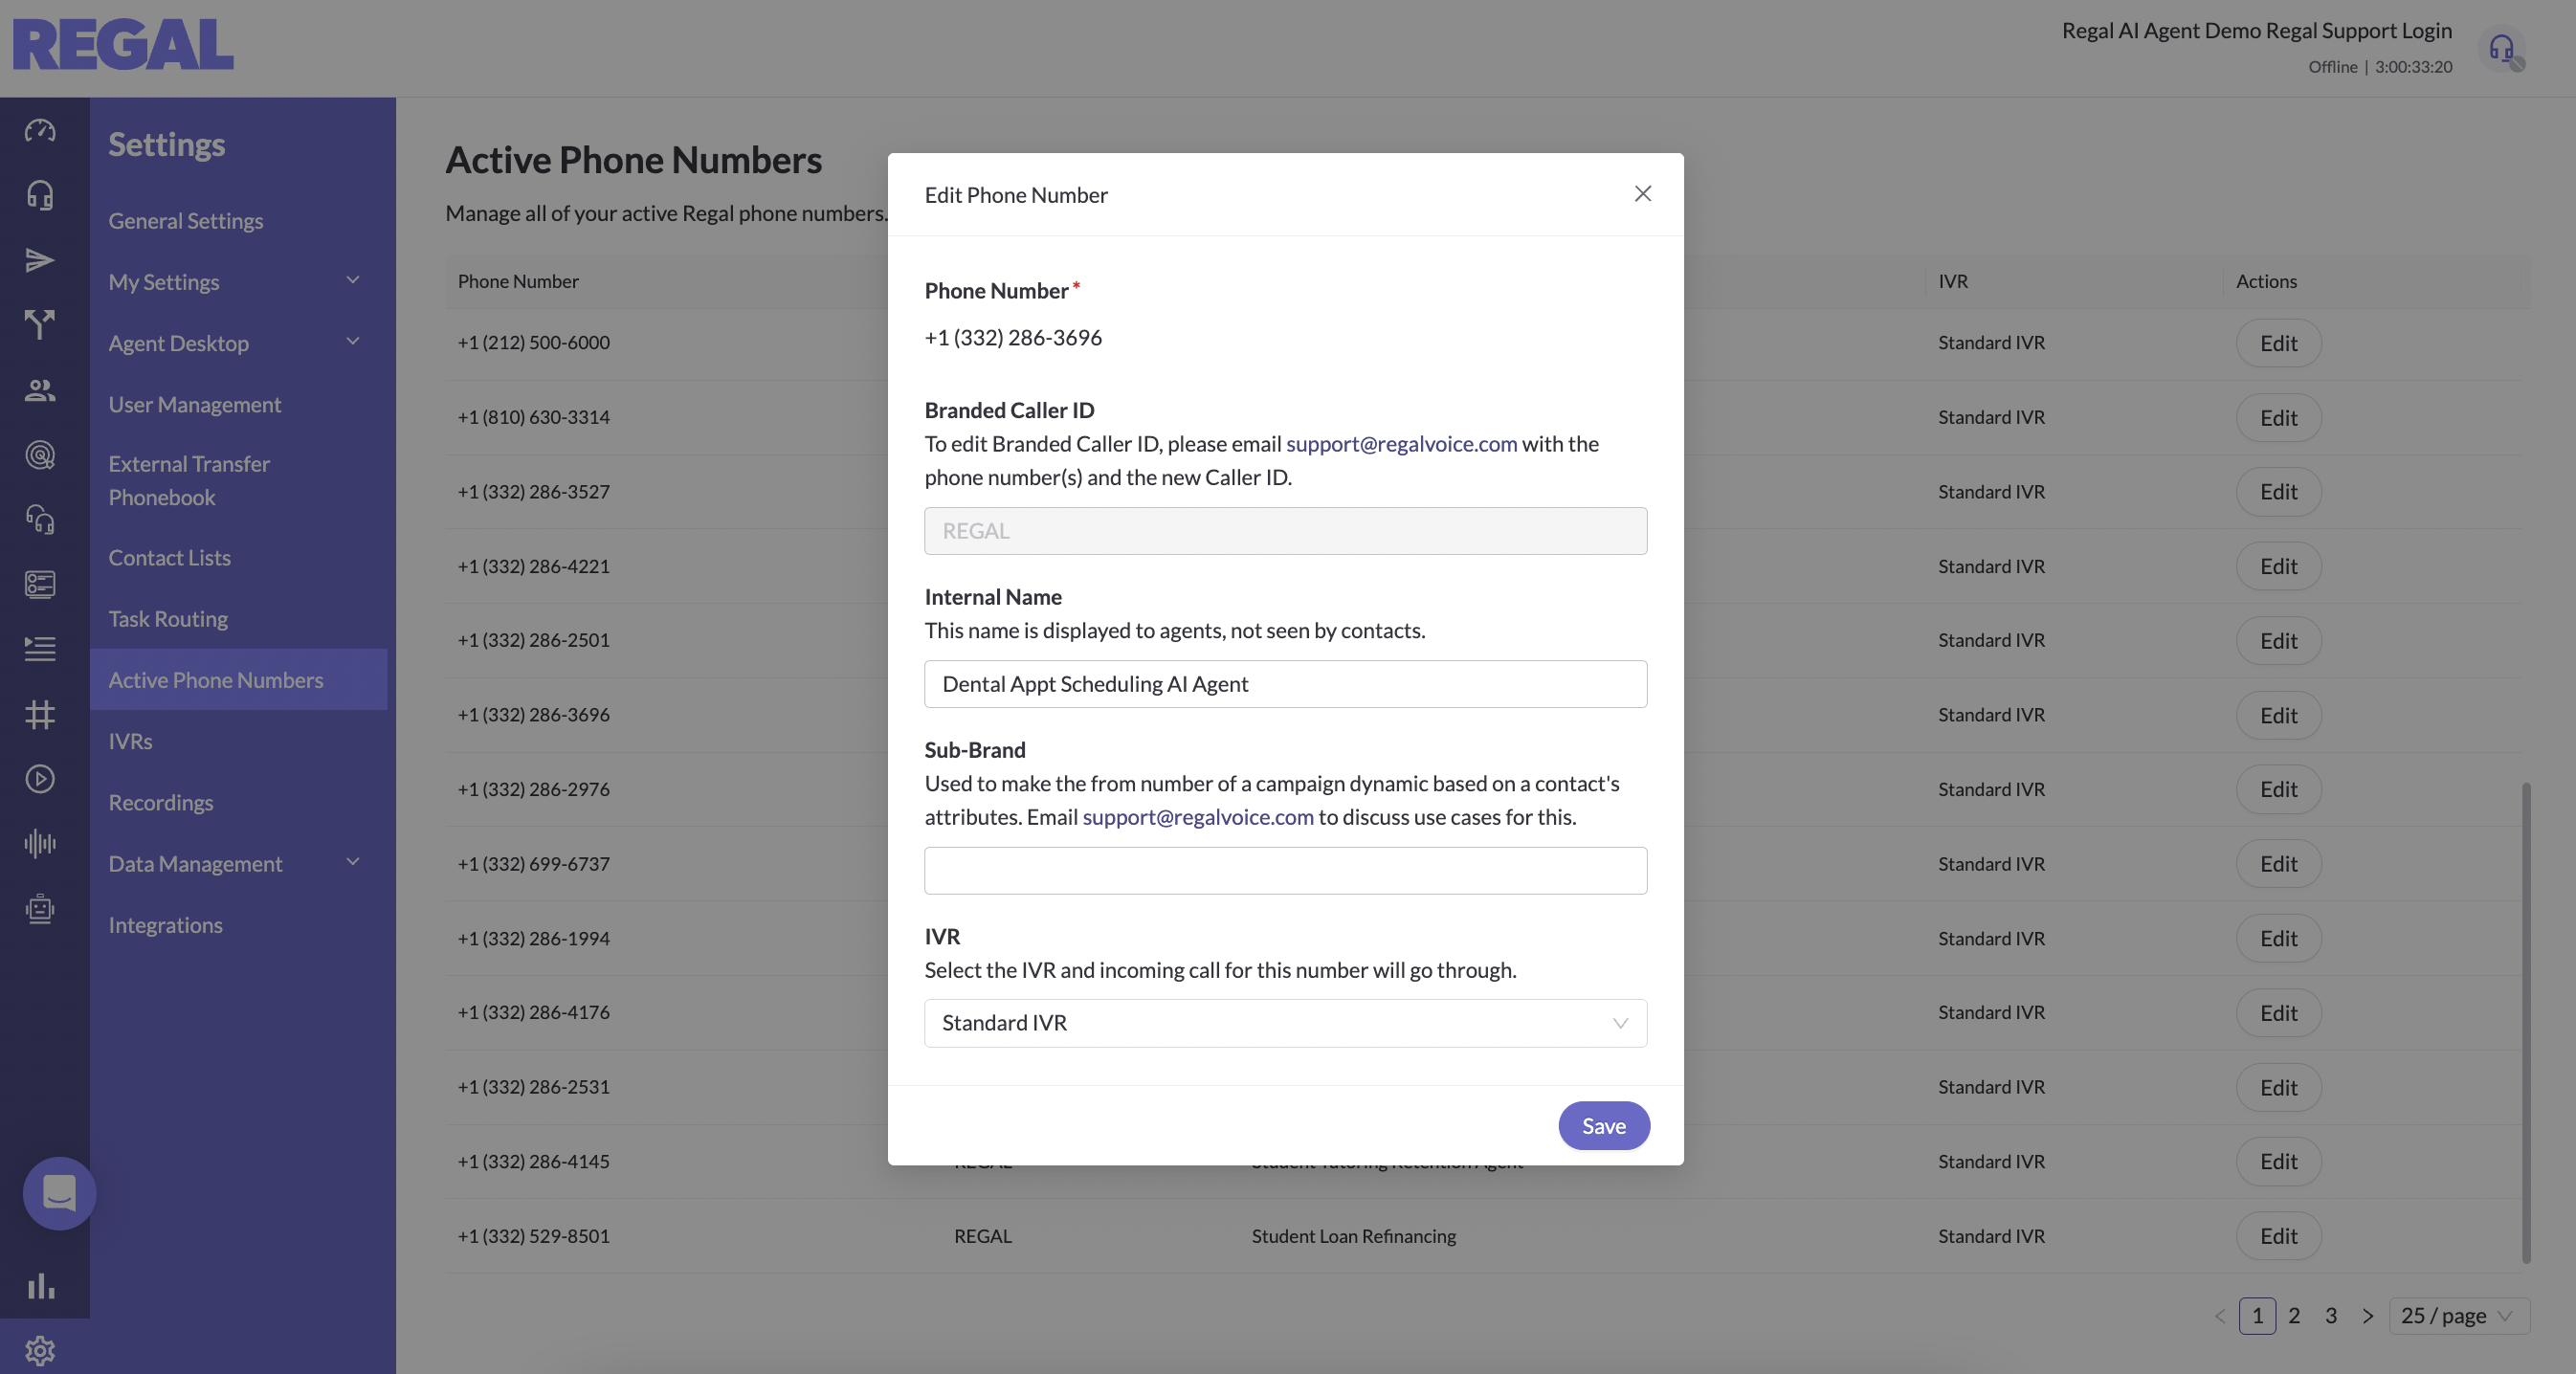
This is what the simple default IVR looks like. For most use cases there's no need to modify it:
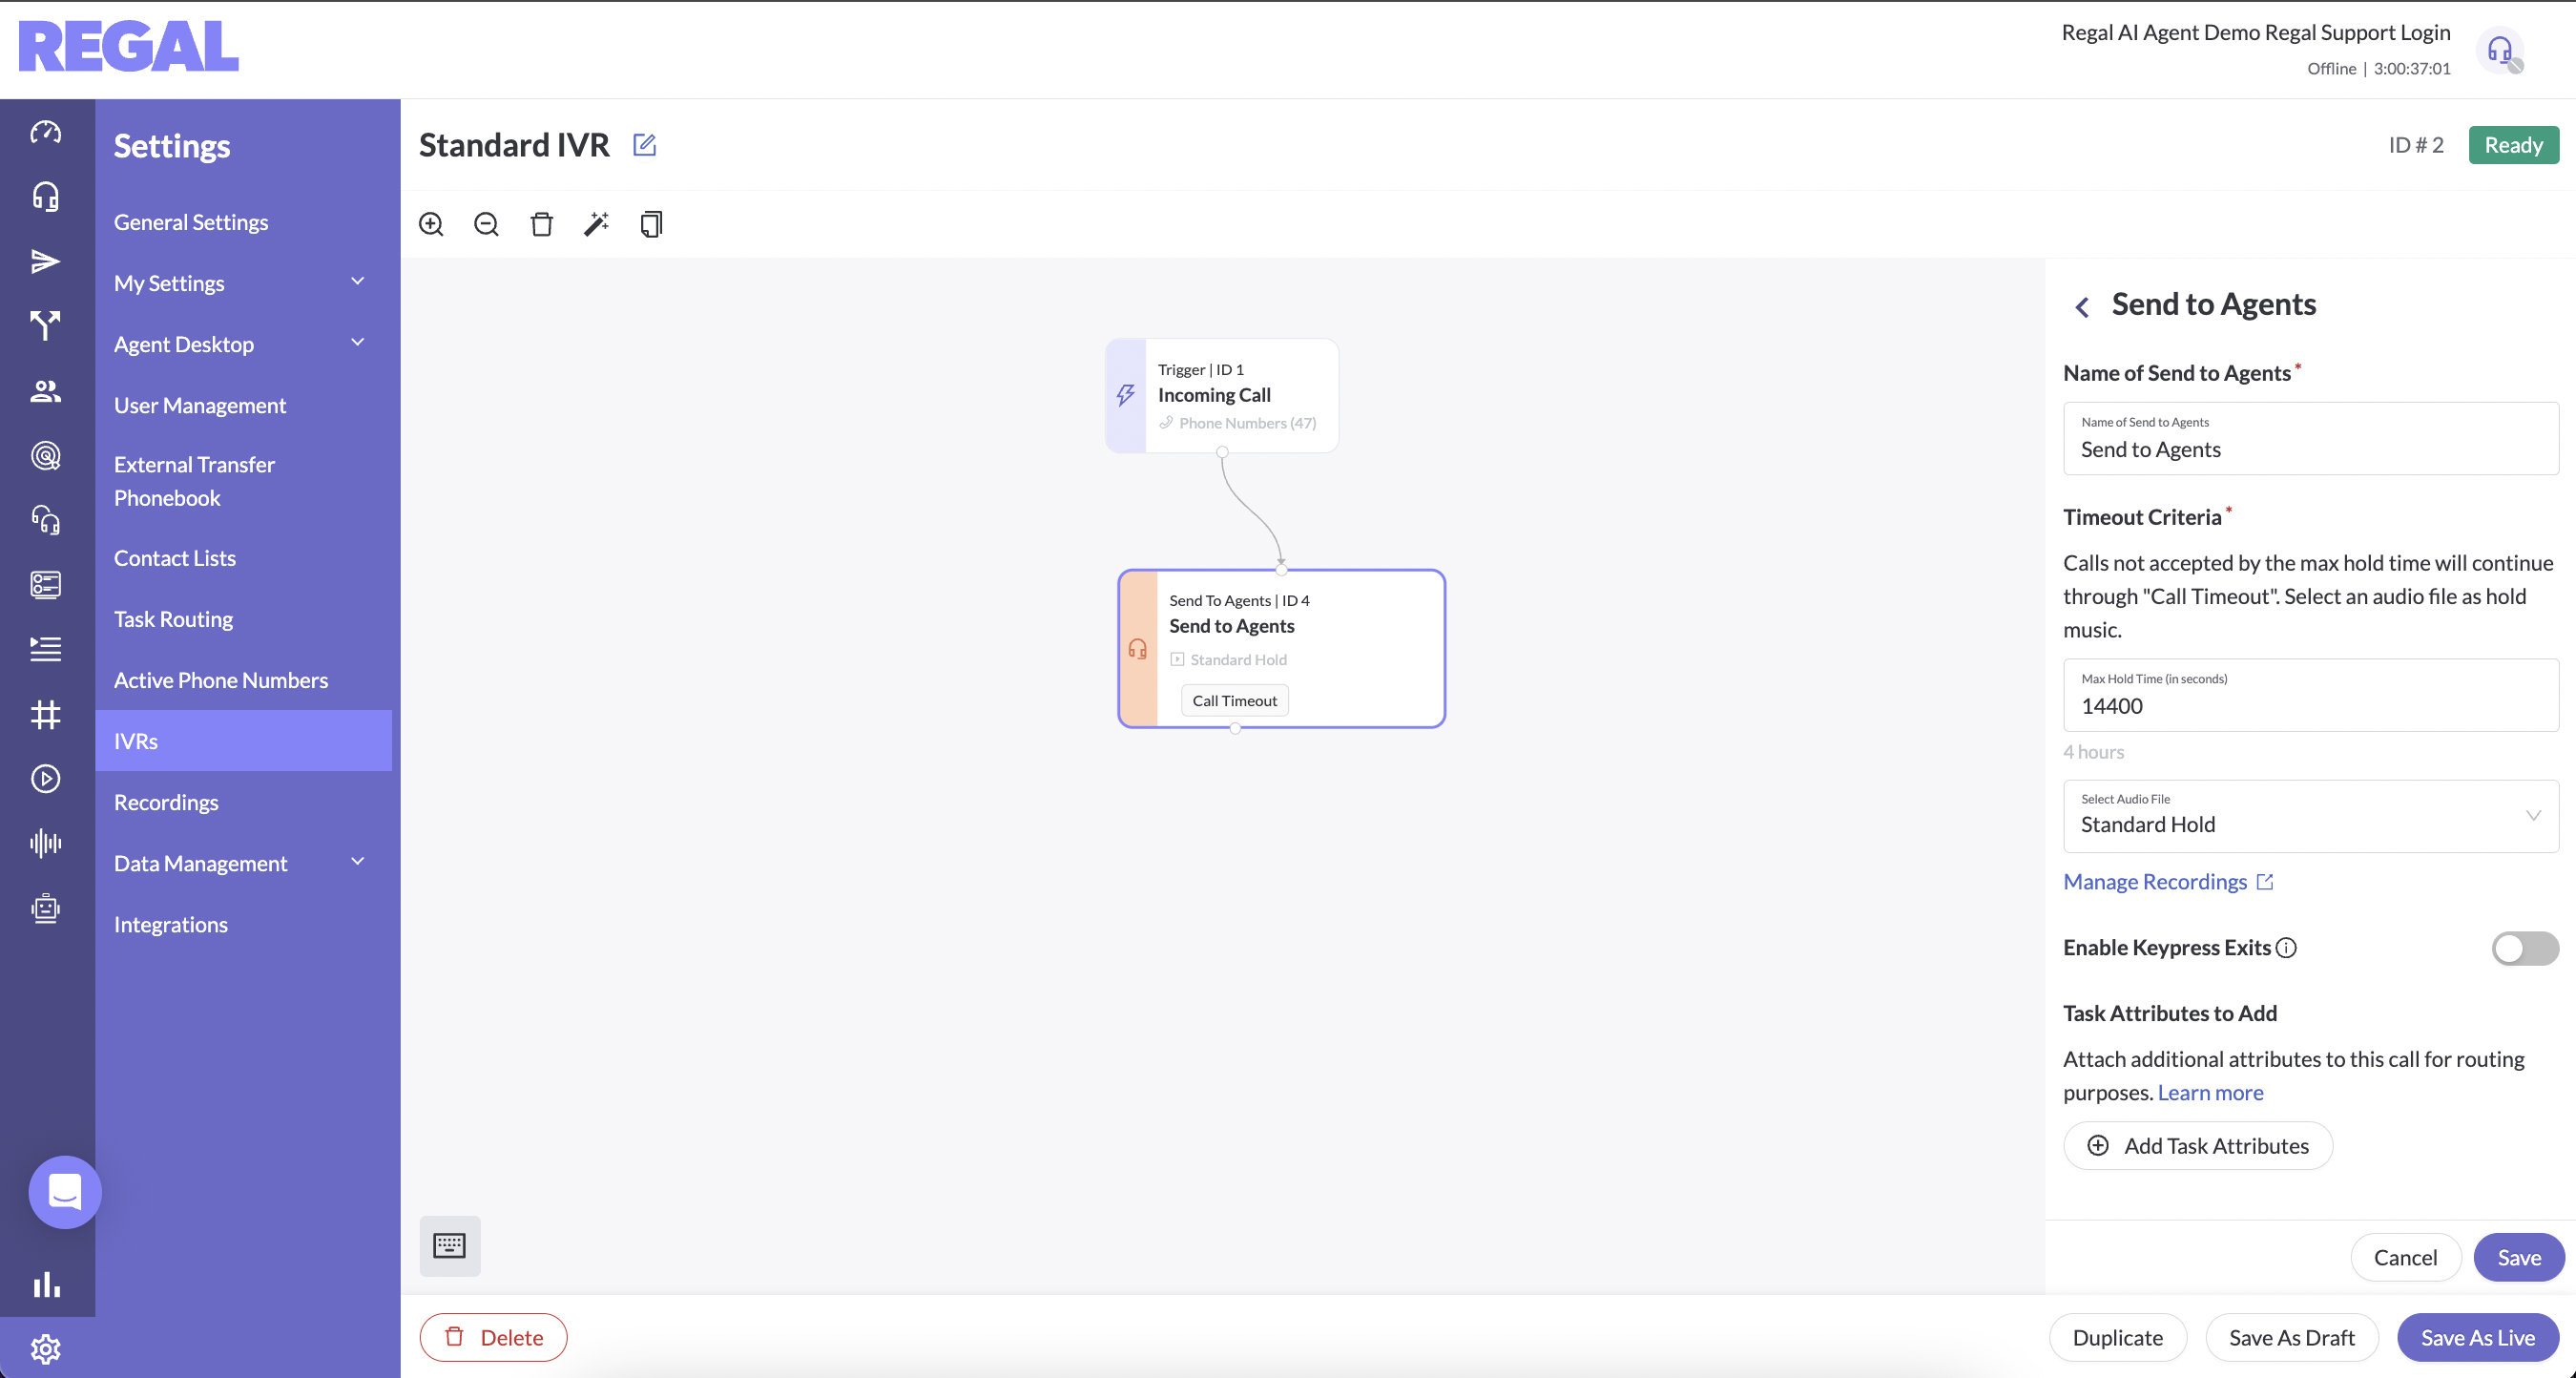
If you plan to use Regal numbers and require a more traditional IVR solution before sending a subset of calls to AI agents, see IVR Guide.
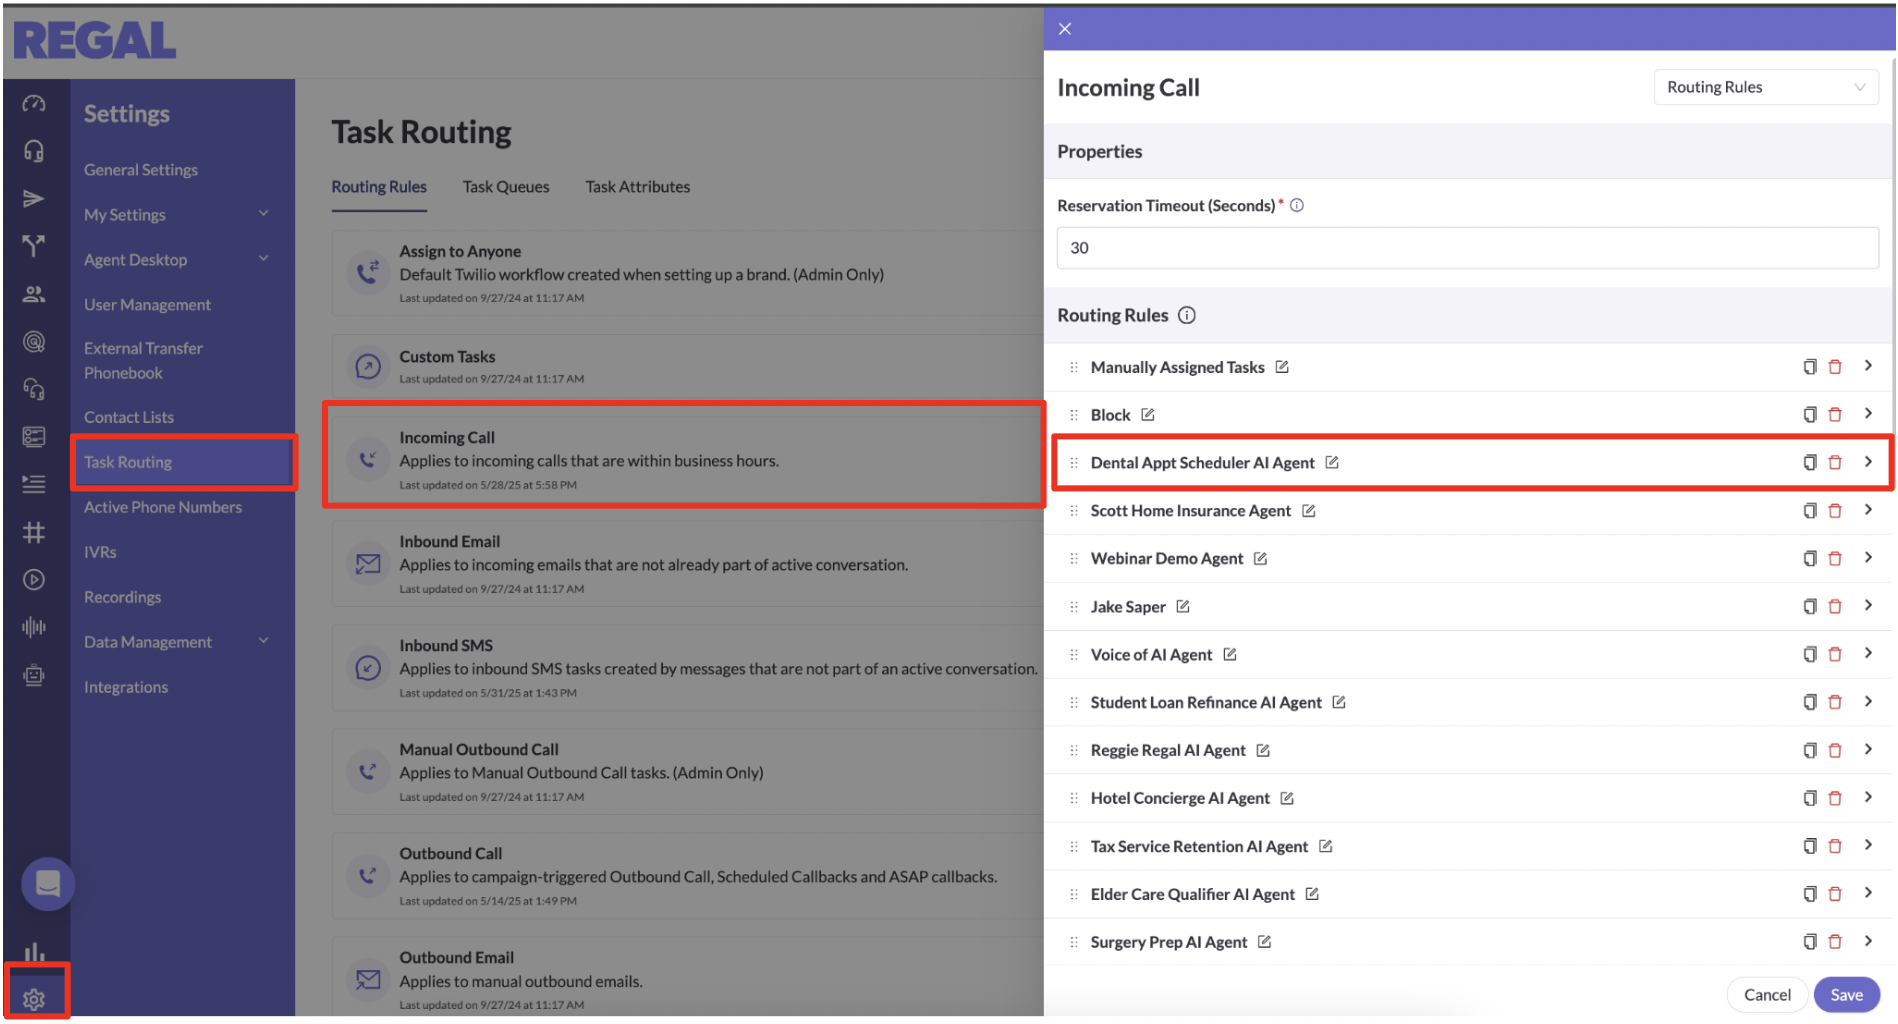
Step 2: Set up an Inbound Call routing rule for that phone number / agent
a. Add Routing Rule(s)
Navigate to Settings > Task Routing > Incoming Call. There you can click "Add Rule" or duplicate an existing rule and modify it.
In this example we're creating a Rule for routing calls to our Dental Appointment Scheduling Agent.
b. Configure your routing rule and Save.
A routing rule is comprised of 4 components:
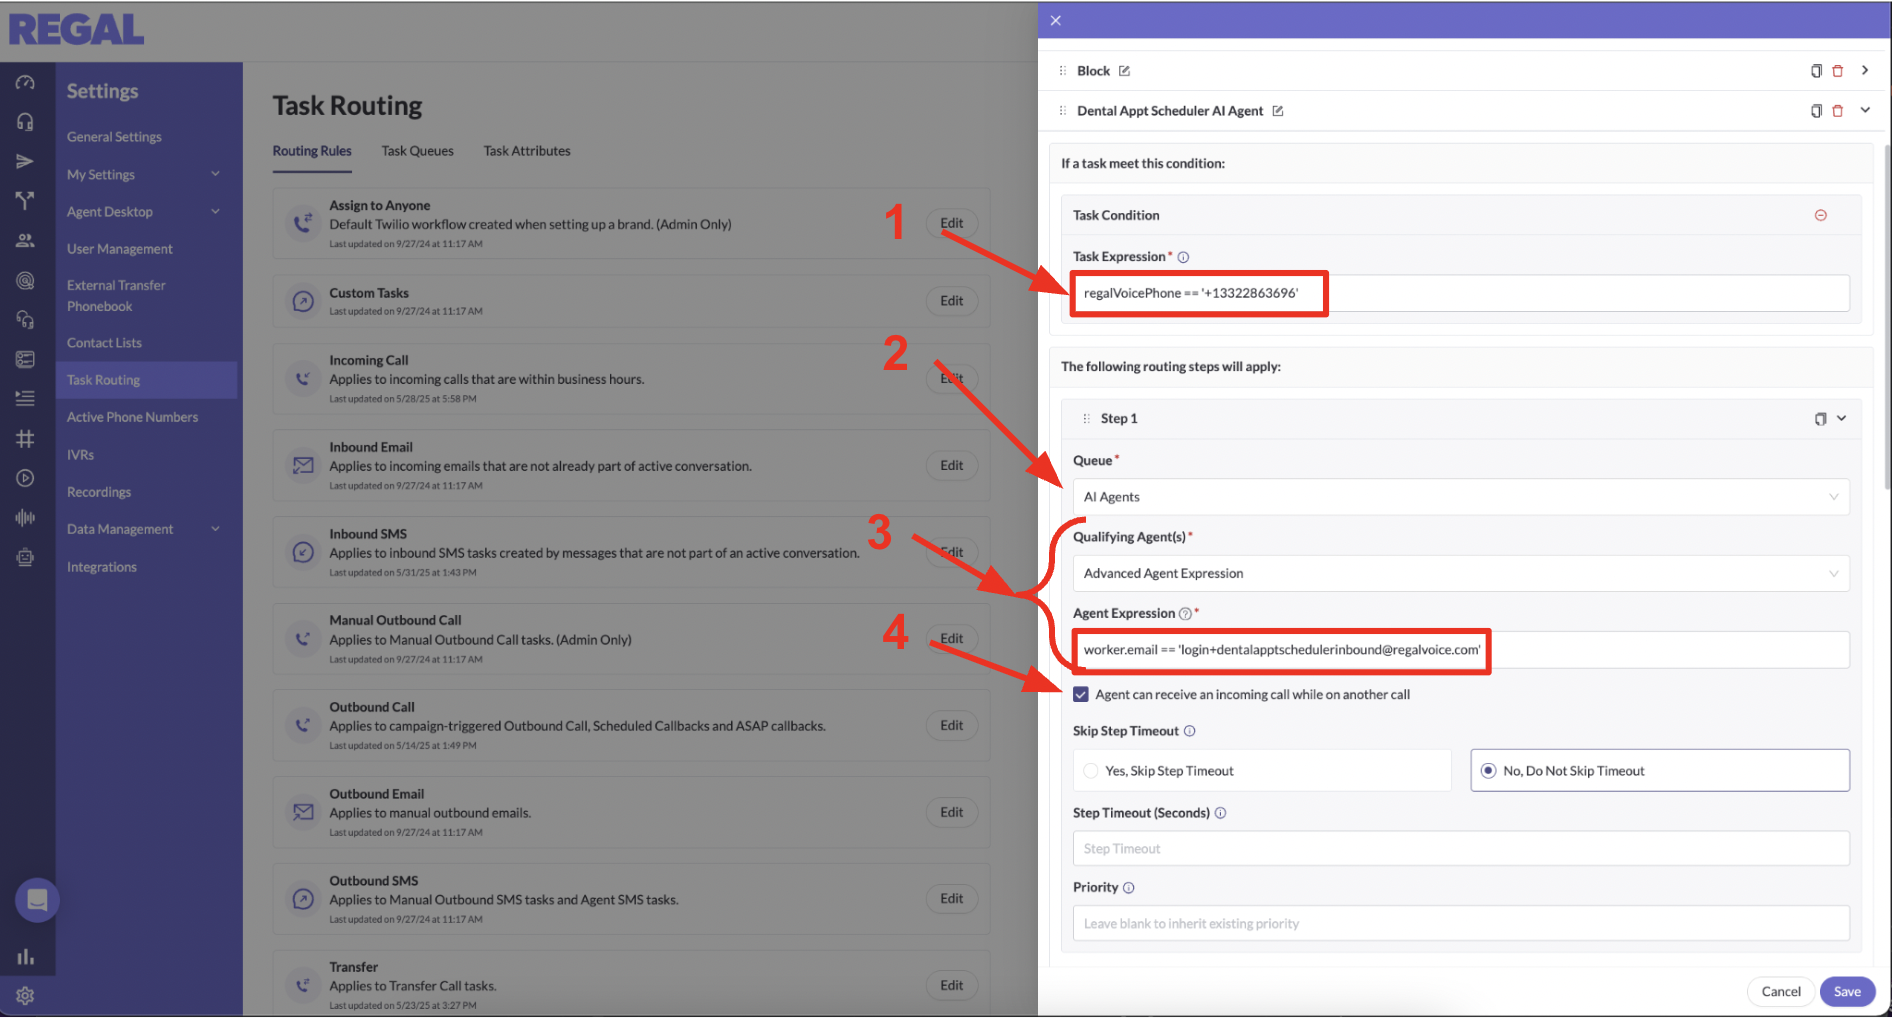
- Task Expression - this is the condition that will tell us what tasks (calls) match this rule. For inbound calls, the simplest expression is to match on the phone number the customer dial, assuming there's different numbers for each AI agent use case (alternatively for example, you can split on information about the customer or information gathered in an IVR etc.).
The syntax for doing this by Regal phone number is:
regalVoicePhone == '+1XXXXXXXXXX'
- Queue - this is where your calls will "park" until they are picked up by your agent(s) - we recommend the default AI Agents queue (but you can create other/more queues if you have more advanced use cases)
- Qualifying Agent - in our example, we are selecting to give it to a single agent within the AI Agents queue so we select "Advanced Agent Expression" and then match on the agent's email. (But if you had multiple AI agents in a queue that need to split the calls (b/c you need a higher concurrency than 50 calls), you could instead select "All Agents".)
The syntax for doing this by agent email is:
worker.email == 'agentemailaddress'
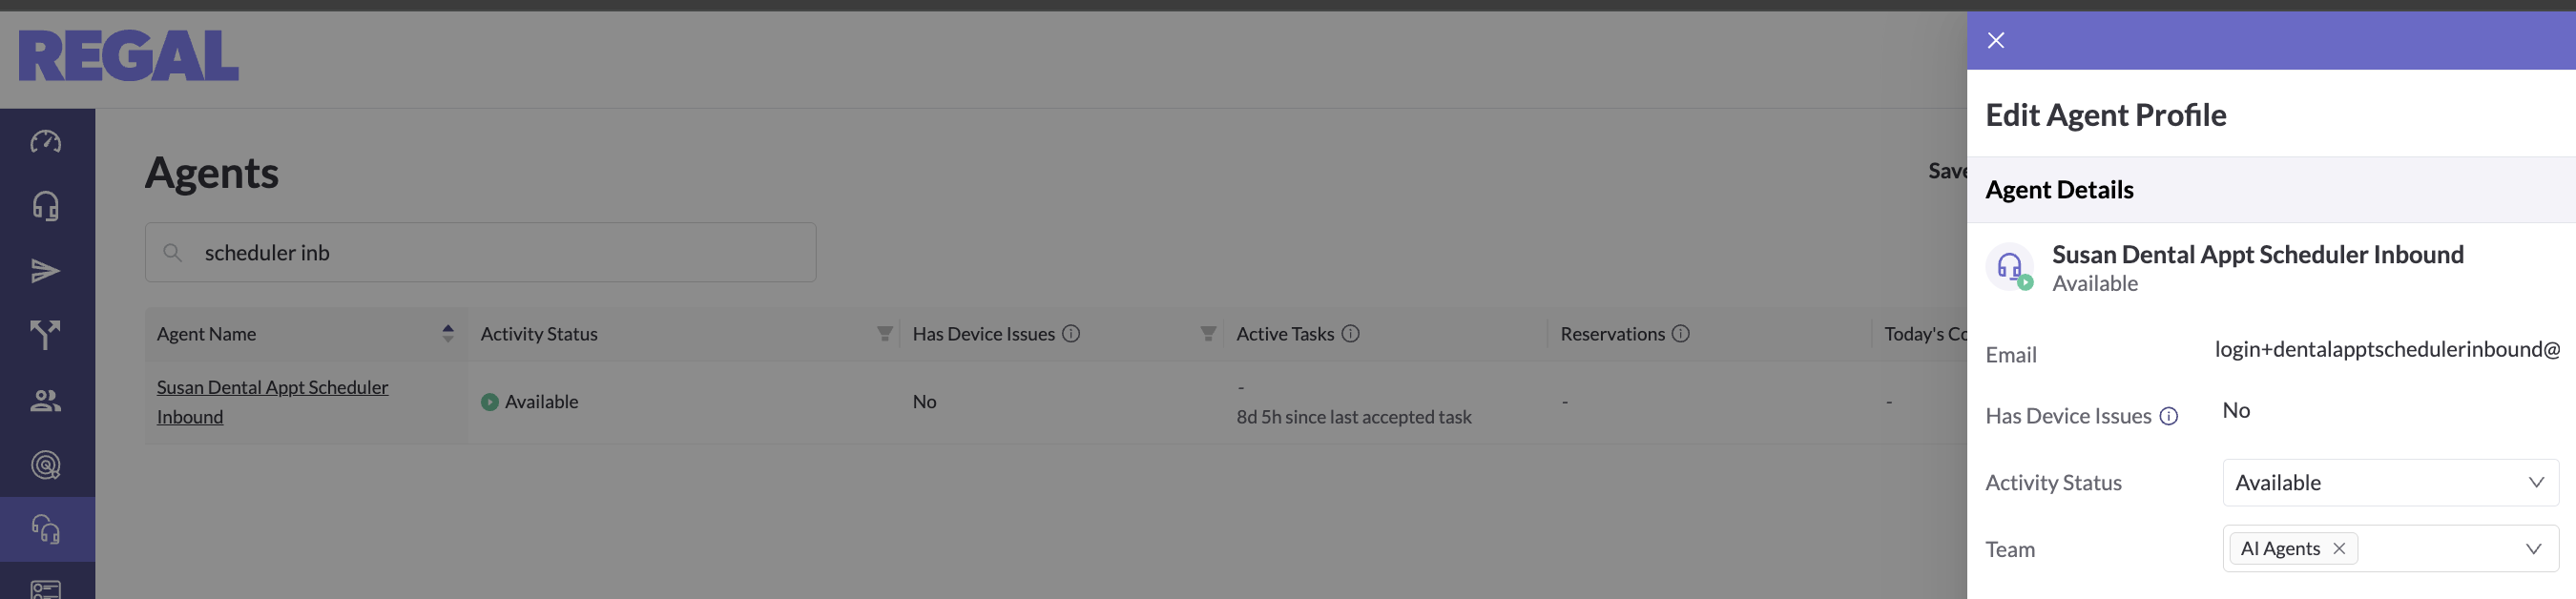
You can find the email address of your agent from the Agents page by clicking on your agent.
- Select "Agent can receive an incoming call while on another call" - as Regal supports both human agents and AI Agents, this is to make sure if you're routing to an AI agent it can receive multiple calls, but if it's a human agent you would leave this unchecked.
Routing RulesRouting rules are evaluated from top to bottom. The first rule that matches your task will route it. The syntax is particular you can refer to this Routing Rule Syntax Guide for different use cases.
Step 3: Turn your AI agent to Available!
Go to the Agents page, click on your agent, and change their status to available. (When an AI agent is created we default it to Offline.)
Your agent is now ready to take calls. Place a call to your Regal phone number and talk to your agent!
Steps for Option 2: Numbers in Other Telephony Provider
To deploy your inbound voice agent and start receiving calls leveraging a different telephony solution:
Step 1: Ask your telephony provider to provision a SIP trunk
Make sure you determine with them the number of channels you need for concurrent calls.
Step 2: Configure your SIP connection
Follow the SIP Implementation Guide to connect your calls to your Regal SIP domain. Your FDE will help you through this process, including connecting your SIP domain to the simple default IVR in Regal.
Step 3: Set up a Inbound Call routing rule(s)
When leveraging a SIP integration, you can add SIP headers as metadata along with the call. You should make sure one of those SIP headers defines which agent/use case the call is intended for. For example, let's say you have an Inbound Support Agent, an In-Hours Inbound SDR agent and an After-Hours SDR agent, all of whom have different conversations to conduct. One of your SIP headers could be callType where you pass a value of e.g., inbound_support, in_hours_SDR, or after_hours_SDR. All incoming SIP headers are added to an attribute (object) called incomingSIPHeaders on your call tasks.
In that case you would configure 3 separate inbound call routing rules (one for each use case), where the task matching expression references the incomingSIPHeaders.callType and then the Qualifying agent expression is the email of each corresponding agent.
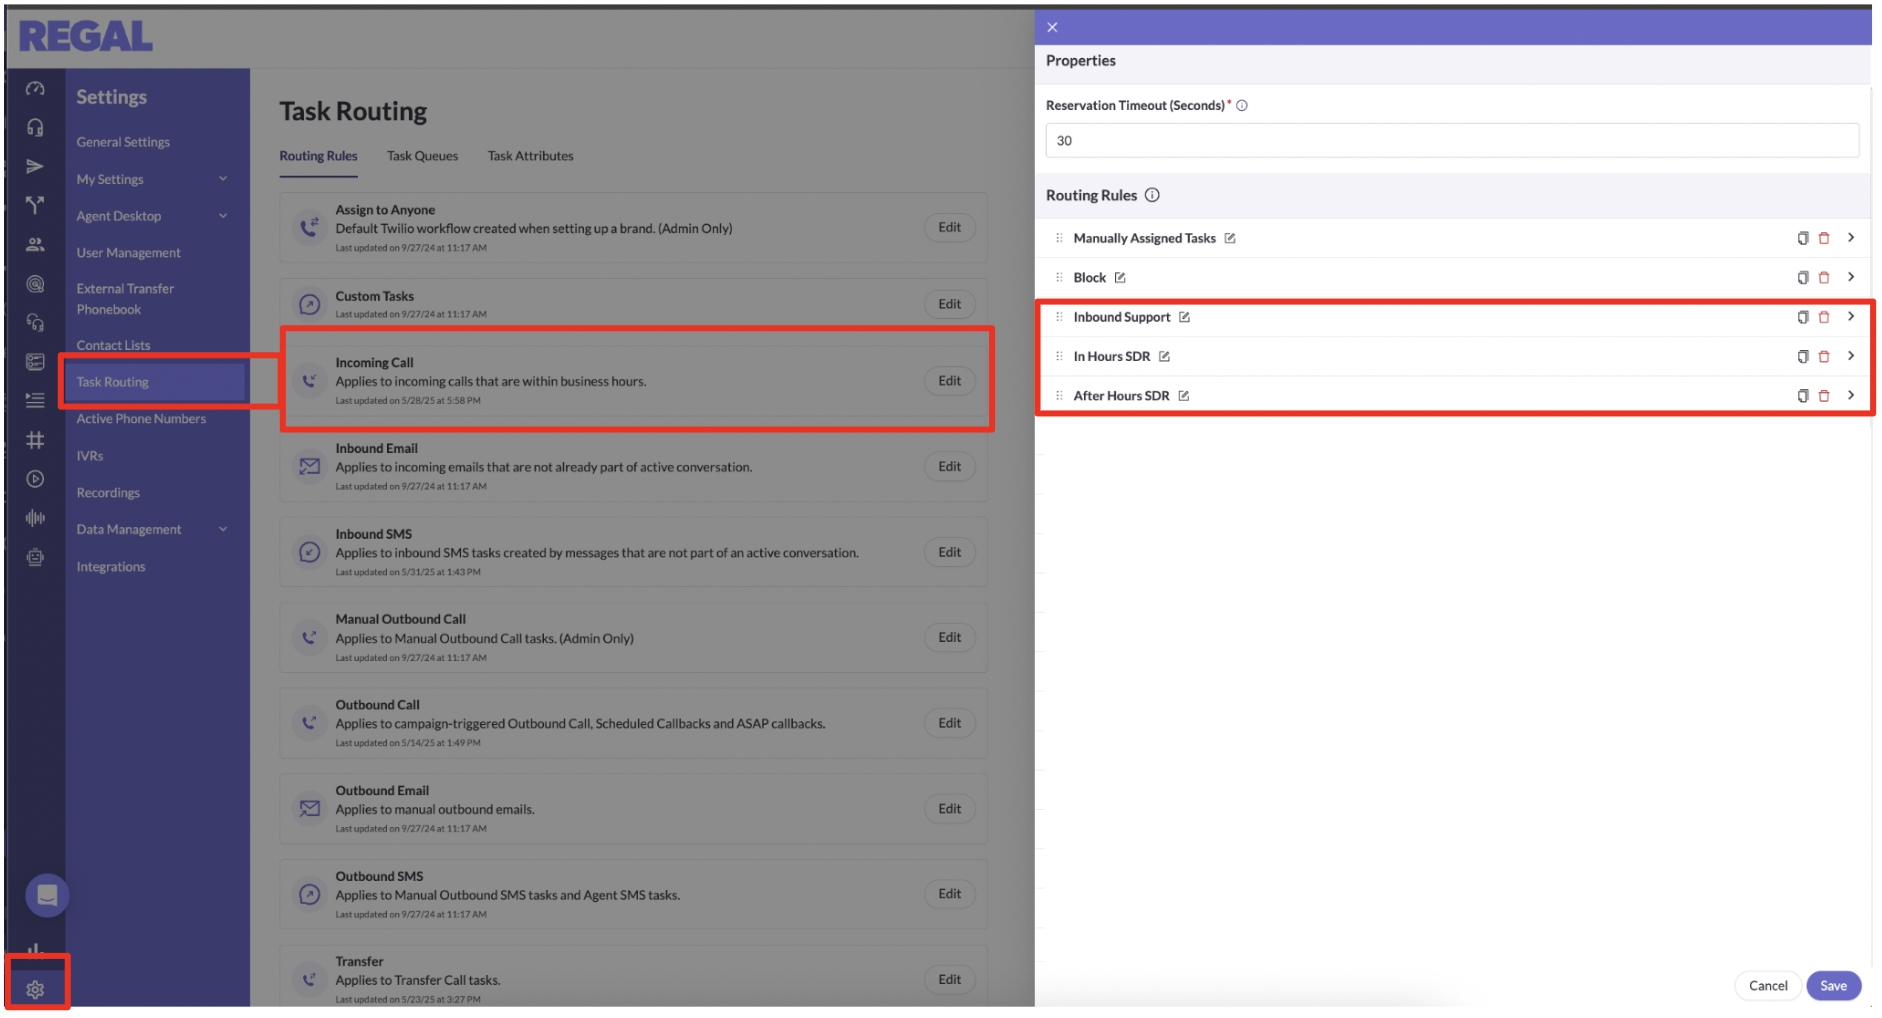
a. Add Routing Rule(s)
Navigate to Settings > Task Routing > Incoming Call. There you can click "Add Rule" or duplicate an existing rule and modify it.
In this example we're creating 3 rules.
b. Configure your routing rule(s) and Save.
This example shows the routing rule for the inbound support use case.
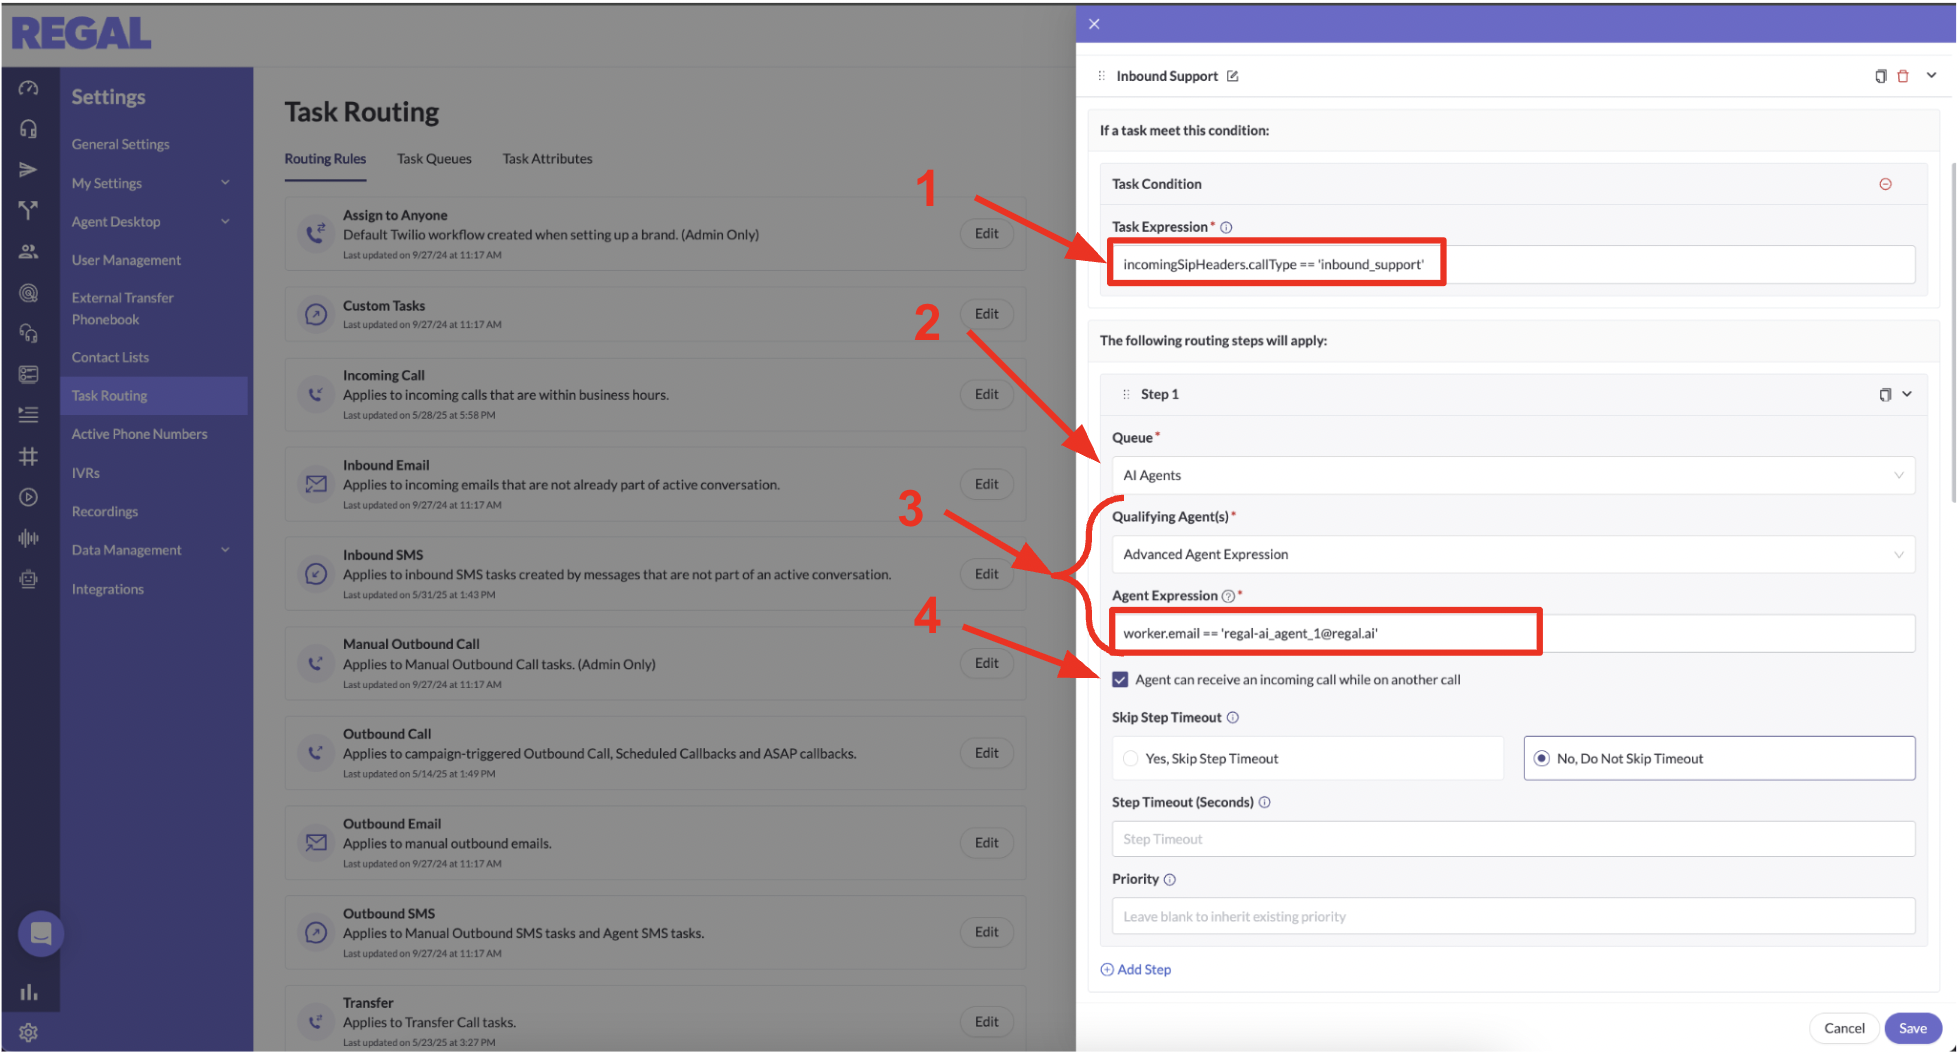
Each routing rule is comprised of 4 components:
- Task Expression - this is the condition that will tell us what tasks (calls) match this rule.
The syntax for using a SIP Header is
incomingSIPHeaders.sipHeader == 'header value'
For the example we described above, your 3 task expressions would be:
incomingSIPHeaders.callType == 'inbound_support'
incomingSIPHeaders.callType == 'in_hours_SDR'
incomingSIPHeaders.callType == 'after_hours_SDR'
- Queue - this is where your calls will "park" until they are picked up by your agent(s) - we recommend the default AI Agents queue (but you can create other/more queues if you have more advanced use cases)
- Qualifying Agent - in our example, we are selecting to give it 3 separate agents within the AI Agents queue (one for each call type) so we select "Advanced Agent Expression" and then match on the agent's email. (But if you had multiple AI agents in a queue that need to split the calls (b/c you need a higher concurrency than 50 calls), you could instead select "All Agents".)
The syntax for doing this by agent email is:
worker.email == 'agentemailaddress'
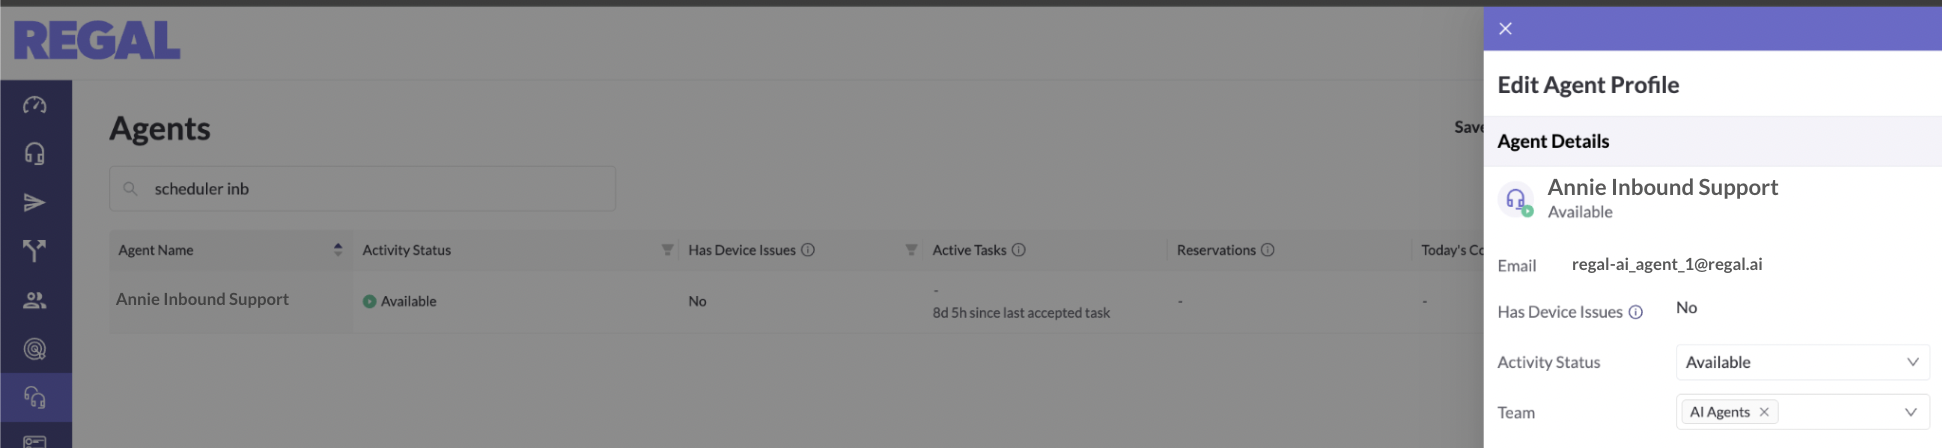
You can find the email address of your agents from the Agents page by clicking on your agent.
- Select "Agent can receive an incoming call while on another call" - as Regal supports both human agents and AI Agents, this is to make sure if you're routing to an AI agent it can receive multiple calls, but if it's a human agent you would leave this unchecked.
Routing RulesRouting rules are evaluated from top to bottom. The first rule that matches your task will route it. The syntax is particular you can refer to this Routing Rule Syntax Guide for different use cases.
Step 4: Turn your AI agent to Available!
Navigate to Agents page > Select your agent > Change their status to 'Available'. (When an AI agent is created we default it to Offline.)
Your agent is now ready to take calls. Place a call to your phone number and talk to your agent!
▶️ VIDEO TUTORIAL
Updated 3 months ago