Salesforce Embed
This guide describe how to embed Regal's Agent Desktop as an iFrame into Salesforce so your agents can handle Regal tasks directly in Salesforce.
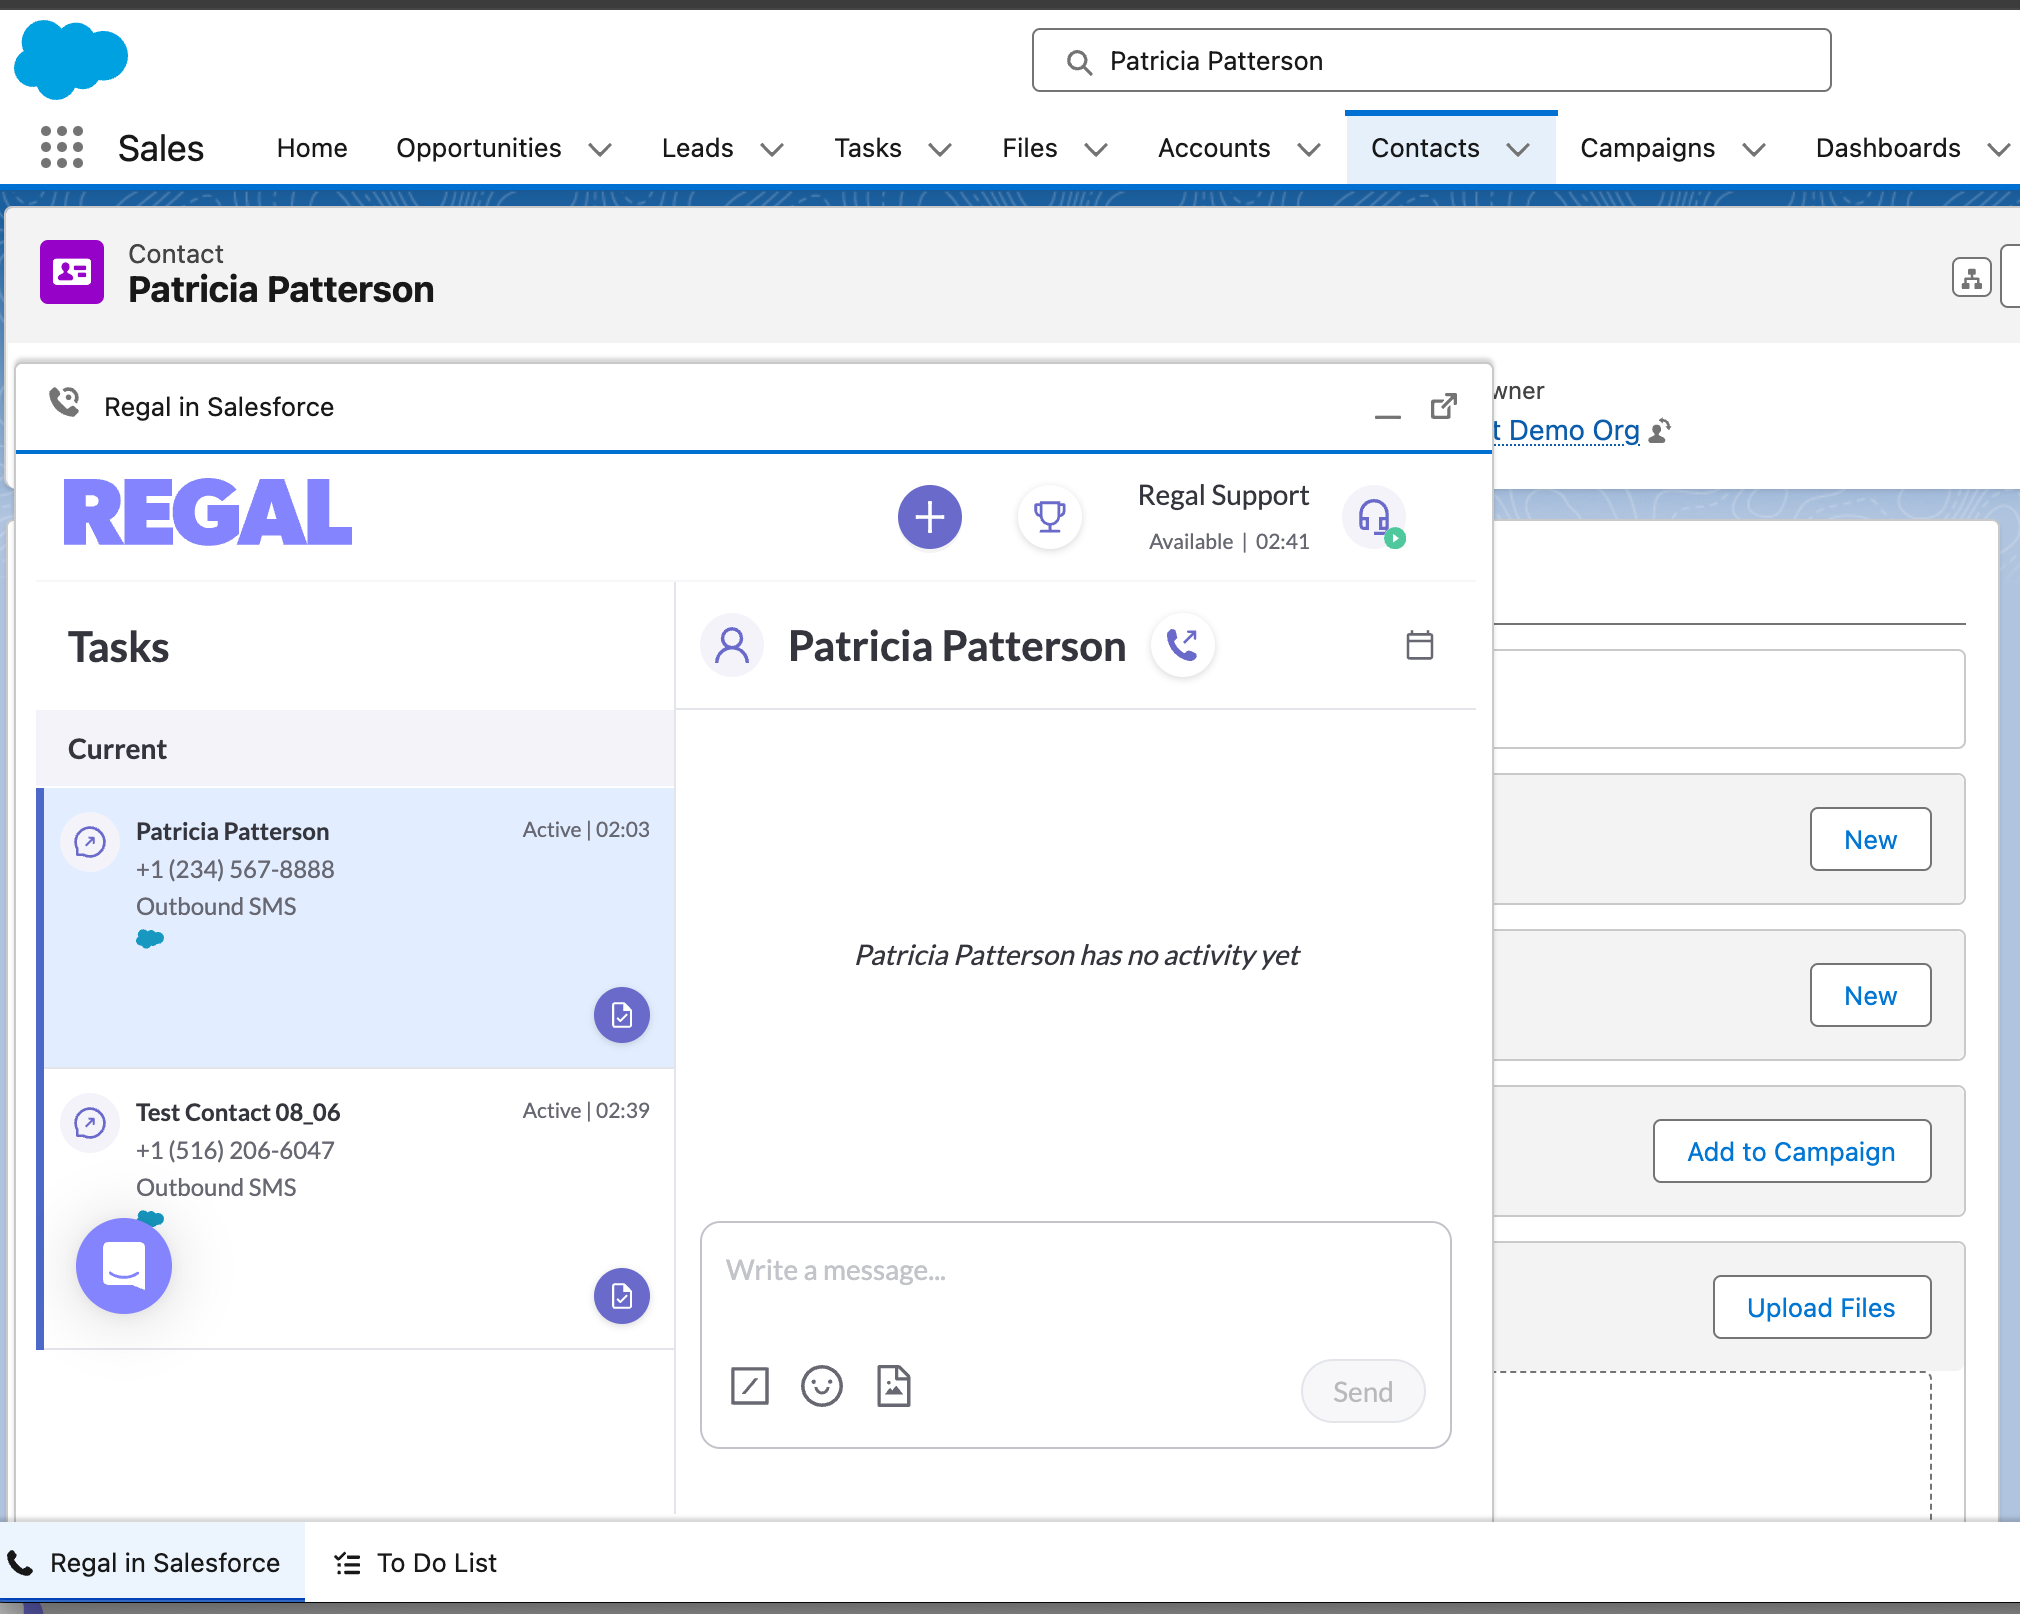
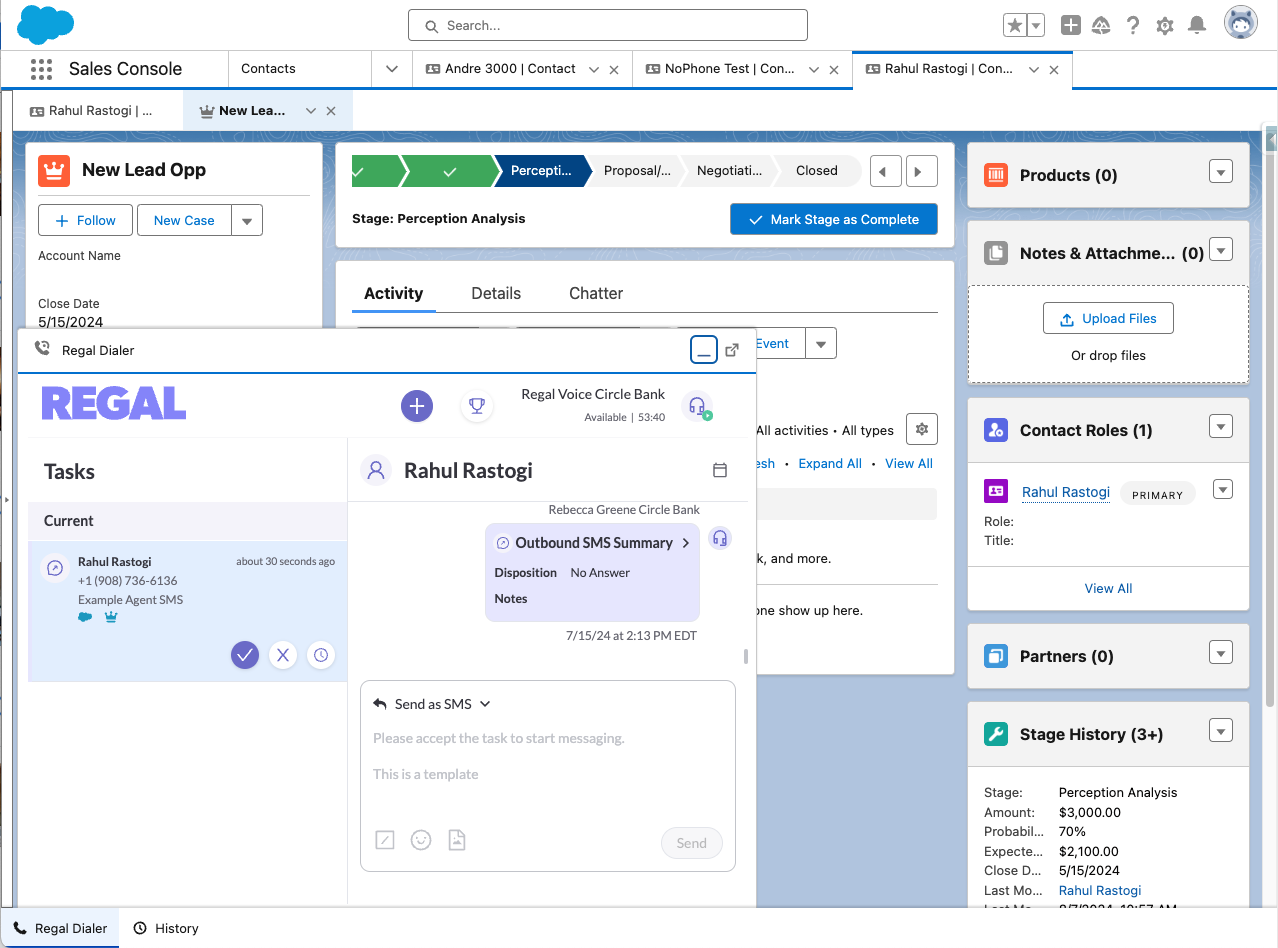
With the Regal Dialer widget in Salesforce, your users can enjoy the power of Regal from directly within Salesforce.
- The dialer will be a collapsible UI component in the utility bar at the bottom of your Salesforce browser window.
Phone numbers in Salesforce will be actionable "click-to-dial" links that can initiate a call or sms conversation with the contact in the widget. - New tasks assigned to an agent will automatically pop open and notify the agent, where they can then accept and complete the task.
- Tasks that show in the widget will also include links to the relevant Lead, Contact, Account, or Opportunity record, and once clicked will open the record within a new tab in the Salesforce window (if using the Sales Console app), or within a new tab in the browser (if using the Sales app).
The Regal Dialer Widget must be independently installed and enabled in your Salesforce org by following the setup instructions below.
Setup Instructions
Step 1: Create the Apex Class
- Navigate to Setup within your Salesforce instance.
- Use the Quick Find box to search for Apex Classes and select it.
- Click New to create a new Apex Class.
- Copy and paste the Apex Class (RegalDialerWidgetController.cls) from this gist.
- Also copy and past the test class (RegalDialerWidgetControllerTest.cls) from this gist.
- Click Save.
Step 2: Create the Visualforce Page
- Navigate to Setup within your Salesforce instance.
- Use the Quick Find box to search for Visualforce Pages and select it.
- Click New to create a new Visualforce page.
- Name your page RegalDialerContainer.
- Copy and paste the Visualforce code (RegalDialerContainer.page) from this gist.
- Click Save.
Step 3: Assign Page Access
Ensure that users who need access to the dialer have the necessary permissions:
- For admin users, access is granted by default.
- For non-admin users, either update their profiles to include access to the RegalDialerContainer page or create a permission set granting access and assign it to the relevant users.
Step 4: Configure the Call Center
- Download the call center definition XML file.
- Go back to Setup and search for Call Centers.
- Click Import and upload the XML file.
- After importing, add users to the call center by clicking on Manage Call Center Users and selecting the users who should be able to use the Regal Dialer Widget.
Step 5: Add to the Salesforce App
- In Setup, search for App Manager.
- Find the app you wish to add the dialer to (e.g. Sales Console), and click Edit.
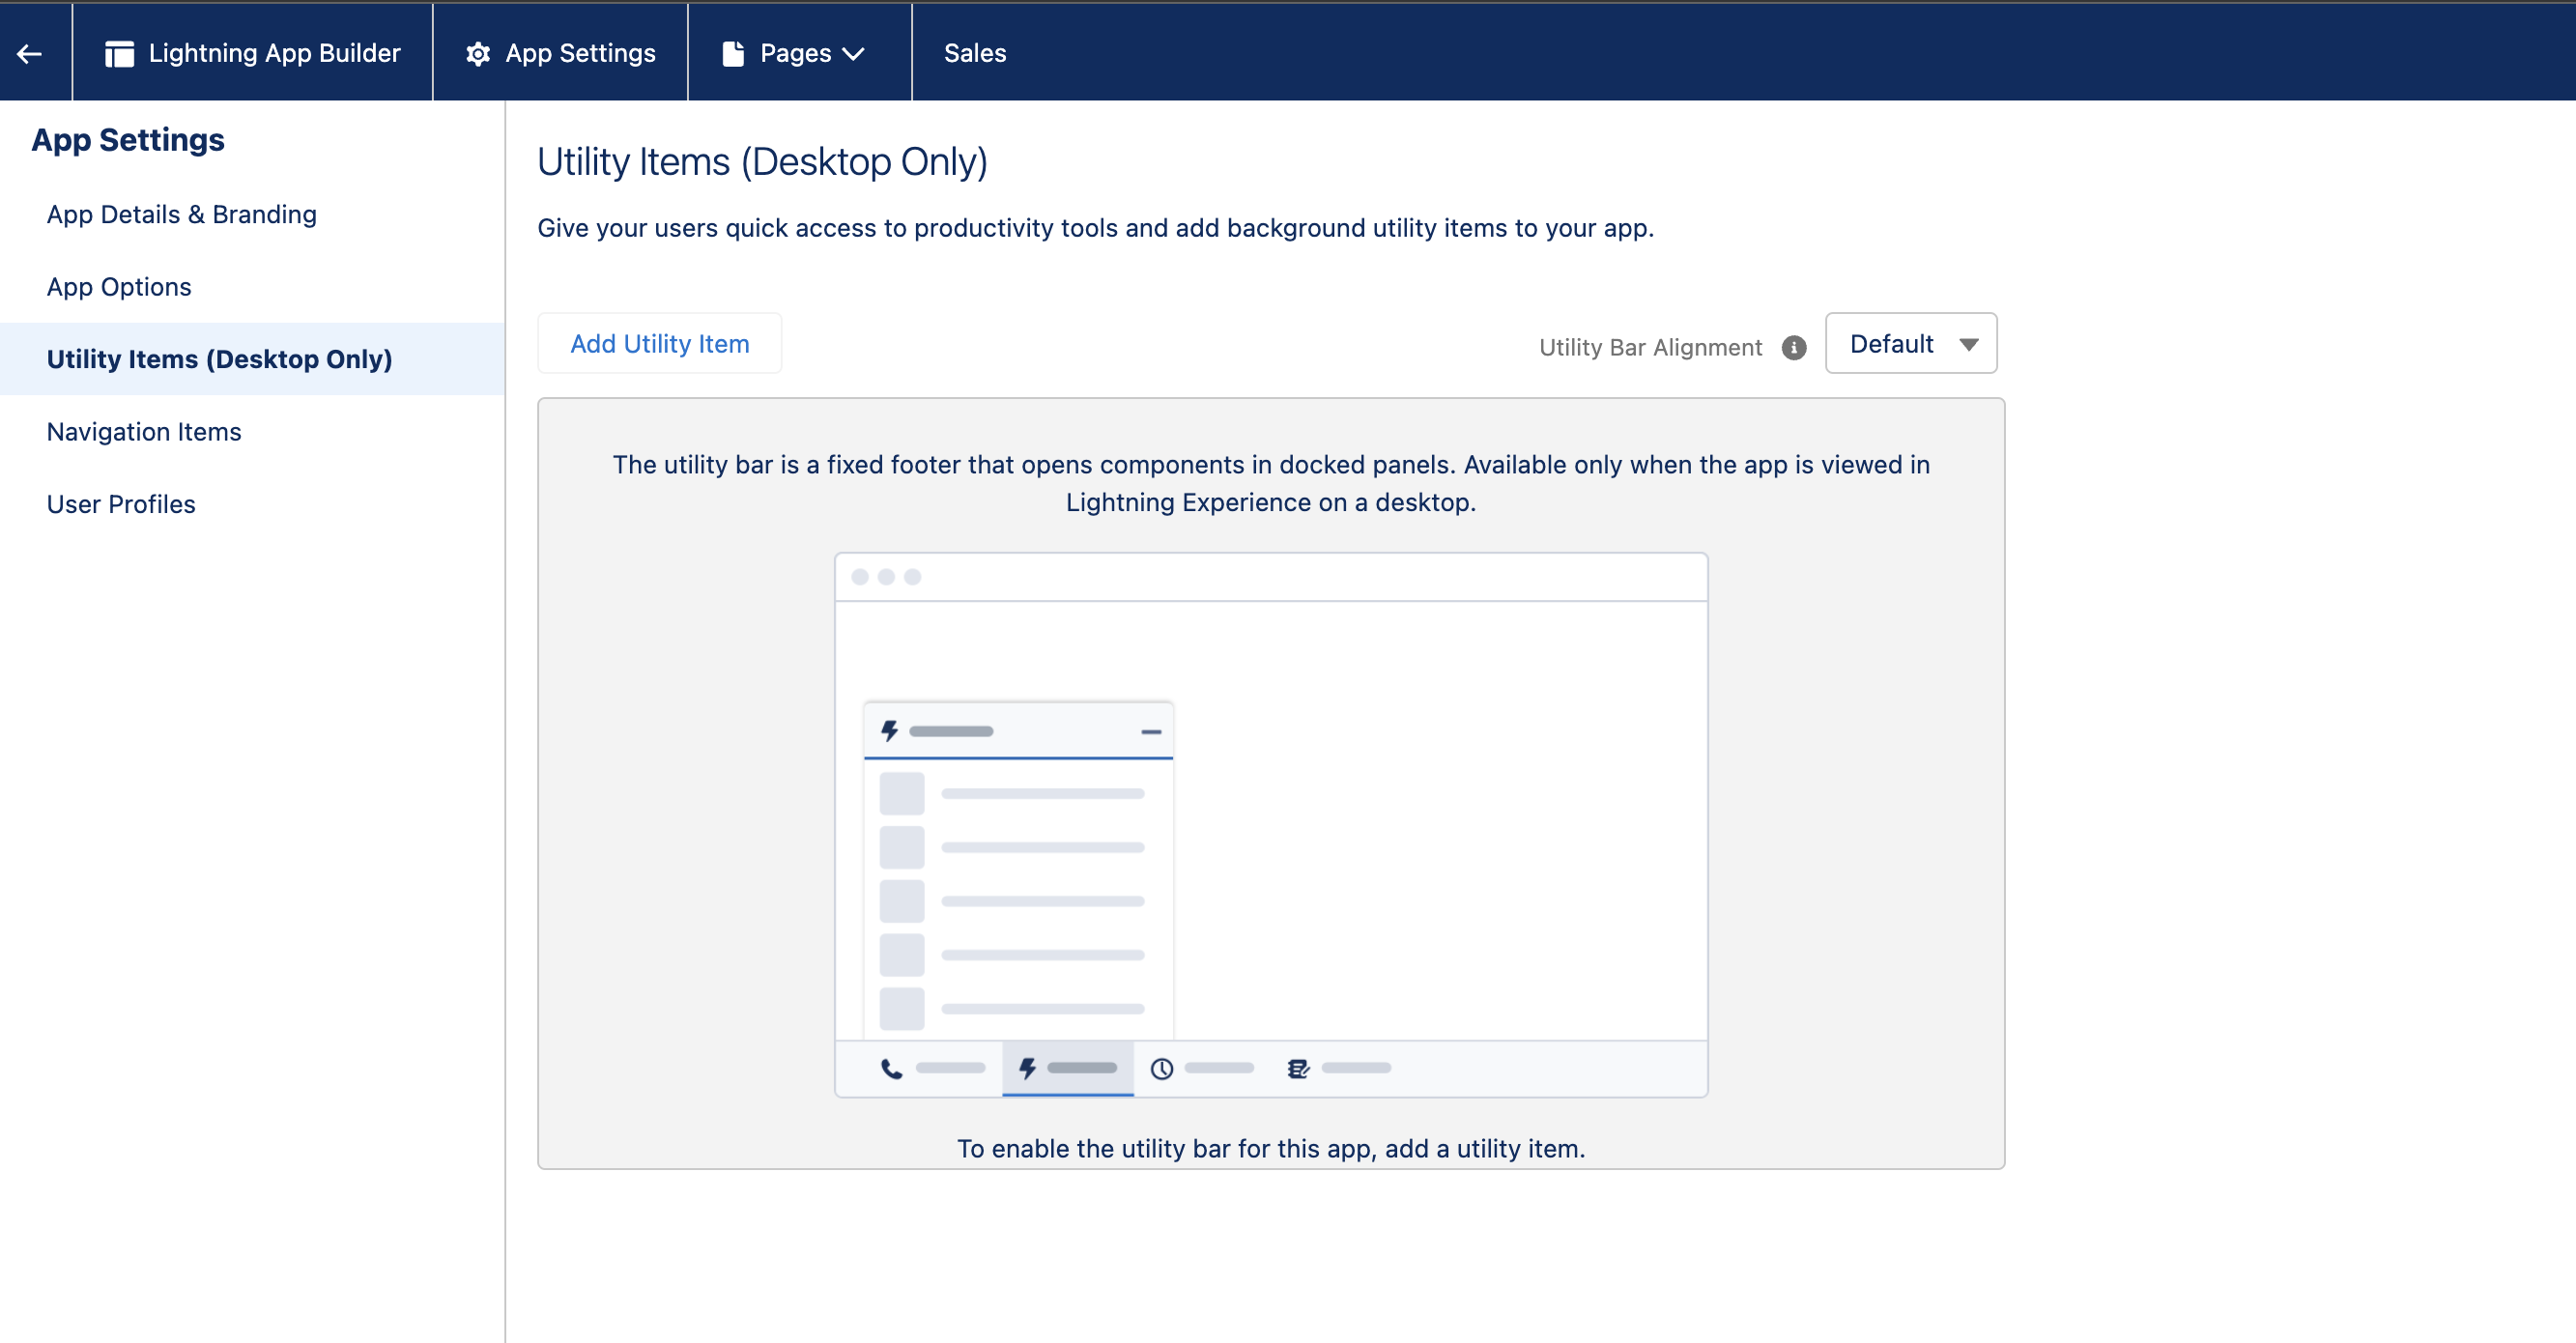
- Navigate to the Utility Items tab, click on Add Utility Item, and select Open CTI Softphone. Configure as instructed.

Step 6: Decide whether click-to-dial functionality should search by phone number or external ID in Regal.
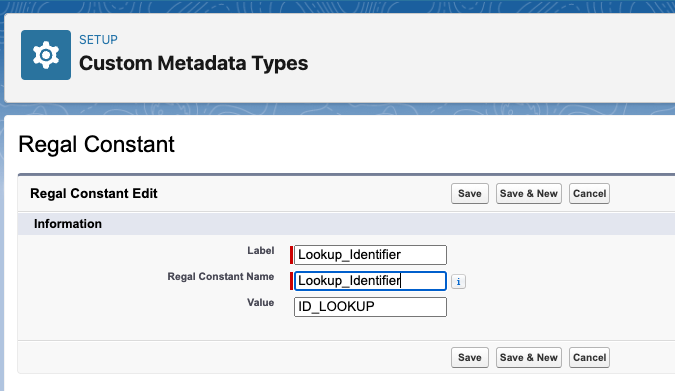
- Go to Setup, search for Custom Metadata Types and select it.
- Click Manage Records on the Regal Constant.
- Add a New Regal Constant value called Lookup_Identifier, as shown below.
- For the Value field, use either ID_LOOKUP or PHONE_LOOKUP as needed.
| Field | Value | Notes |
|---|---|---|
| Label | Lookup Identifier | Can be whatever name you choose. We recommend the one shown. |
| Name | Lookup_Identifier | Please note capitalization. Must be exactly as shown. |
| Value | PHONE_LOOKUP orID_LOOKUP | PHONE_LOOKUP: Click to Dial will search contacts by their Phone ID_LOOKUP: Click to Dial will search contacts by their Salesforce Id |
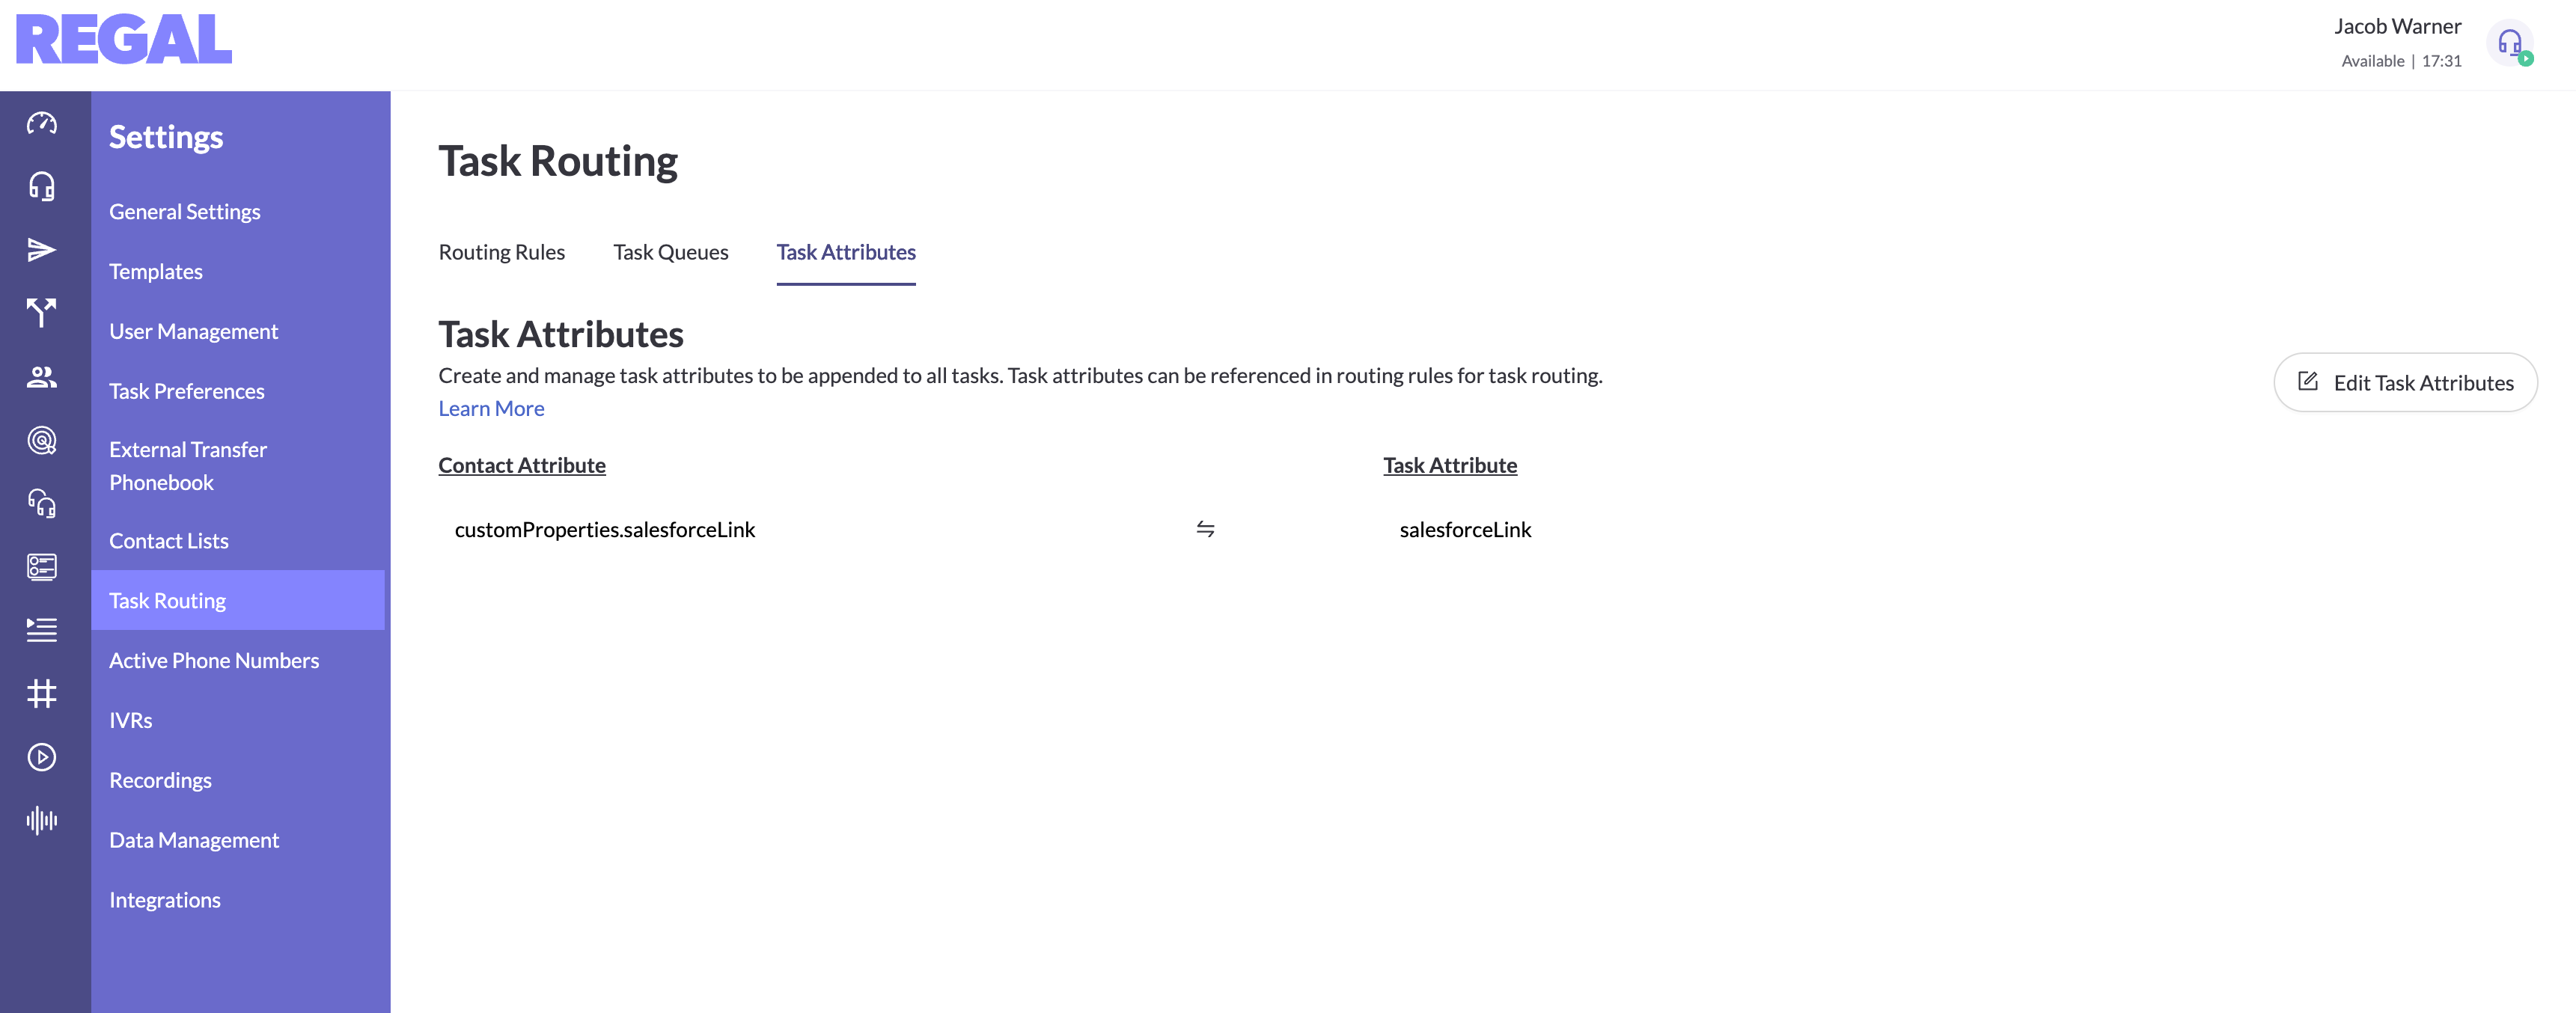
Step 7: Add mapping for salesforceLink in order to show Contact/Account record links in the Regal tasks.
- Go to Settings > Task Routing > Task Attributes
- Include a mapping as shown below:
Step 8: Add mapping for Opportunity ID in order to show Opportunity record links in the Regal tasks.
Make sure that the salesforce opportunity id is included in your opportunity mappings by mapping Id to properties.opportunityId in the salesforce package configuration.
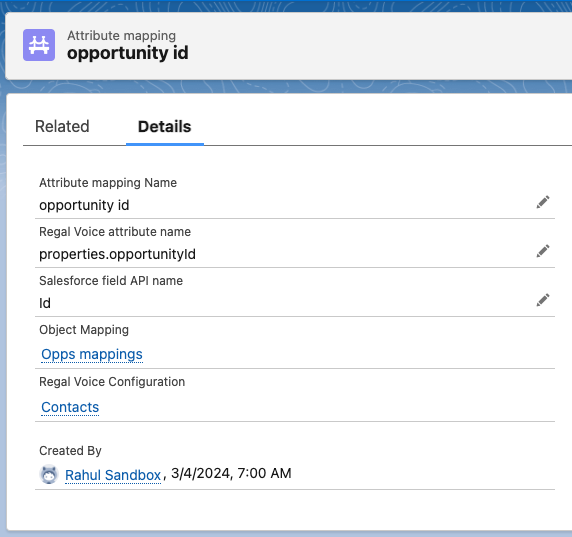
Only tasks generated by Journeys that are triggered by Salesforce Opportunity Created/Updated events will show the linkThis might mean that subsequent follow-up tasks that have different triggers, e.g. Call 2 campaign triggered by a call.completed event, may not have the Opportunity link.
Updated 3 months ago