Improveit360
Improveit360 is a Salesforce add on designed for pros across the home improvement industry. By combining the power of Regal and Improveit, you can level up your inbound & outbound communication.
Follow the Salesforce guide before proceeding with the steps outlined in this guide.
Once you have installed the Regal Voice Salesforce app and completed the necessary configurations in the guide, you may proceed with the remaining steps specific to Improveit360.
The Improveit360 relies on Salesforce flows to send data to Regal from non standard Salesforce objects (i.e. Improveit360 objects).
Create new permission set in Salesforce
- Once you are logged in as a System Admin, navigate to "Set Up"
- Click into "Permission Sets" by searching in the search bar
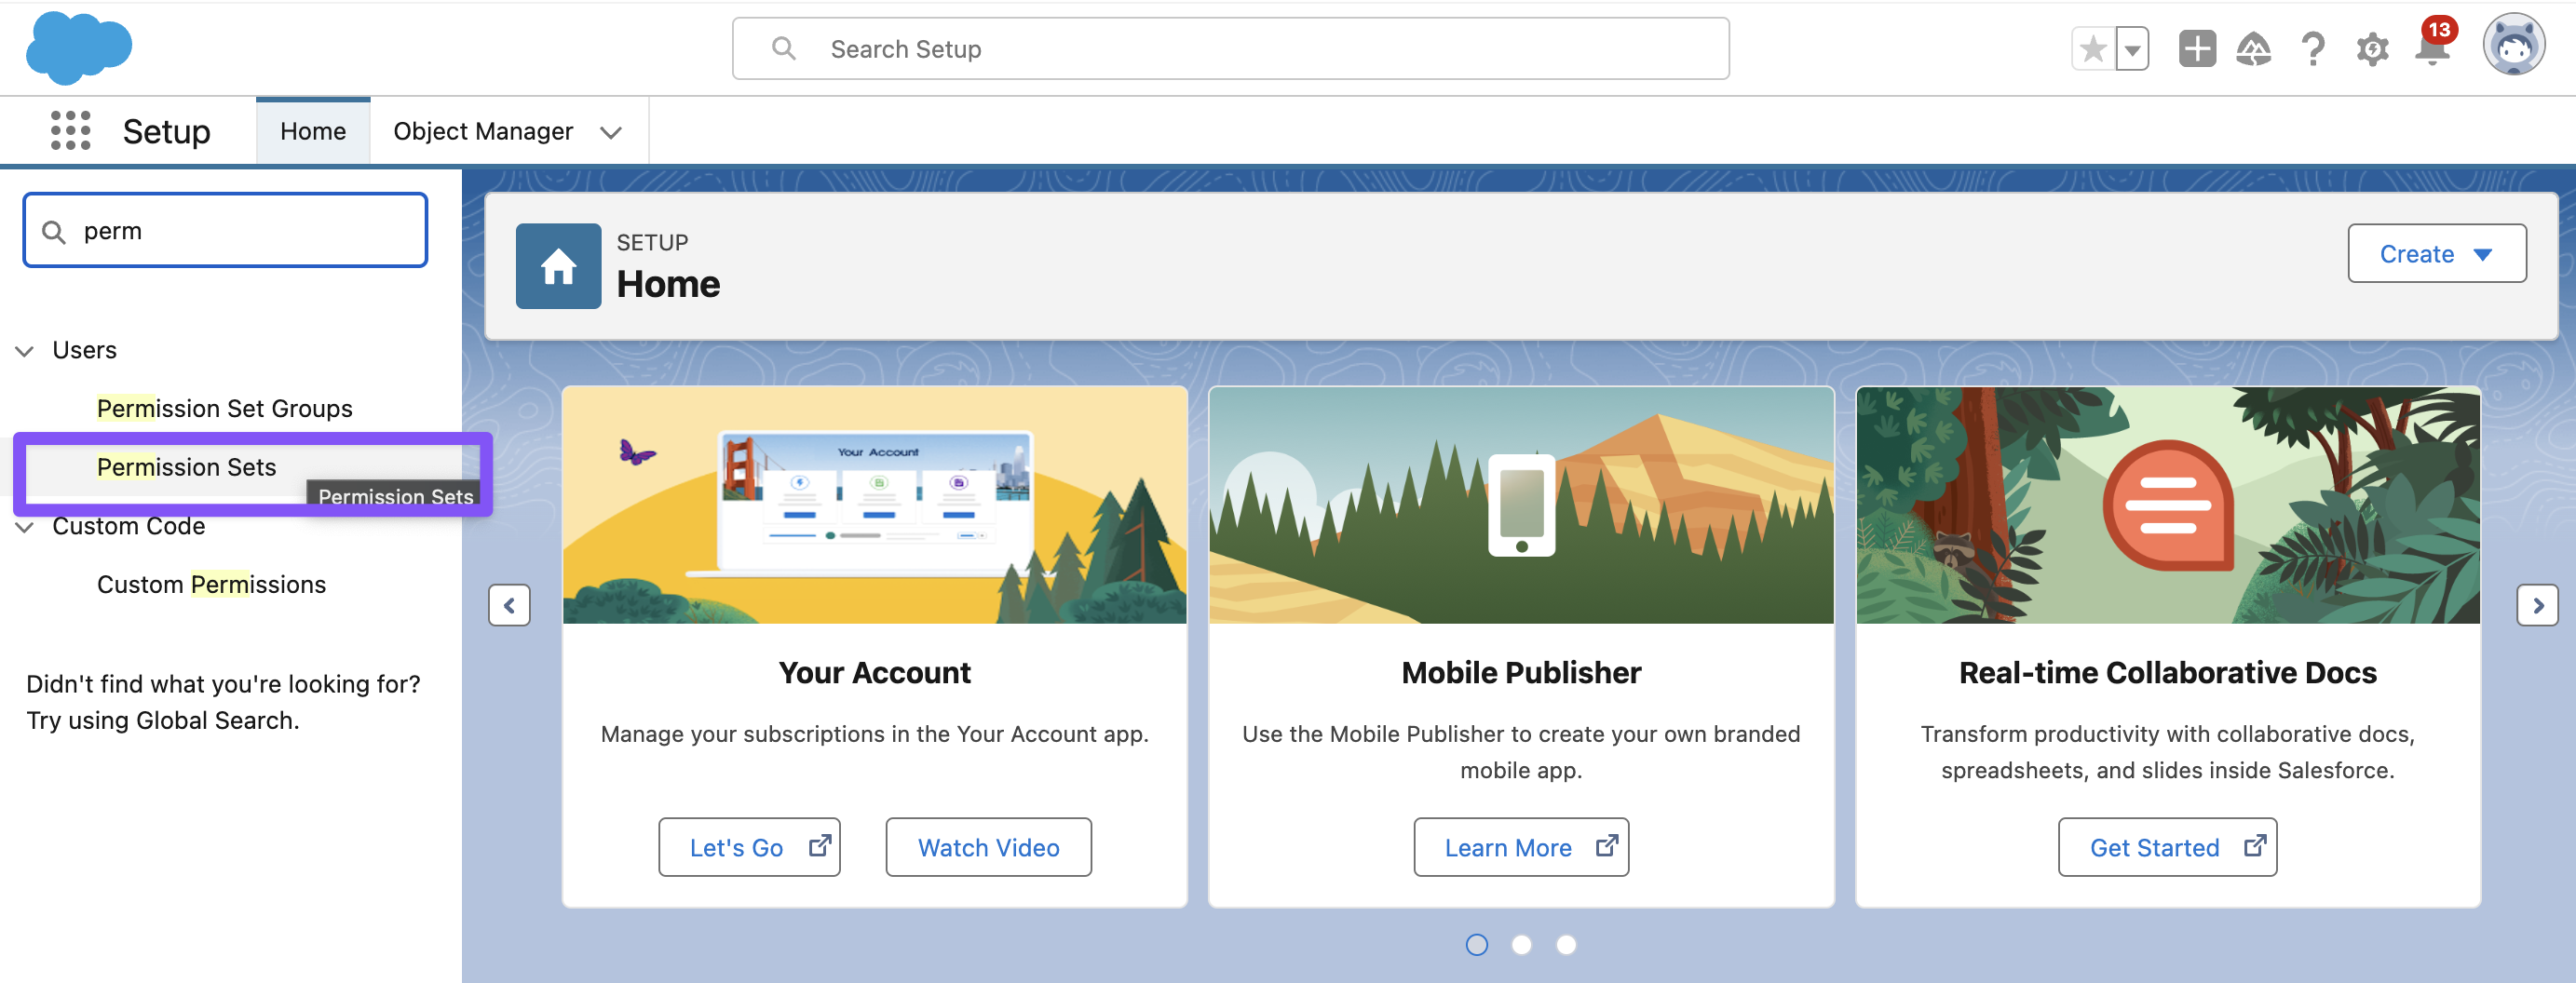
-
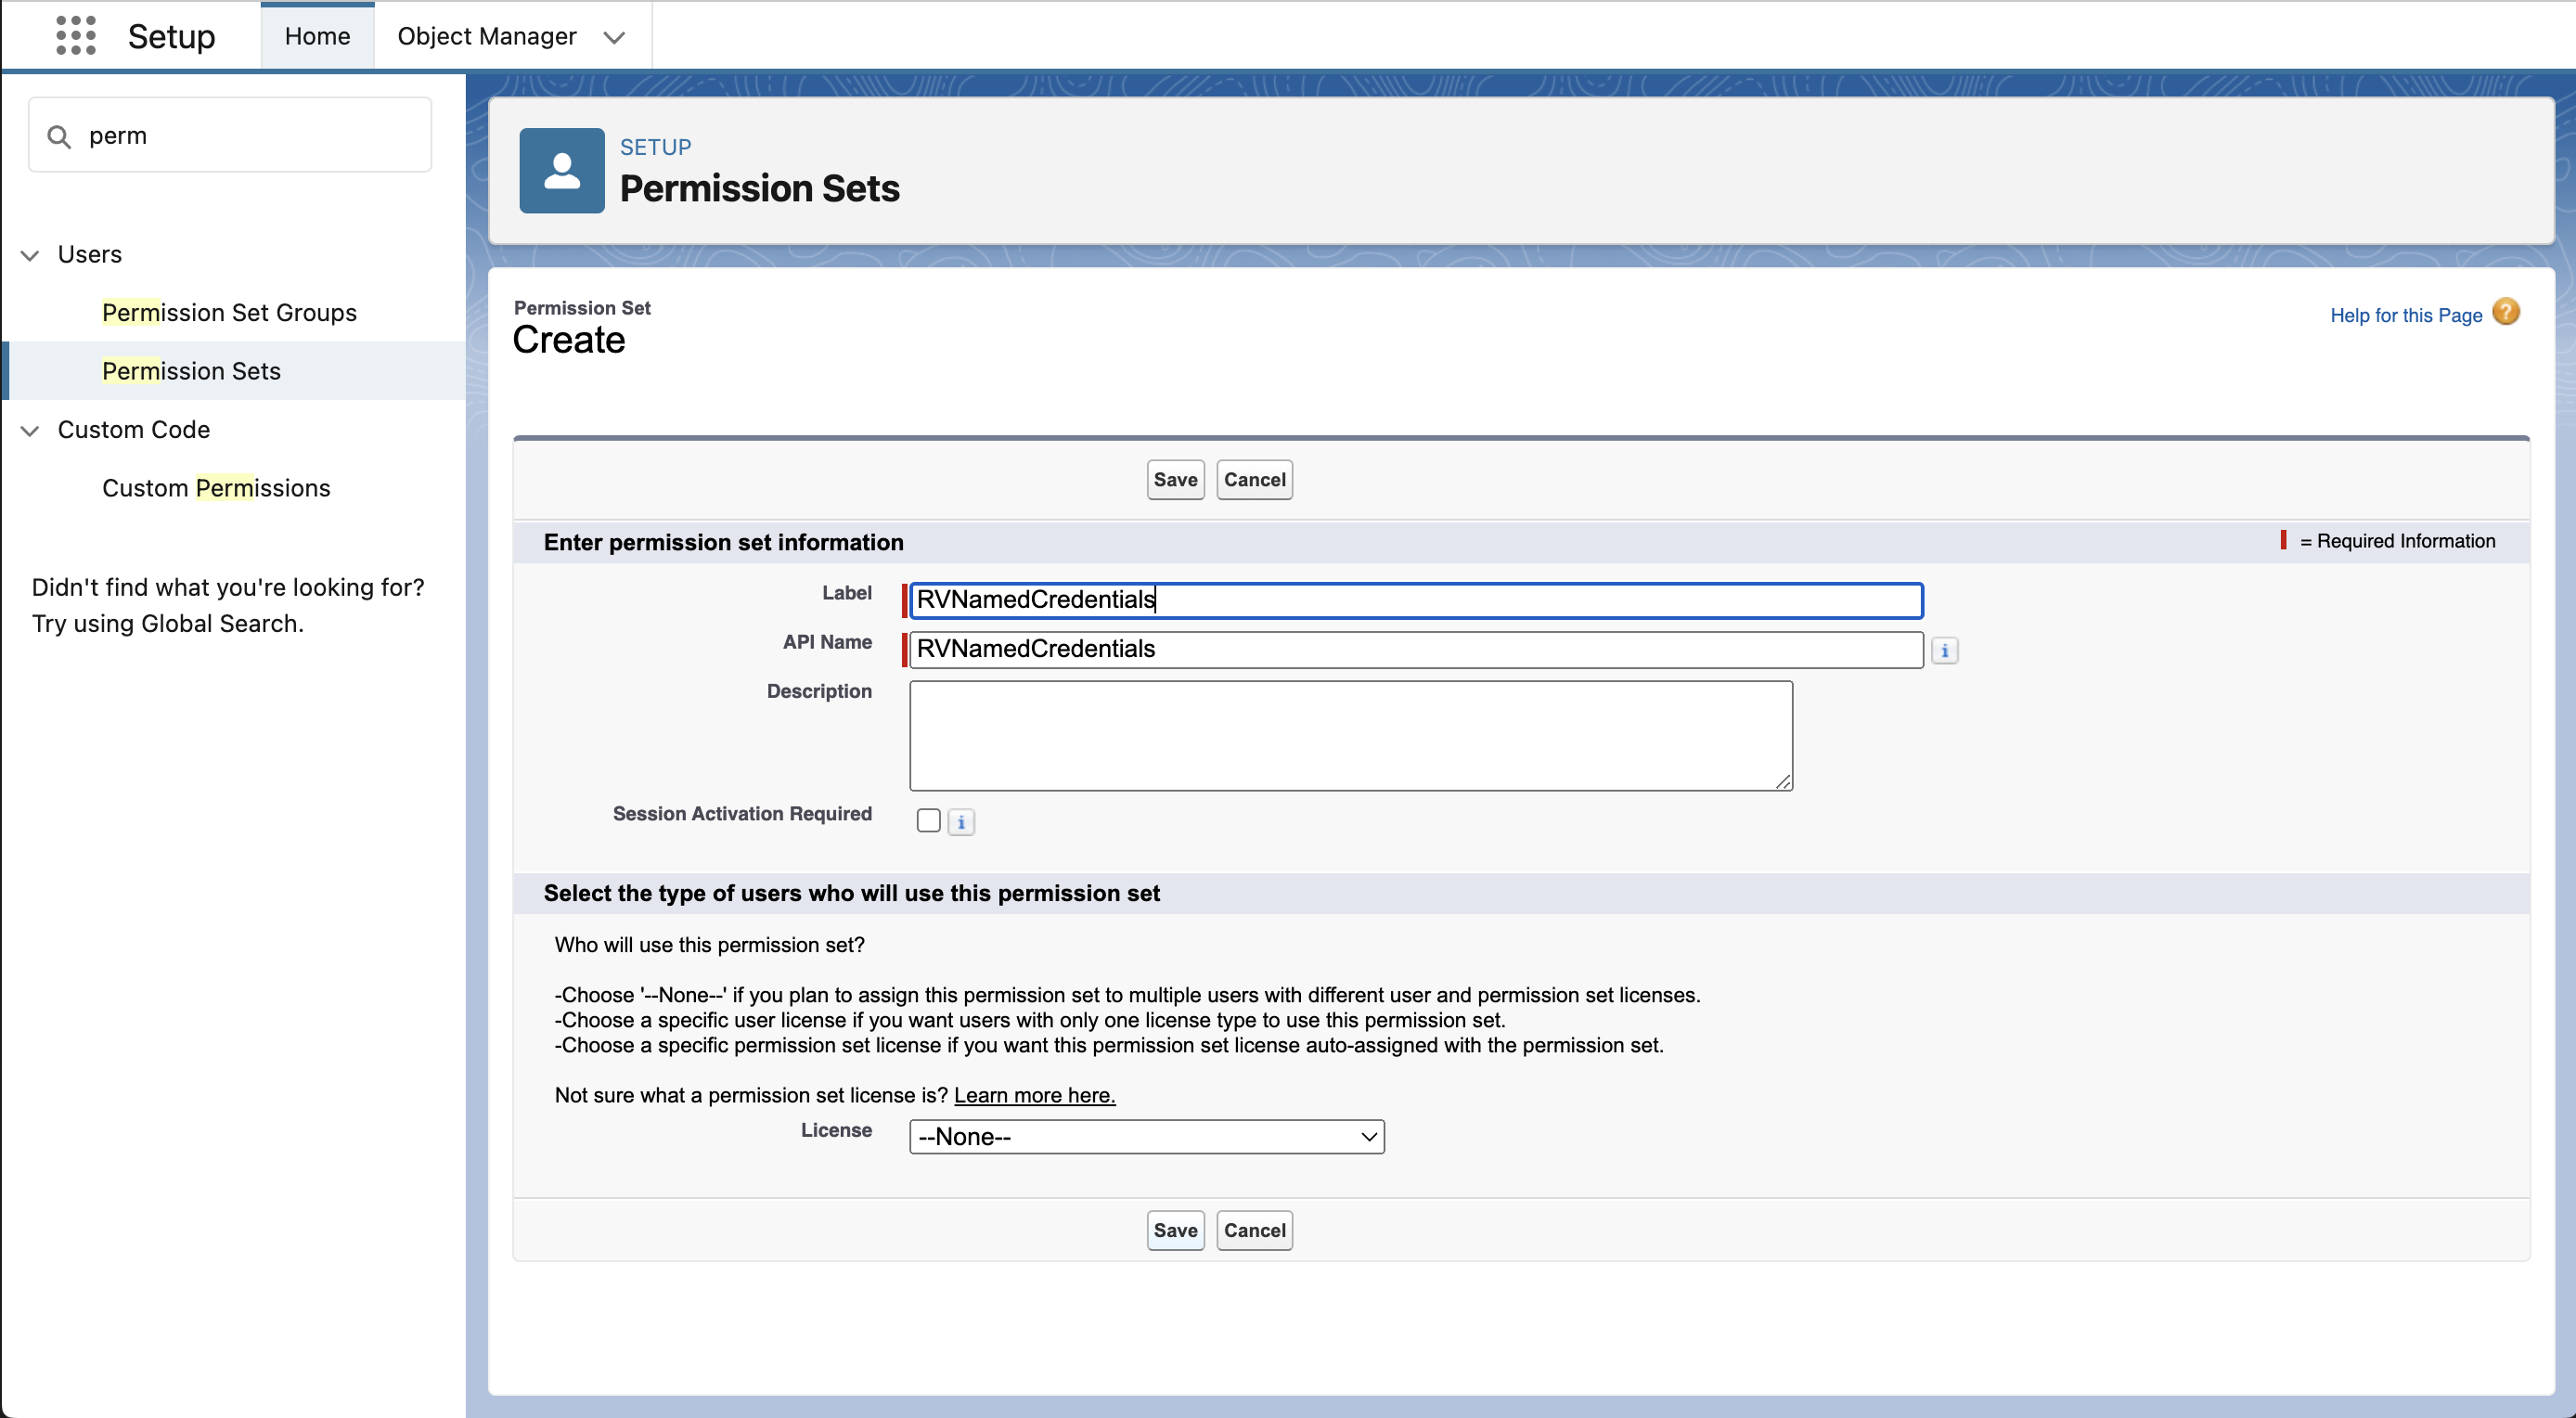
Click the "New" button and Create a Permission Set called "RVNamedCredentials"
- Label: RVNamedCredentials
- API Name:
- Click Save
-
Add yourself and any other team members to the new permission set
- Click Manage Assignments on the "RVNamedCredentials" screen
- Add Assignment
- Select the user that has been configured to run the Salesforce Flows
- Note: We've found that all Salesforce users need to be added to this permission set for it to work for everyone making changes in Salesforce
- Click Next
- Click Assign
- Click Done
Create a new External Credential in Salesforce
- Navigate to Setup > SETTINGS > Security > Named Credentials
- Click on the "External Credentials" tab and click "New"
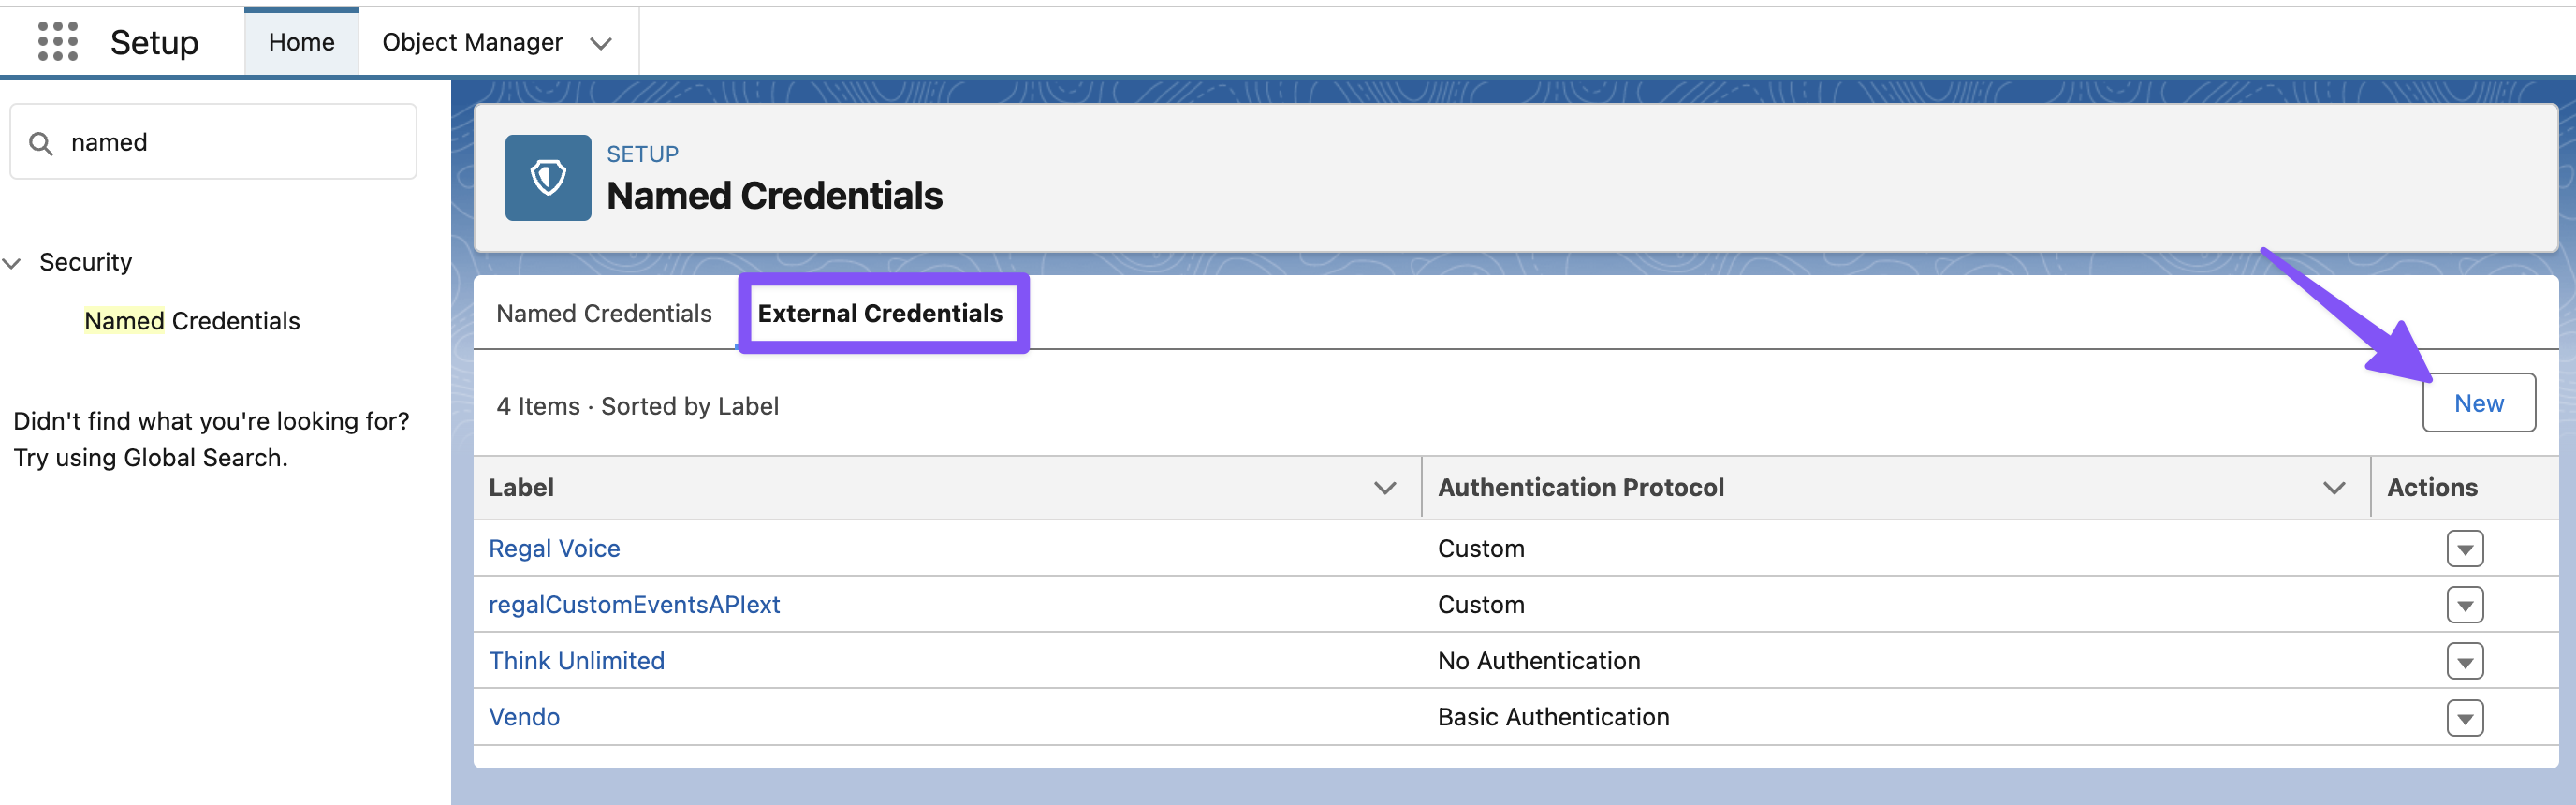
-
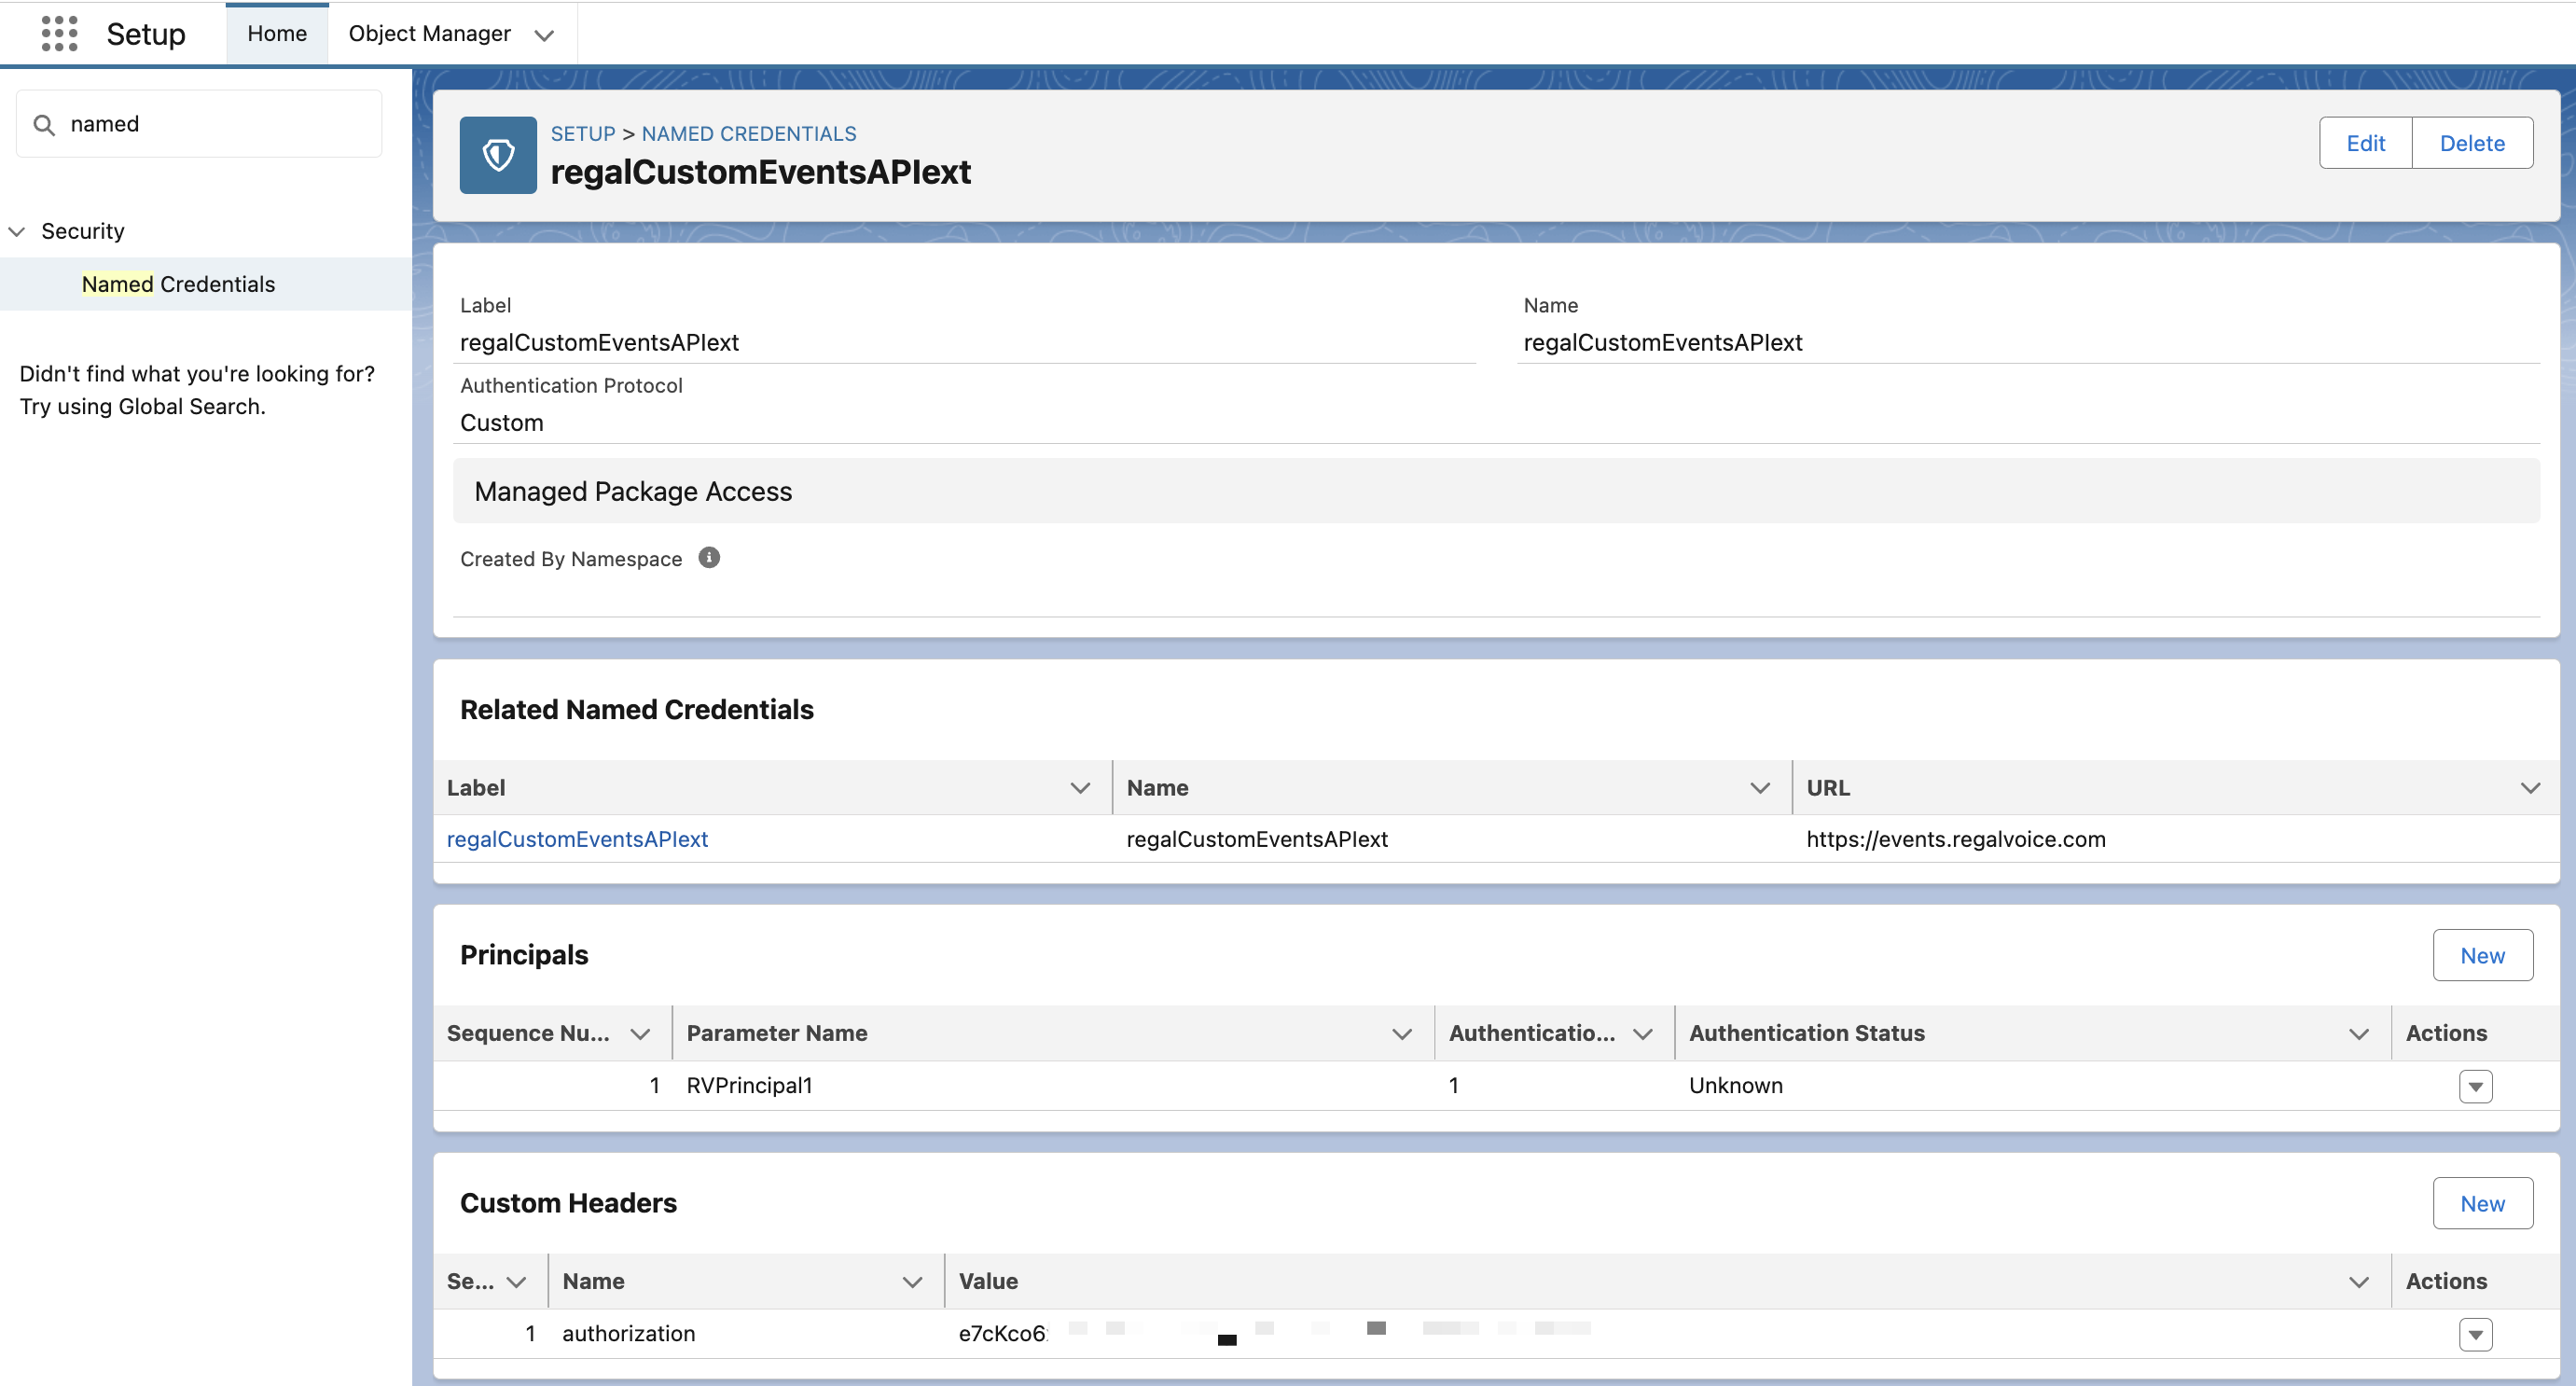
Create New External Credential
- Label: regalCustomEventsAPIext
- Name: regalCustomEventsAPIext
- Authentication Protocol: Custom
- Click Save
-
Scroll down to the Principals section, click "New"
- Parameter Name: RVPrincipal1
- Sequence Number: 1
- Authentication Parameters
- Parameter 1
- Name: authorization
- Value:
- Parameter 1
-
Scroll down to the Custom Headers section and click "New"
- Name: authorization
- Value:
- Click Save
-
Now, navigate to Setup > ADMINISTRATION > Users > Permission Sets
-
Click on RVNamedCredentials
-
Click on the External Credential Principal Access link
-
Click Edit
-
Add the regalCustomEventsAPIext
-
Click Save
TROUBLESHOOTING: If needed, ensure that the perm set has access to the standard object : "User External Credentials"
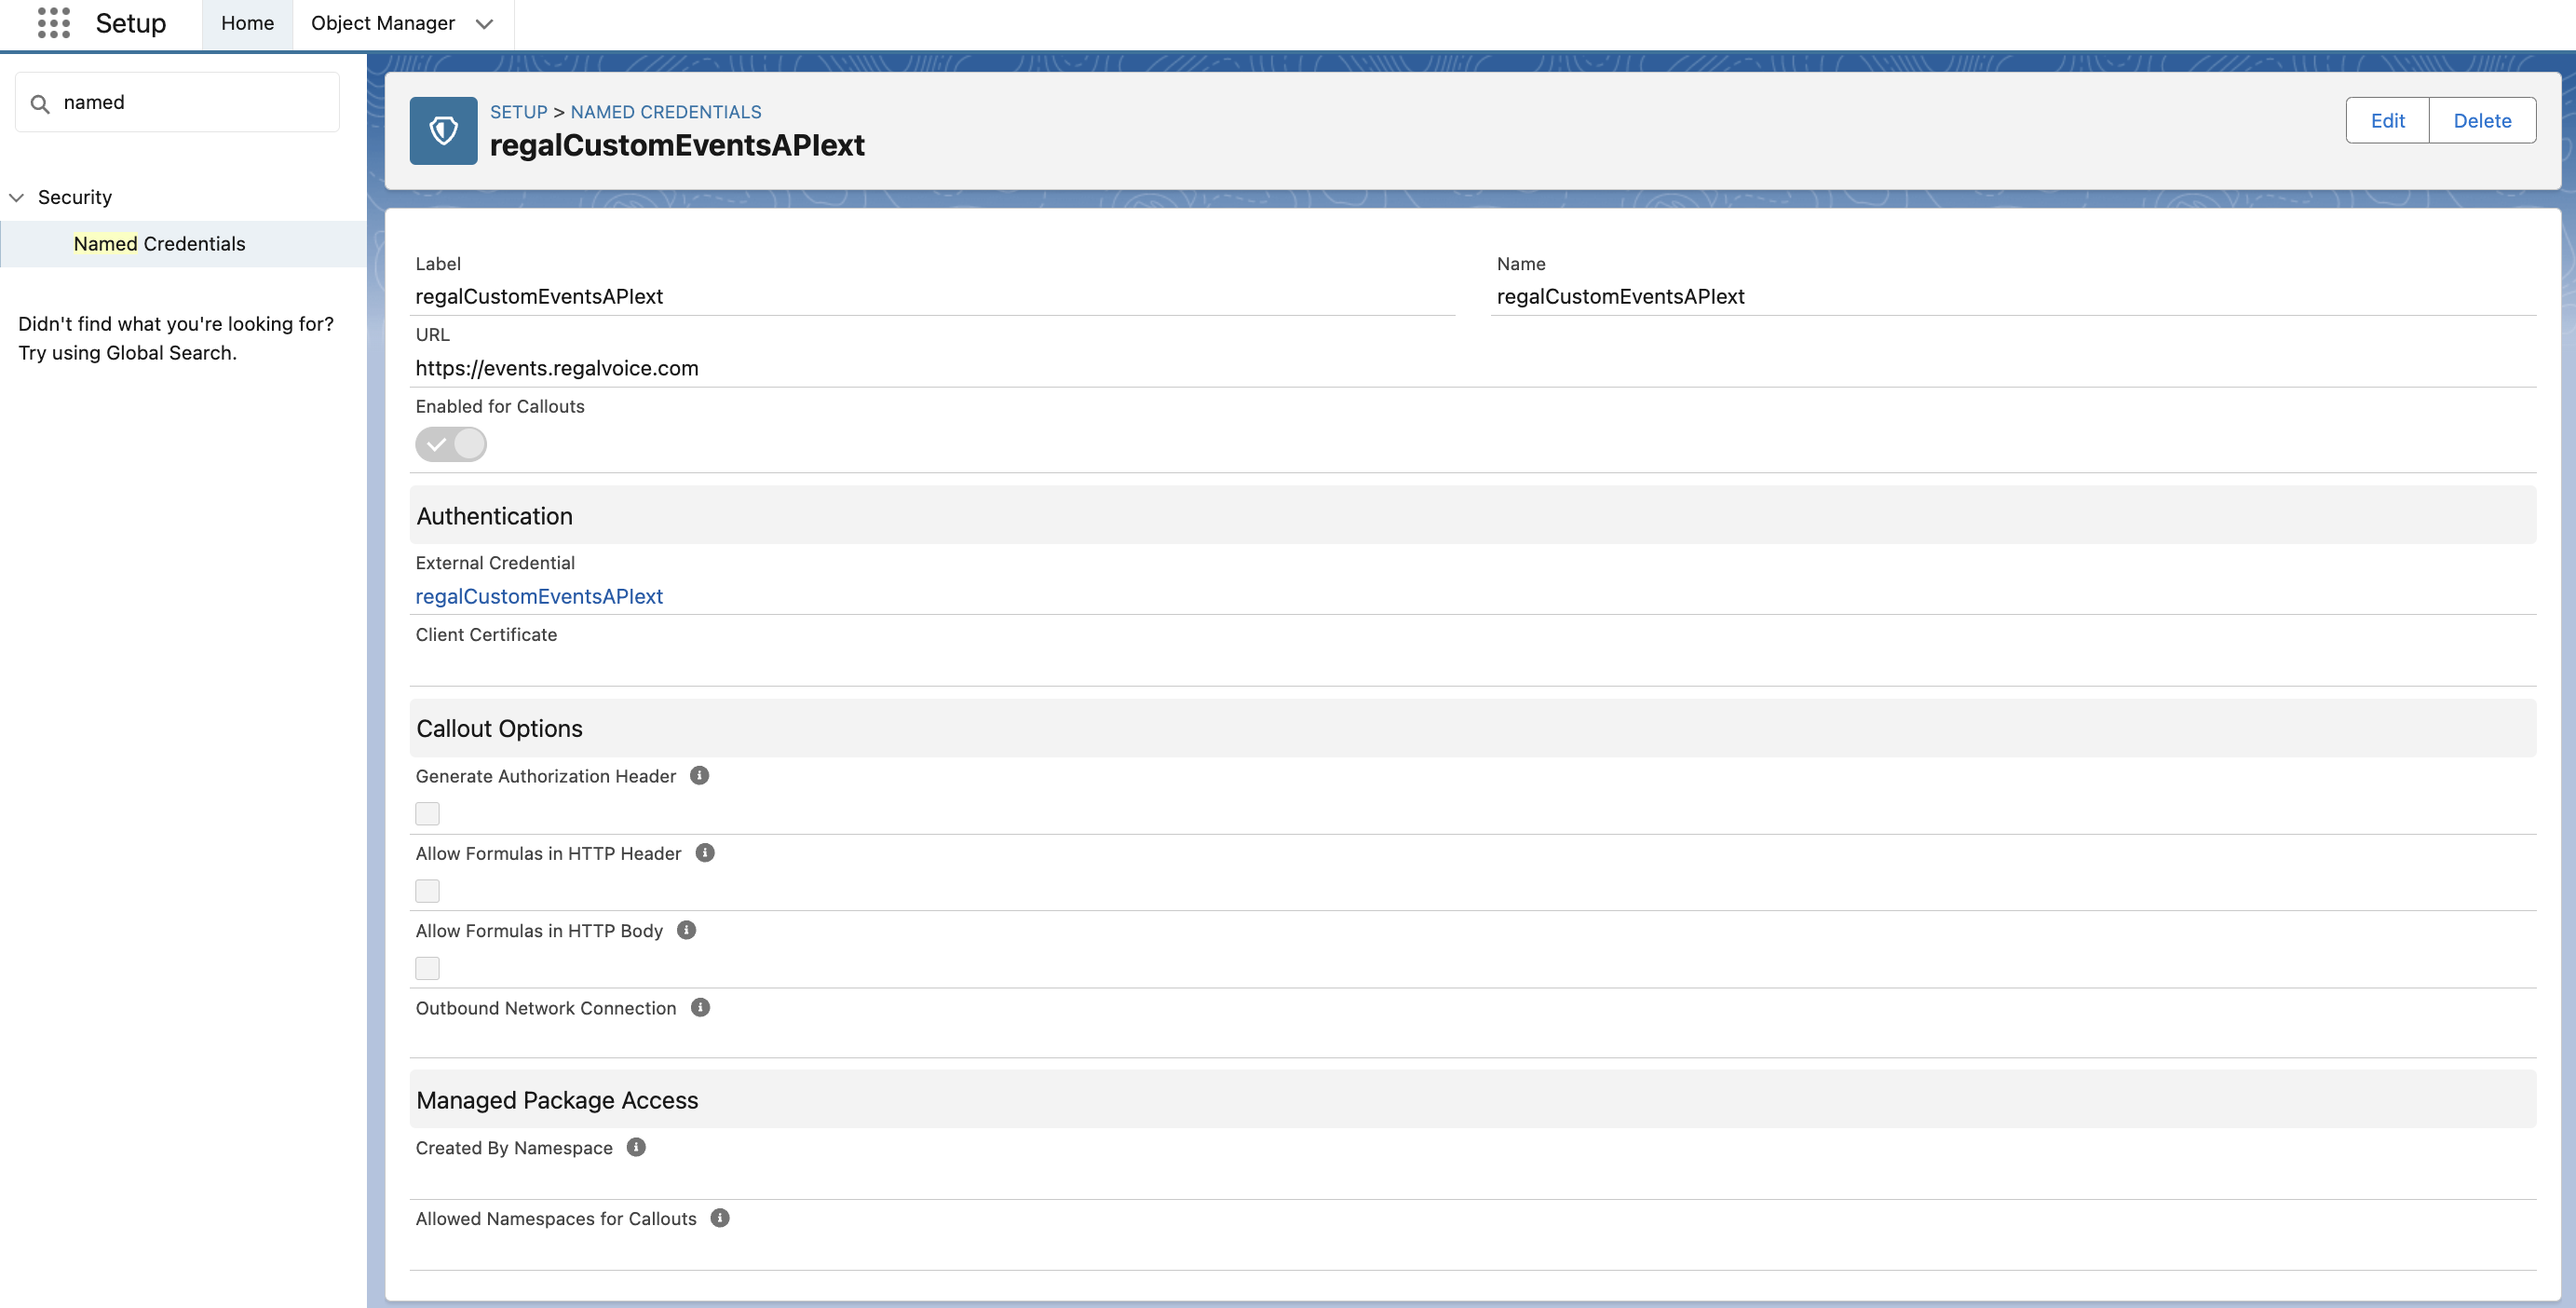
Create a new Named Credential in Salesforce
-
Navigate to Setup > SETTINGS > Security > Named Credentials
-
Click on the "Named Credentials" tab and click "New"
-
Create New Named Credential using the blow info
-
Label: regalCustomEventsAPI
-
Name: regalCustomEventsAPI
-
CHECK 'Enabled for Callouts'
-
External Credential: regalCustomEventsAPIext
-
UNCHECK 'Generate Authorization Header'
-
Click Save
-
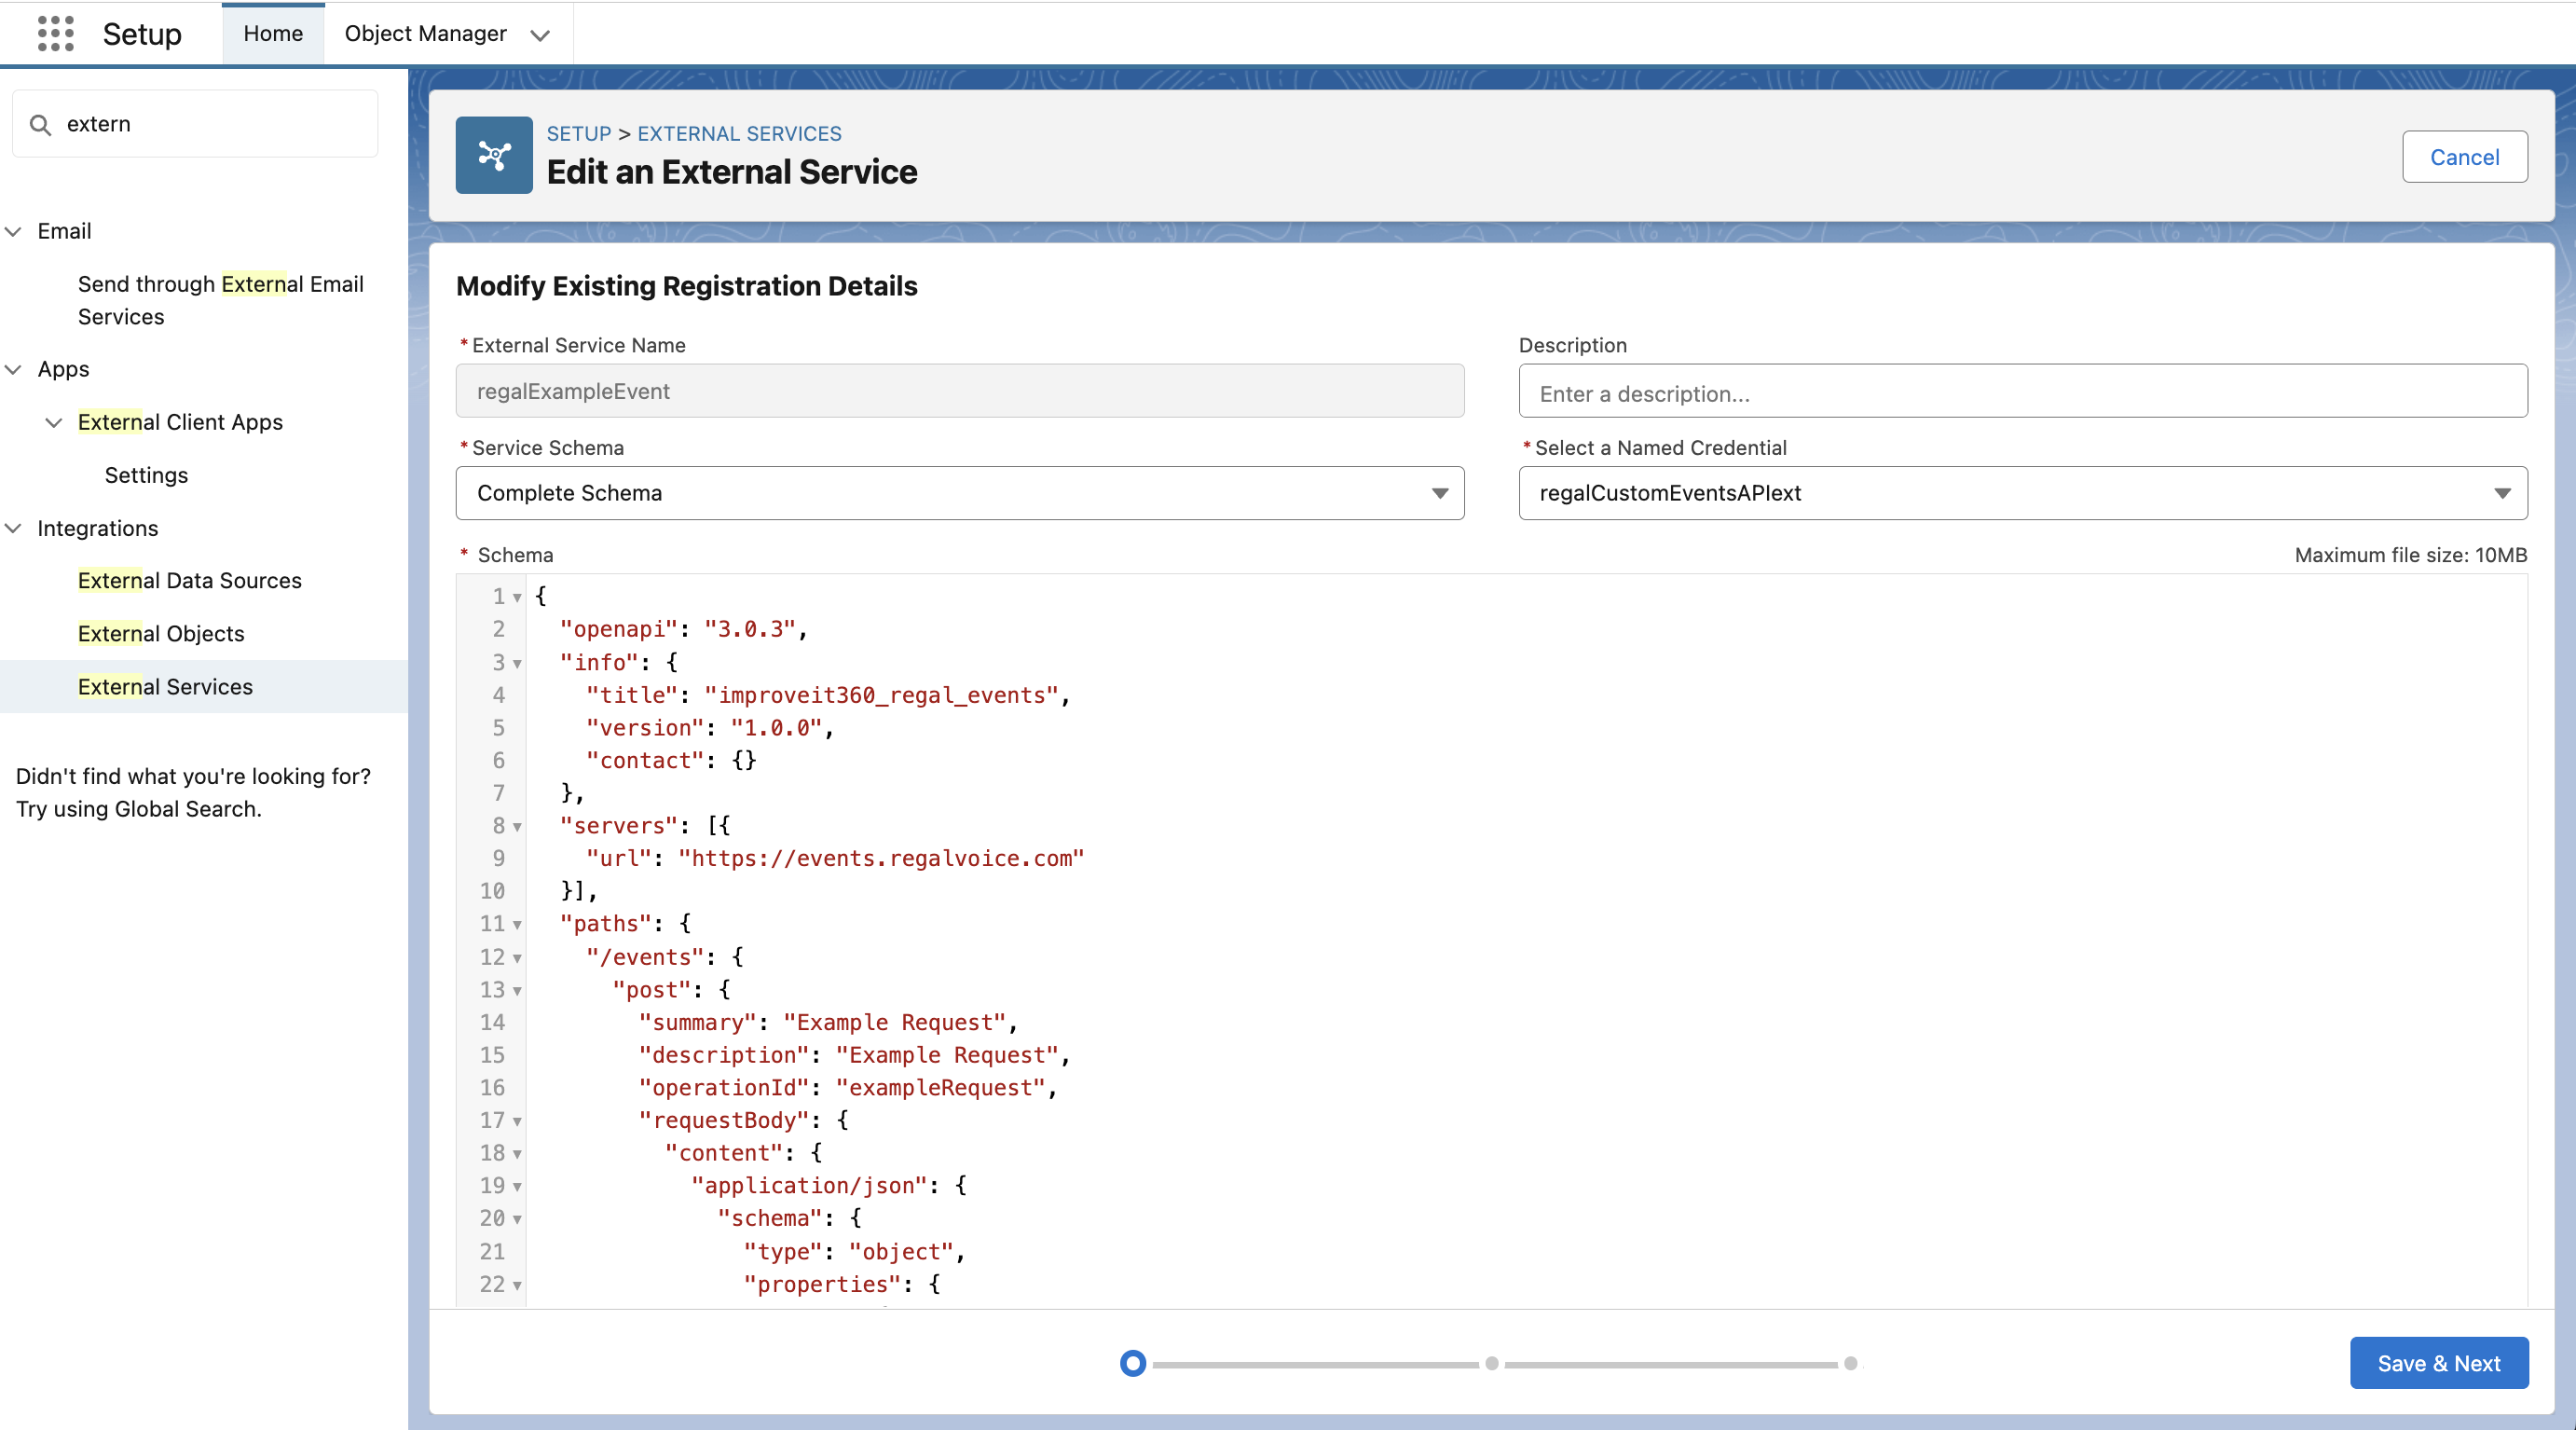
Create a new External Service in Salesforce
-
Navigate to Setup > PLATFORM TOOLS > Integrations > External Services
-
Click "Add an External Service"
-
Create a new external service using the below information
- Choose 'From API Specification'
- Click "Next"
- External Service Name: regalCustomEventsAPIservice
- Service Schema: Complete Schema
- Select a Named Credential: regalCustomEventsAPI
- JSON:
- Click "Save" & "Next"
- Check the box for 'postEvents'
- Click Next
- Click Done/Finish
 Build a Salesforce Flow
Flows allow you to build highly customizable back end jobs & integrations. We'll be using Flows to send data from i360 custom object to Regal's Events API to trigger journeys.
Note: The trigger steps below are for example purposes only; you'll want to choose the appropriate trigger and conditions.
-
Confirm that you are configured as the 'Default Workflow User' (PLATFORM TOOLS > Process Automation > Process Automation Settings)
-
Launch Flows (Setup > PLATFORM TOOLS > Process Automation > Flows)
-
Click "New Flow"
-
Choose "Build from Scratch" > "Record-Triggered Flow" and click Create
-
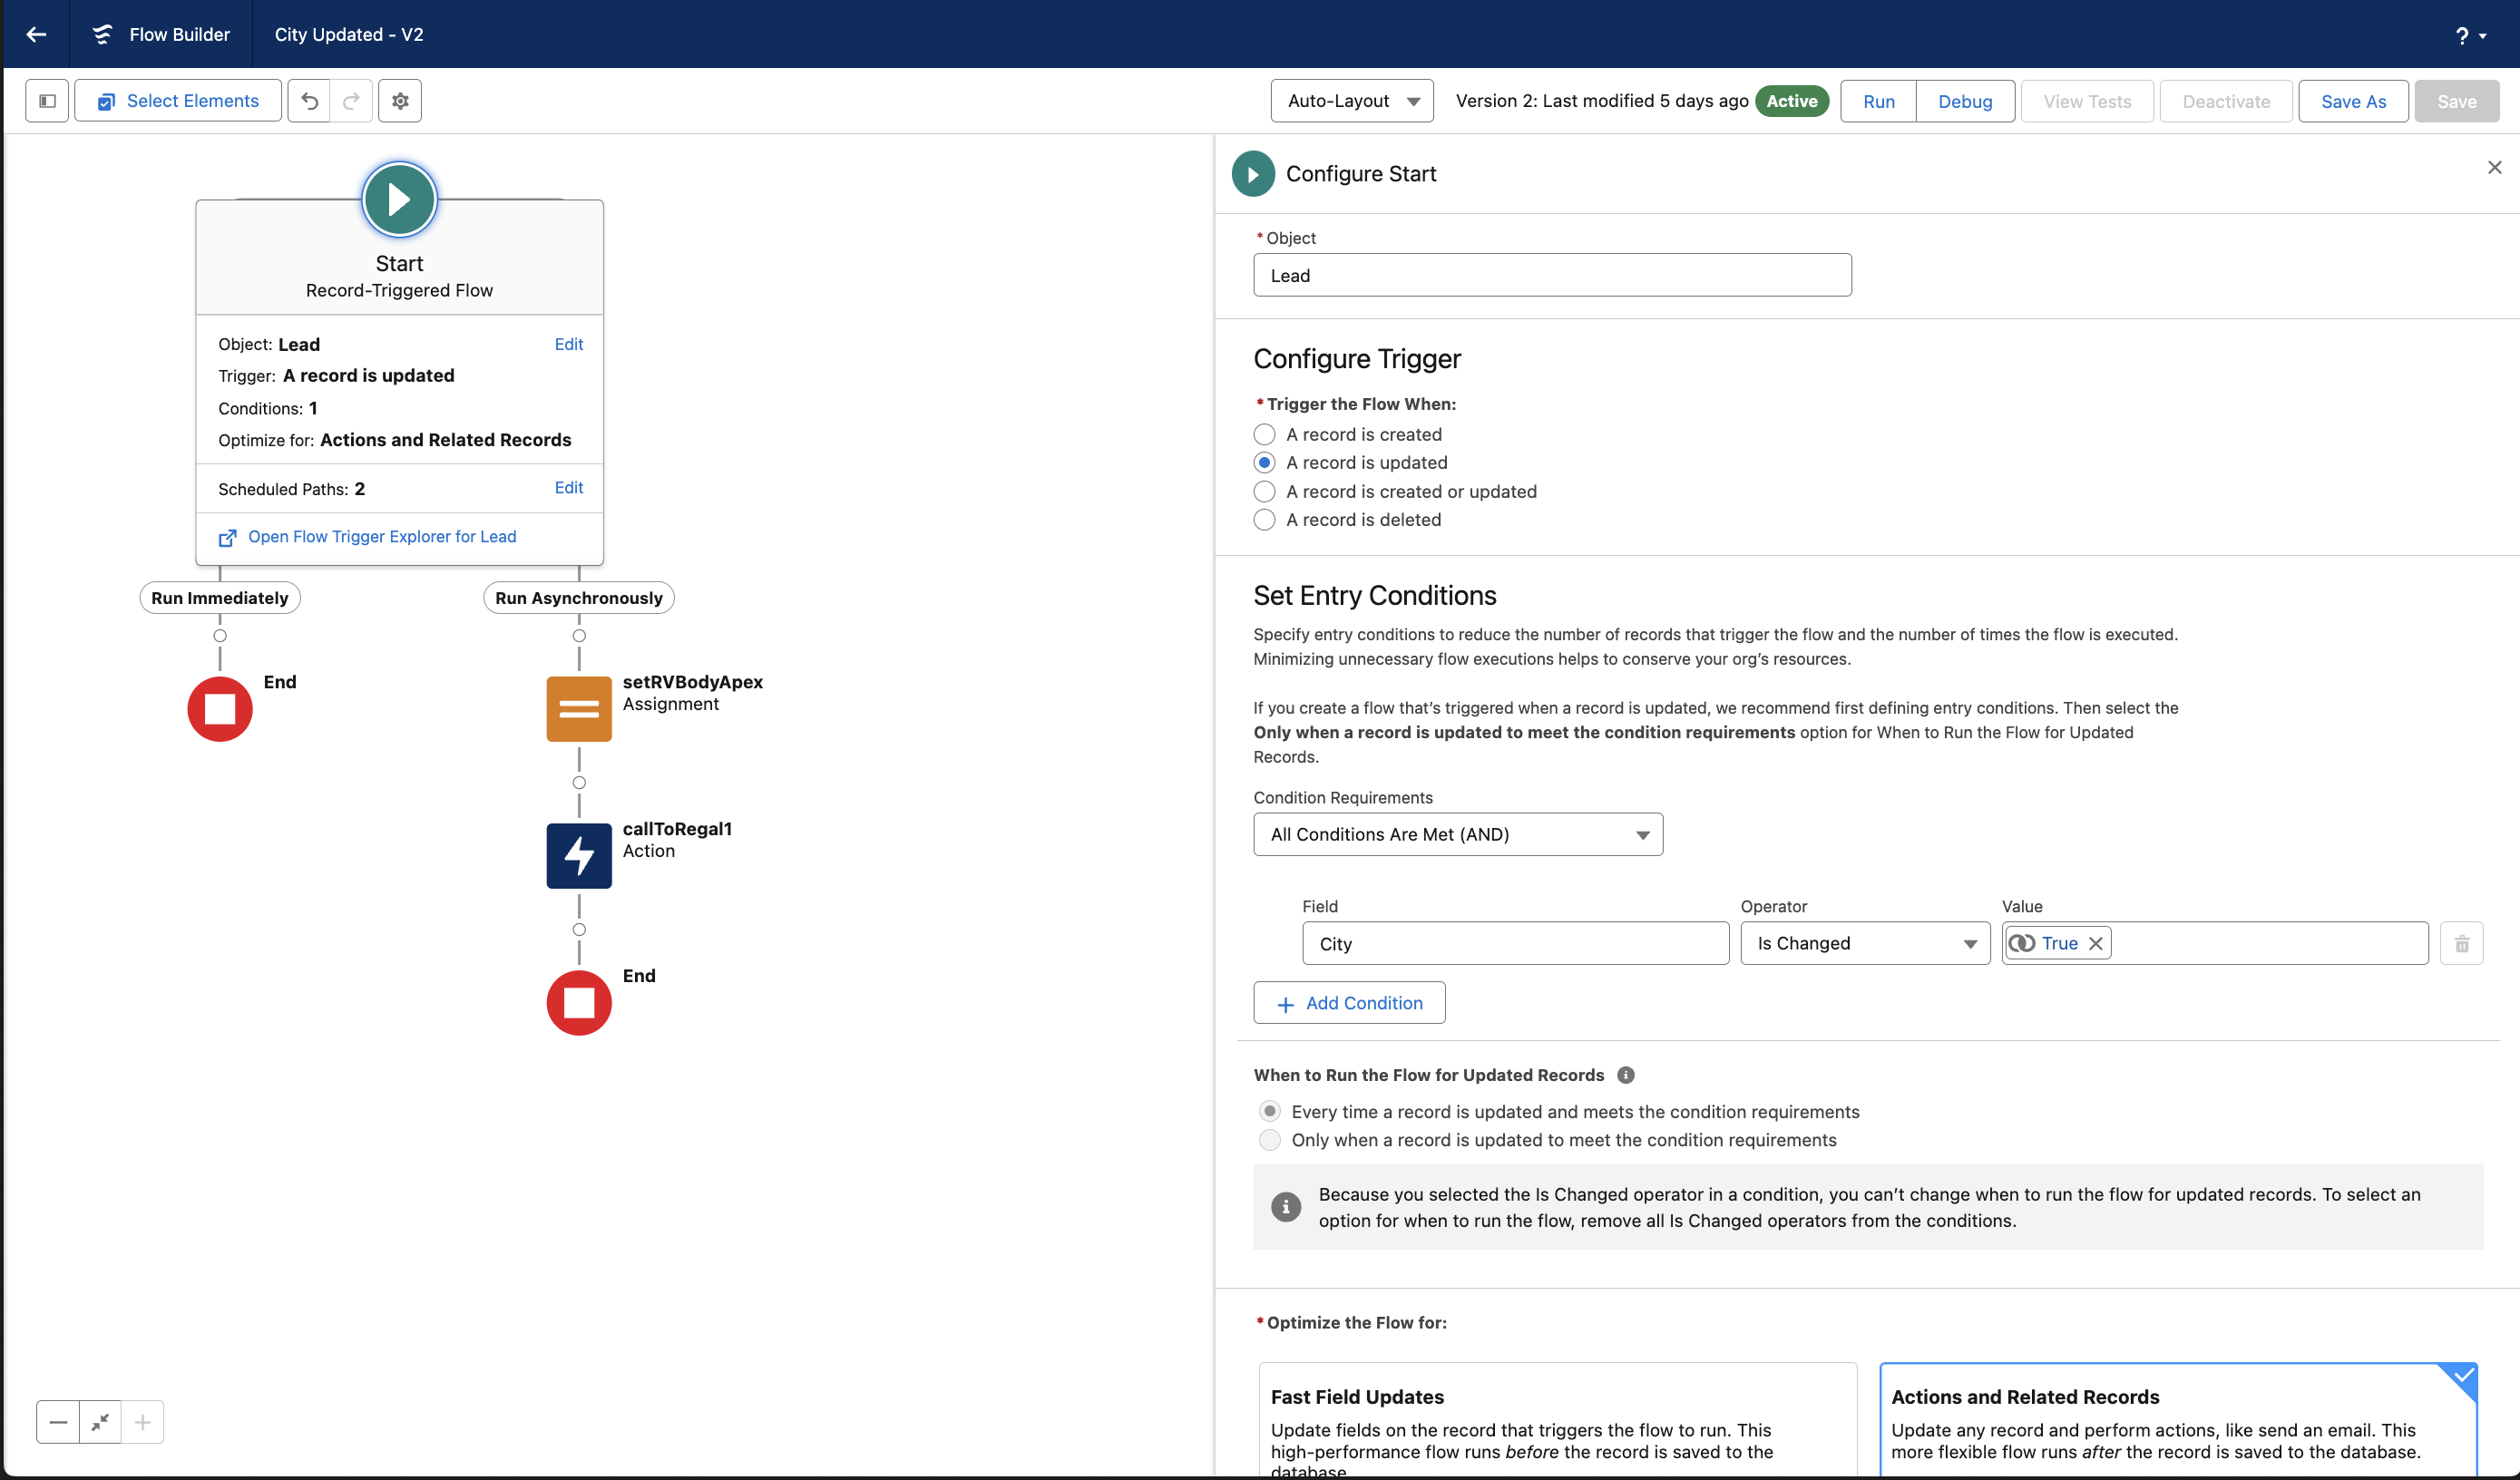
For Select Object, search for and choose 'Lead"
-
For Configure Trigger, choose "A record is updated"
-
For Set Entry Conditions:
- Condition Requirements: All Conditions Are Met (AND)
- Field: City
- Operator: Is Changed
- Value: {!$GlobalConstant.True}
-
When to Run the Flow for Updated Records:
- Every time a record is updated and meets the condition requirements
-
For Optimize the Flow for, choose "Actions and Related Records"
-
Check the box for 'Include a Run Asynchronously path to access an external system after the original transaction for the triggering record is successfully committed'
- This will prevent Salesforce from slowing down by allowing the API call to be sent to Regal asynchronously.
-
Click Done
-
Click Save (so we don't lose our work)
- Flow Label: TestAPICallToRegal1
- Flow API Name:
- Description:
- Click Save
- Close the 'Review these issues' modal since you are only getting it since we haven't actually added enough items yet.
-
-
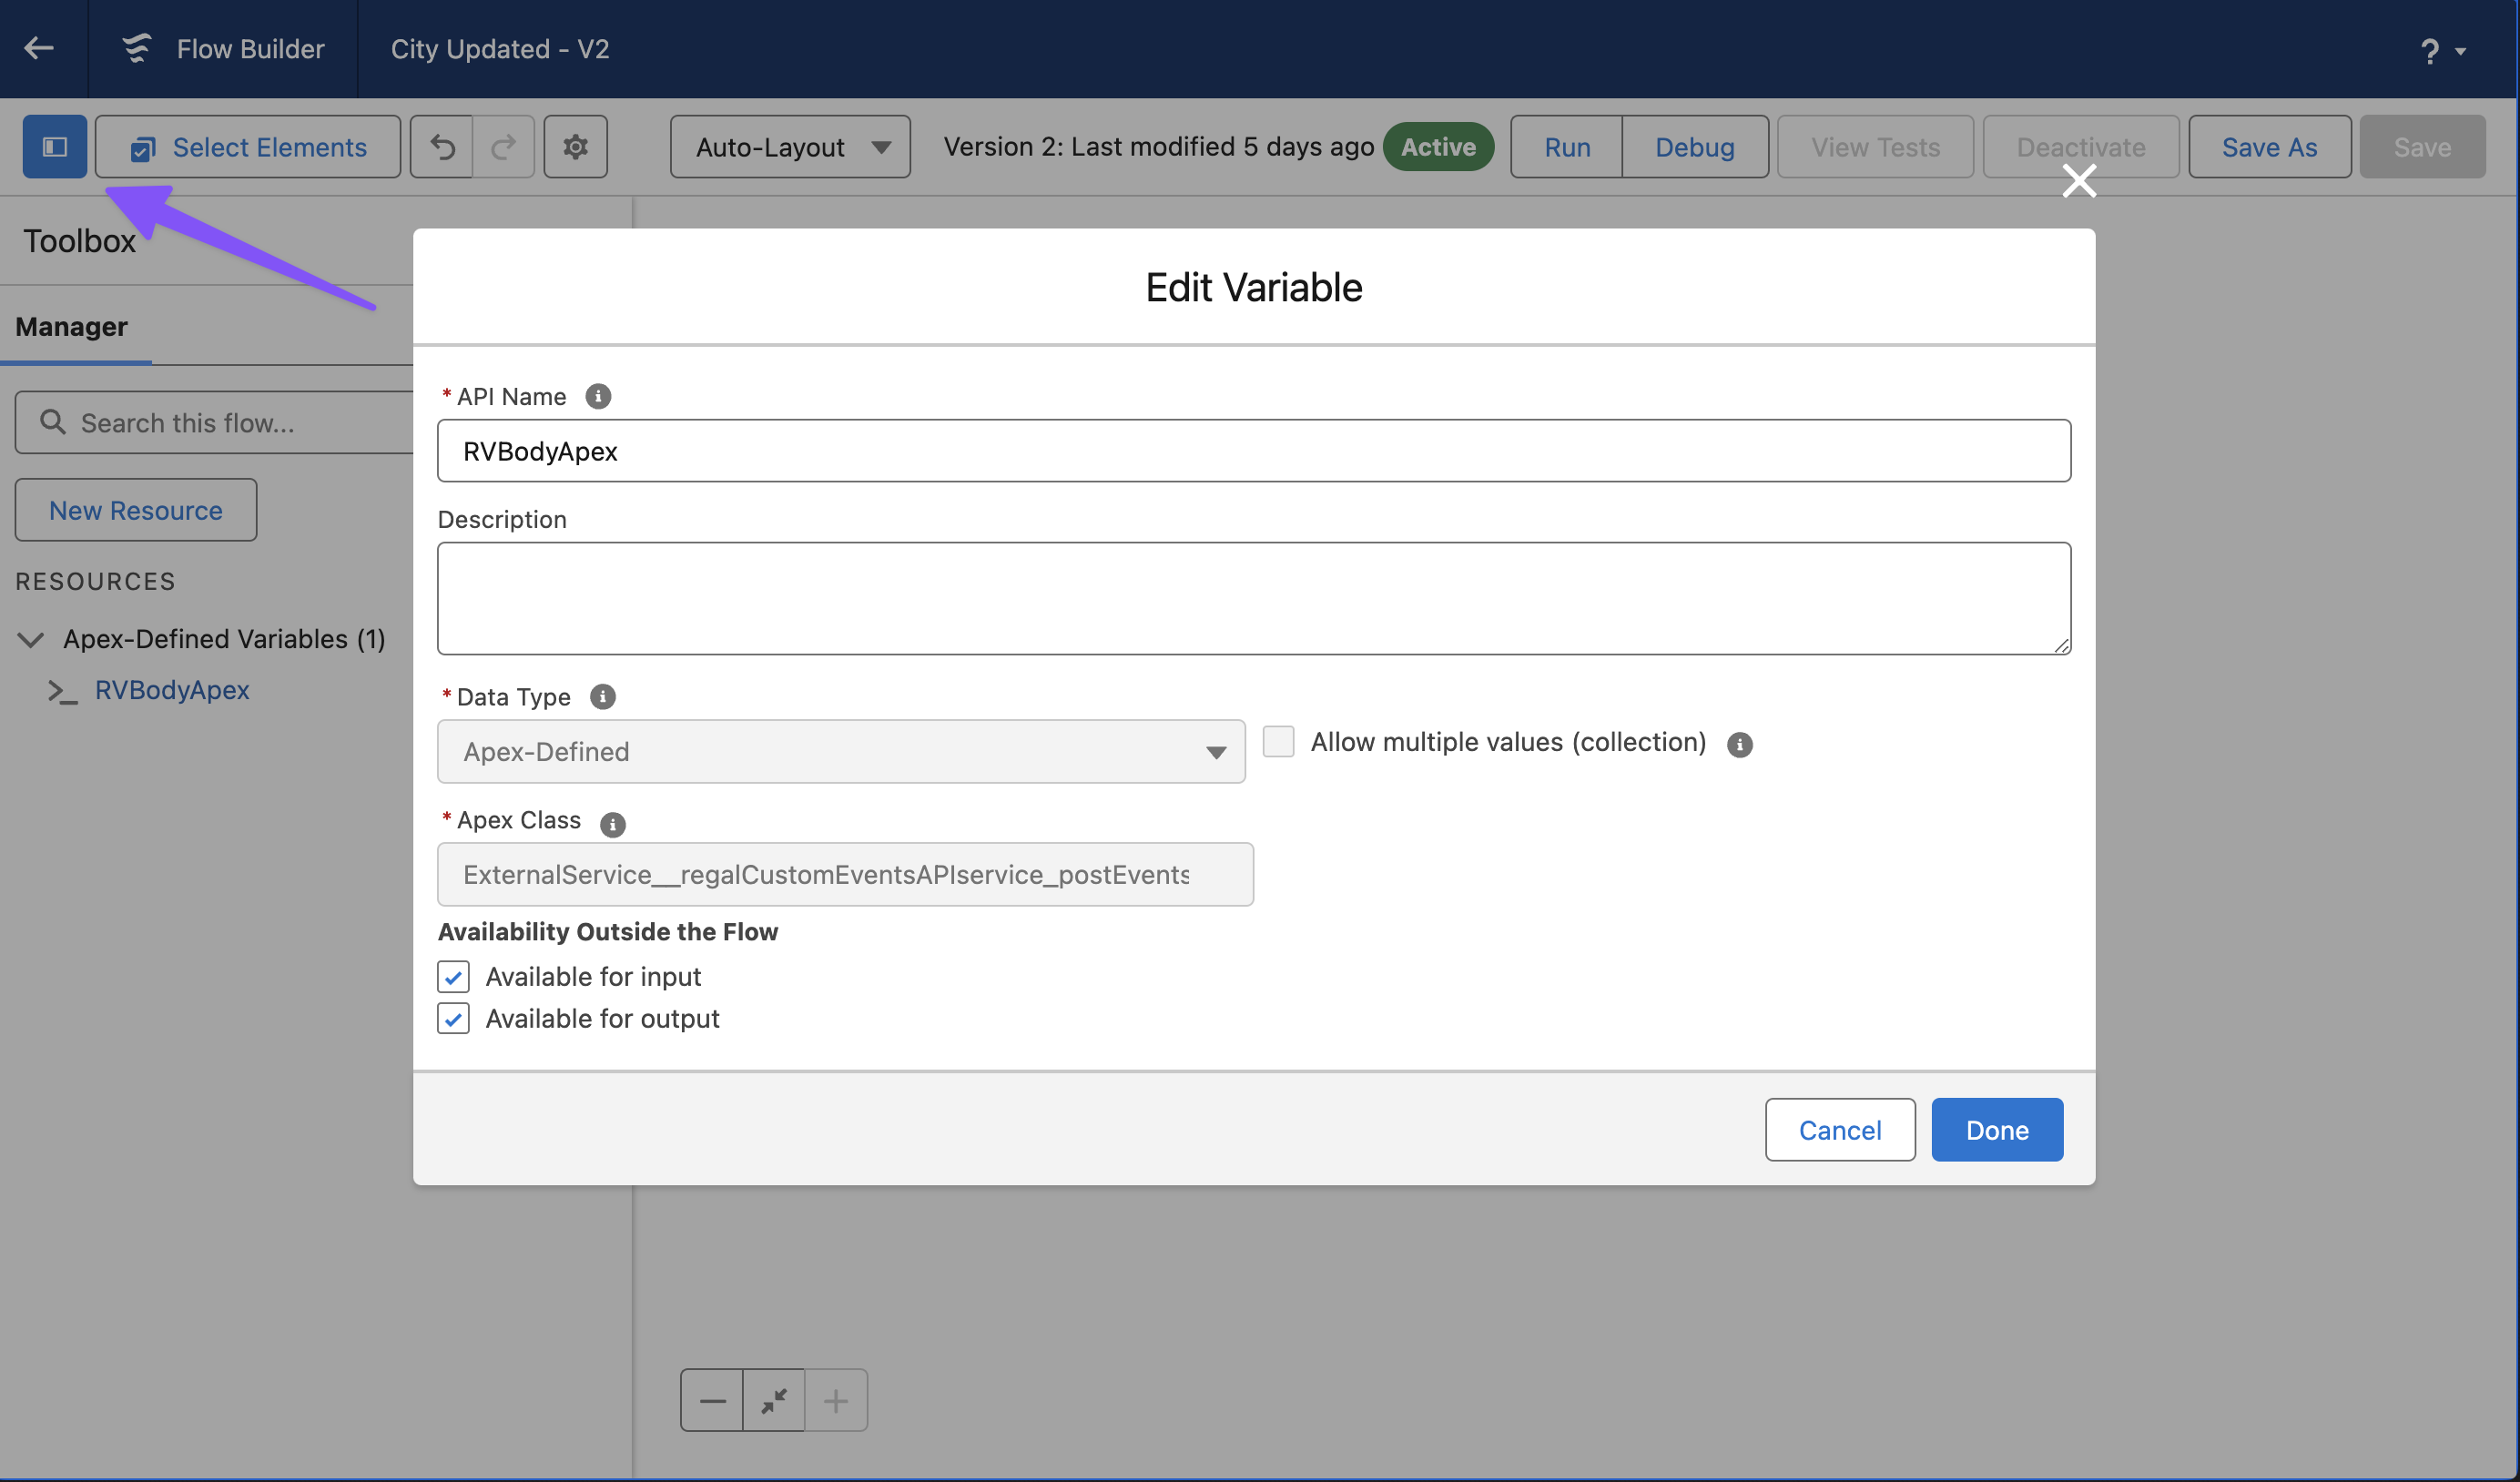
Open the Flow Toolbox in the top left corner and click "New Resource"
- Resource Type: Variable
- API Name: RVBodyApex
- Description:
- Data Type: Apex-Defined
- UNCHECKED Allow multiple values (collection)
- Apex Class: search for 'regal' and choose 'ExternalService__regalCustomEventsAPIservice_postEvents_IN_body'
- CHECKED Available for input
- CHECKED Available for output
- Click Done
-
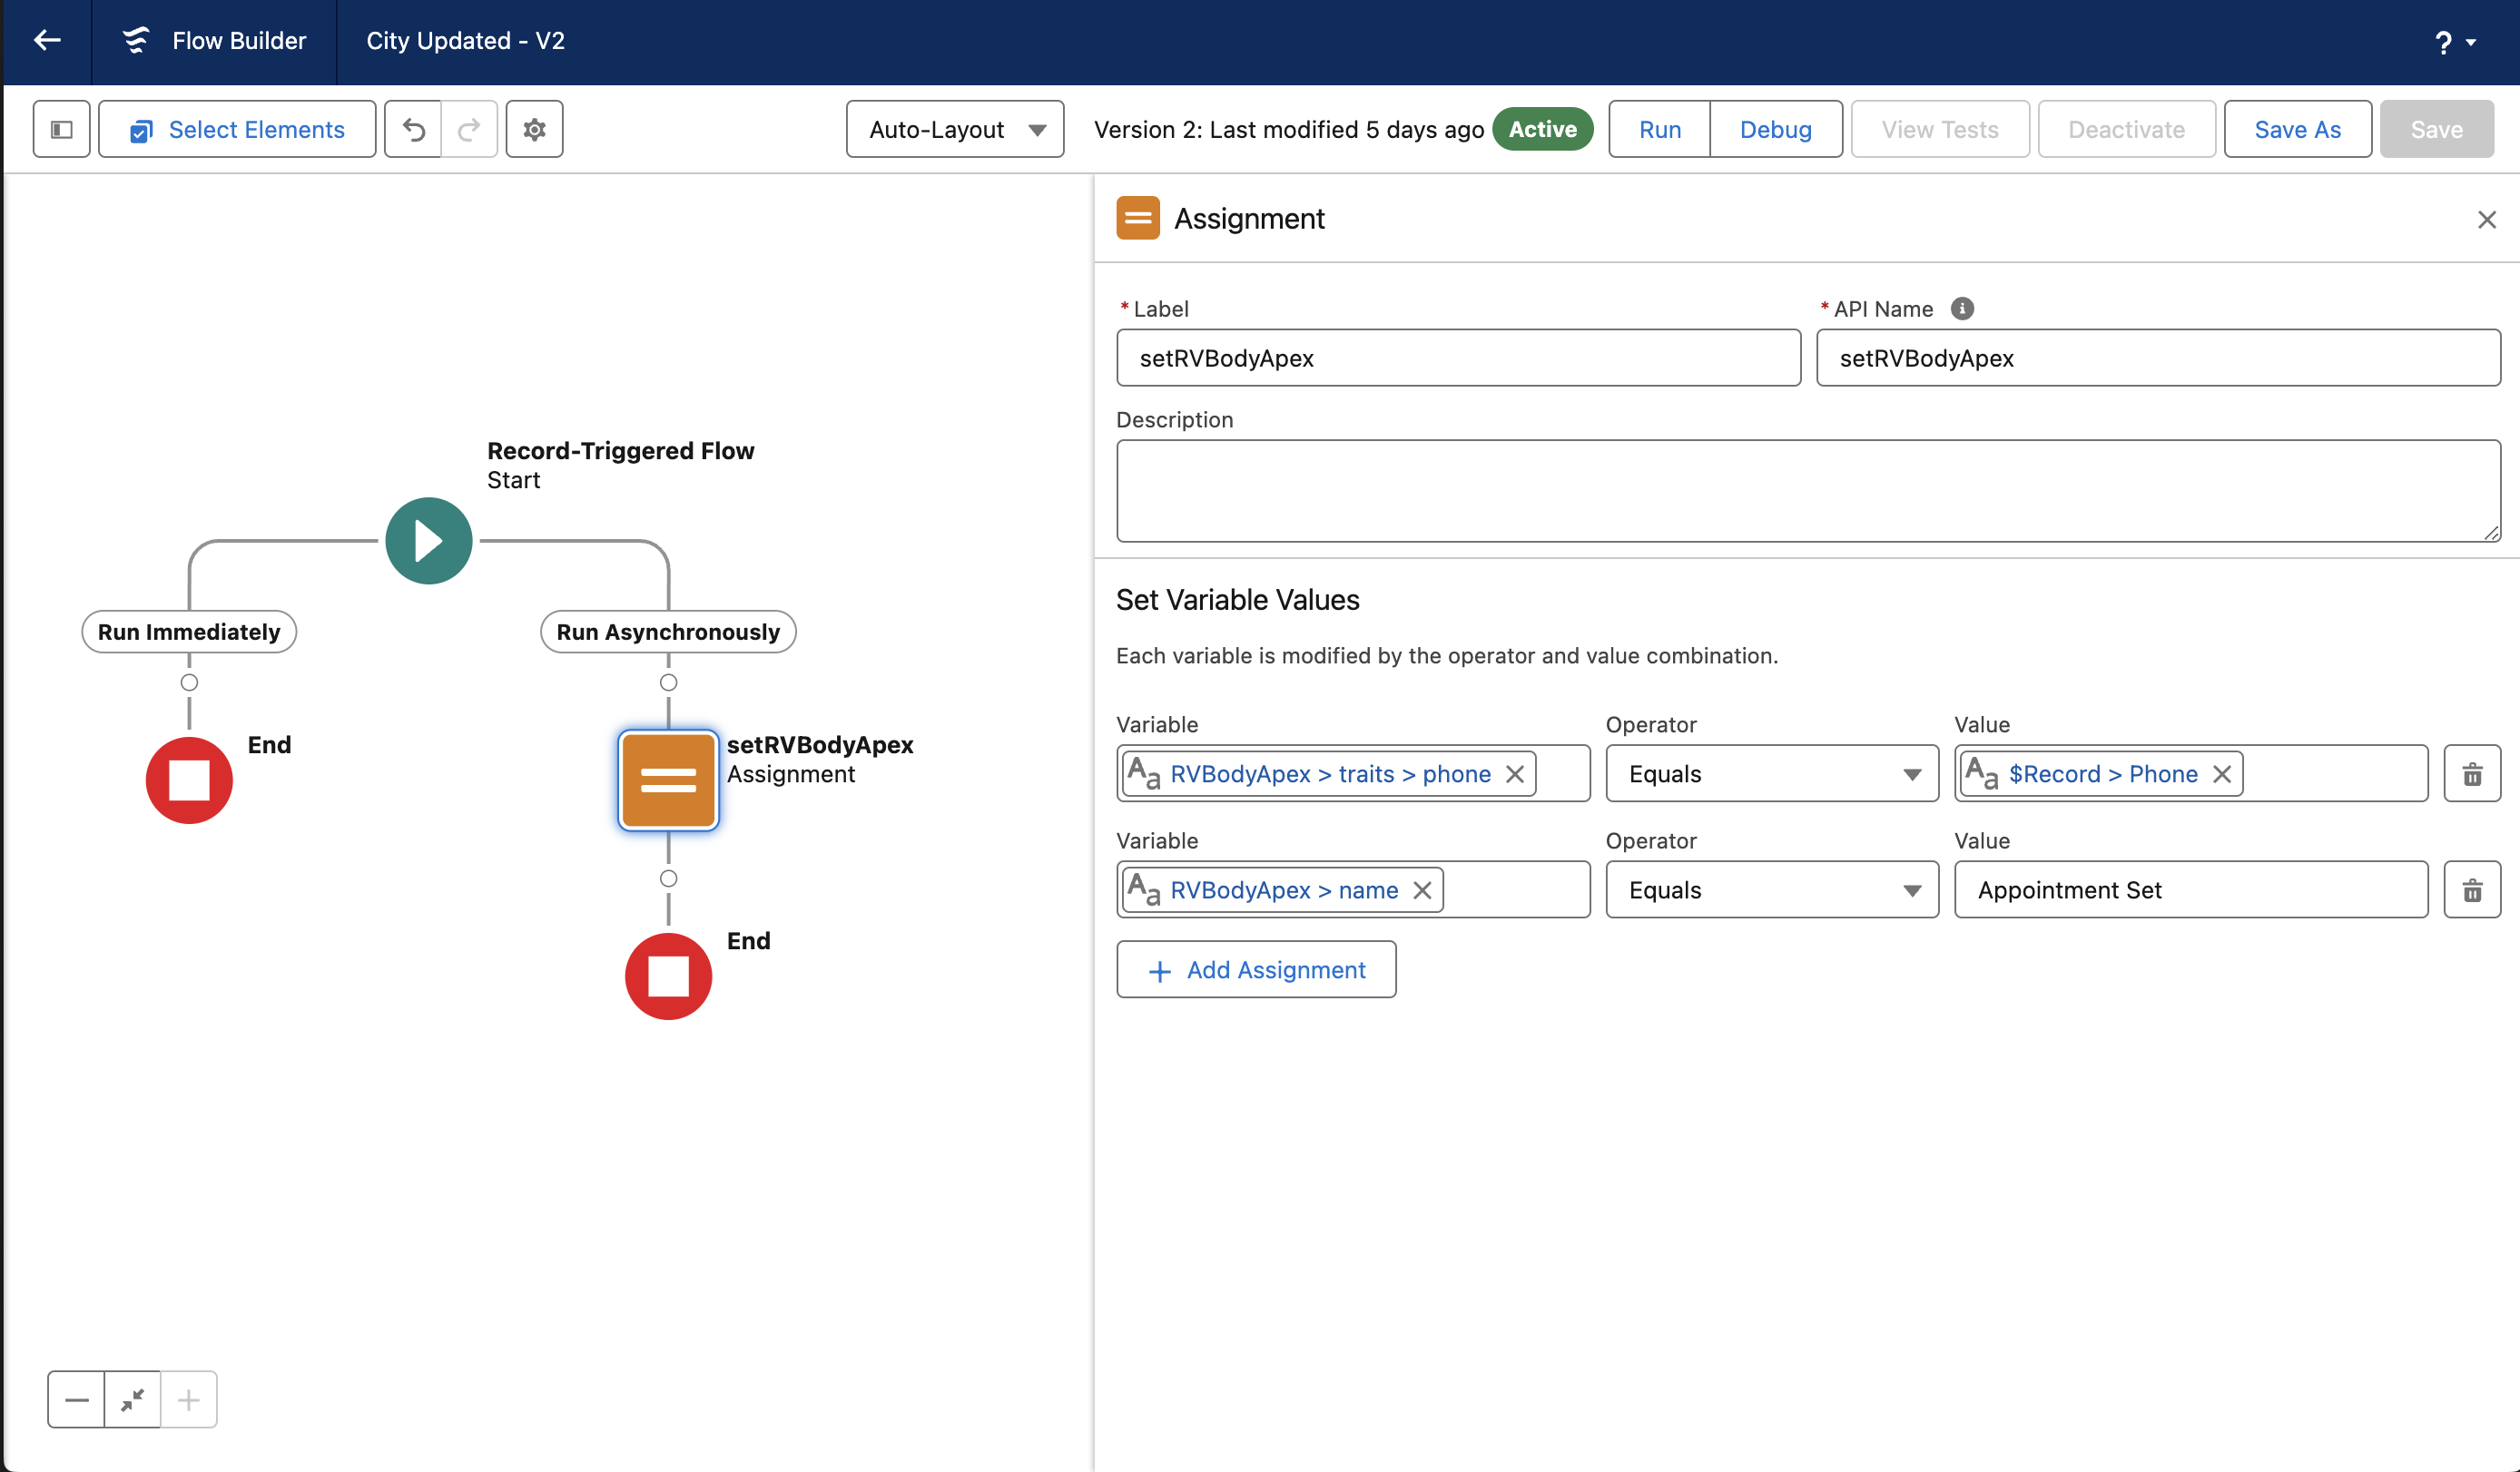
Click the "+" for the "Run Asynchronously" path
- Choose the 'Assignment' element
- Label: setRVBodyApex
- API Name:
- Description:
- Set Variable Values
- Variable: {!RVBodyApex.traits.phone}
- Operator: Equals
- Value: {!$Record.Phone}
- Note: if Phone is not in the proper format, you may need to set another variable to properly format it
- Variable: {!RVBodyApex.name}
- Operator: Equals
- Value: <this will be a static value containing the name of the event that you want to send to Regal; e.g. Conversion Event>
- Click "Done"
-
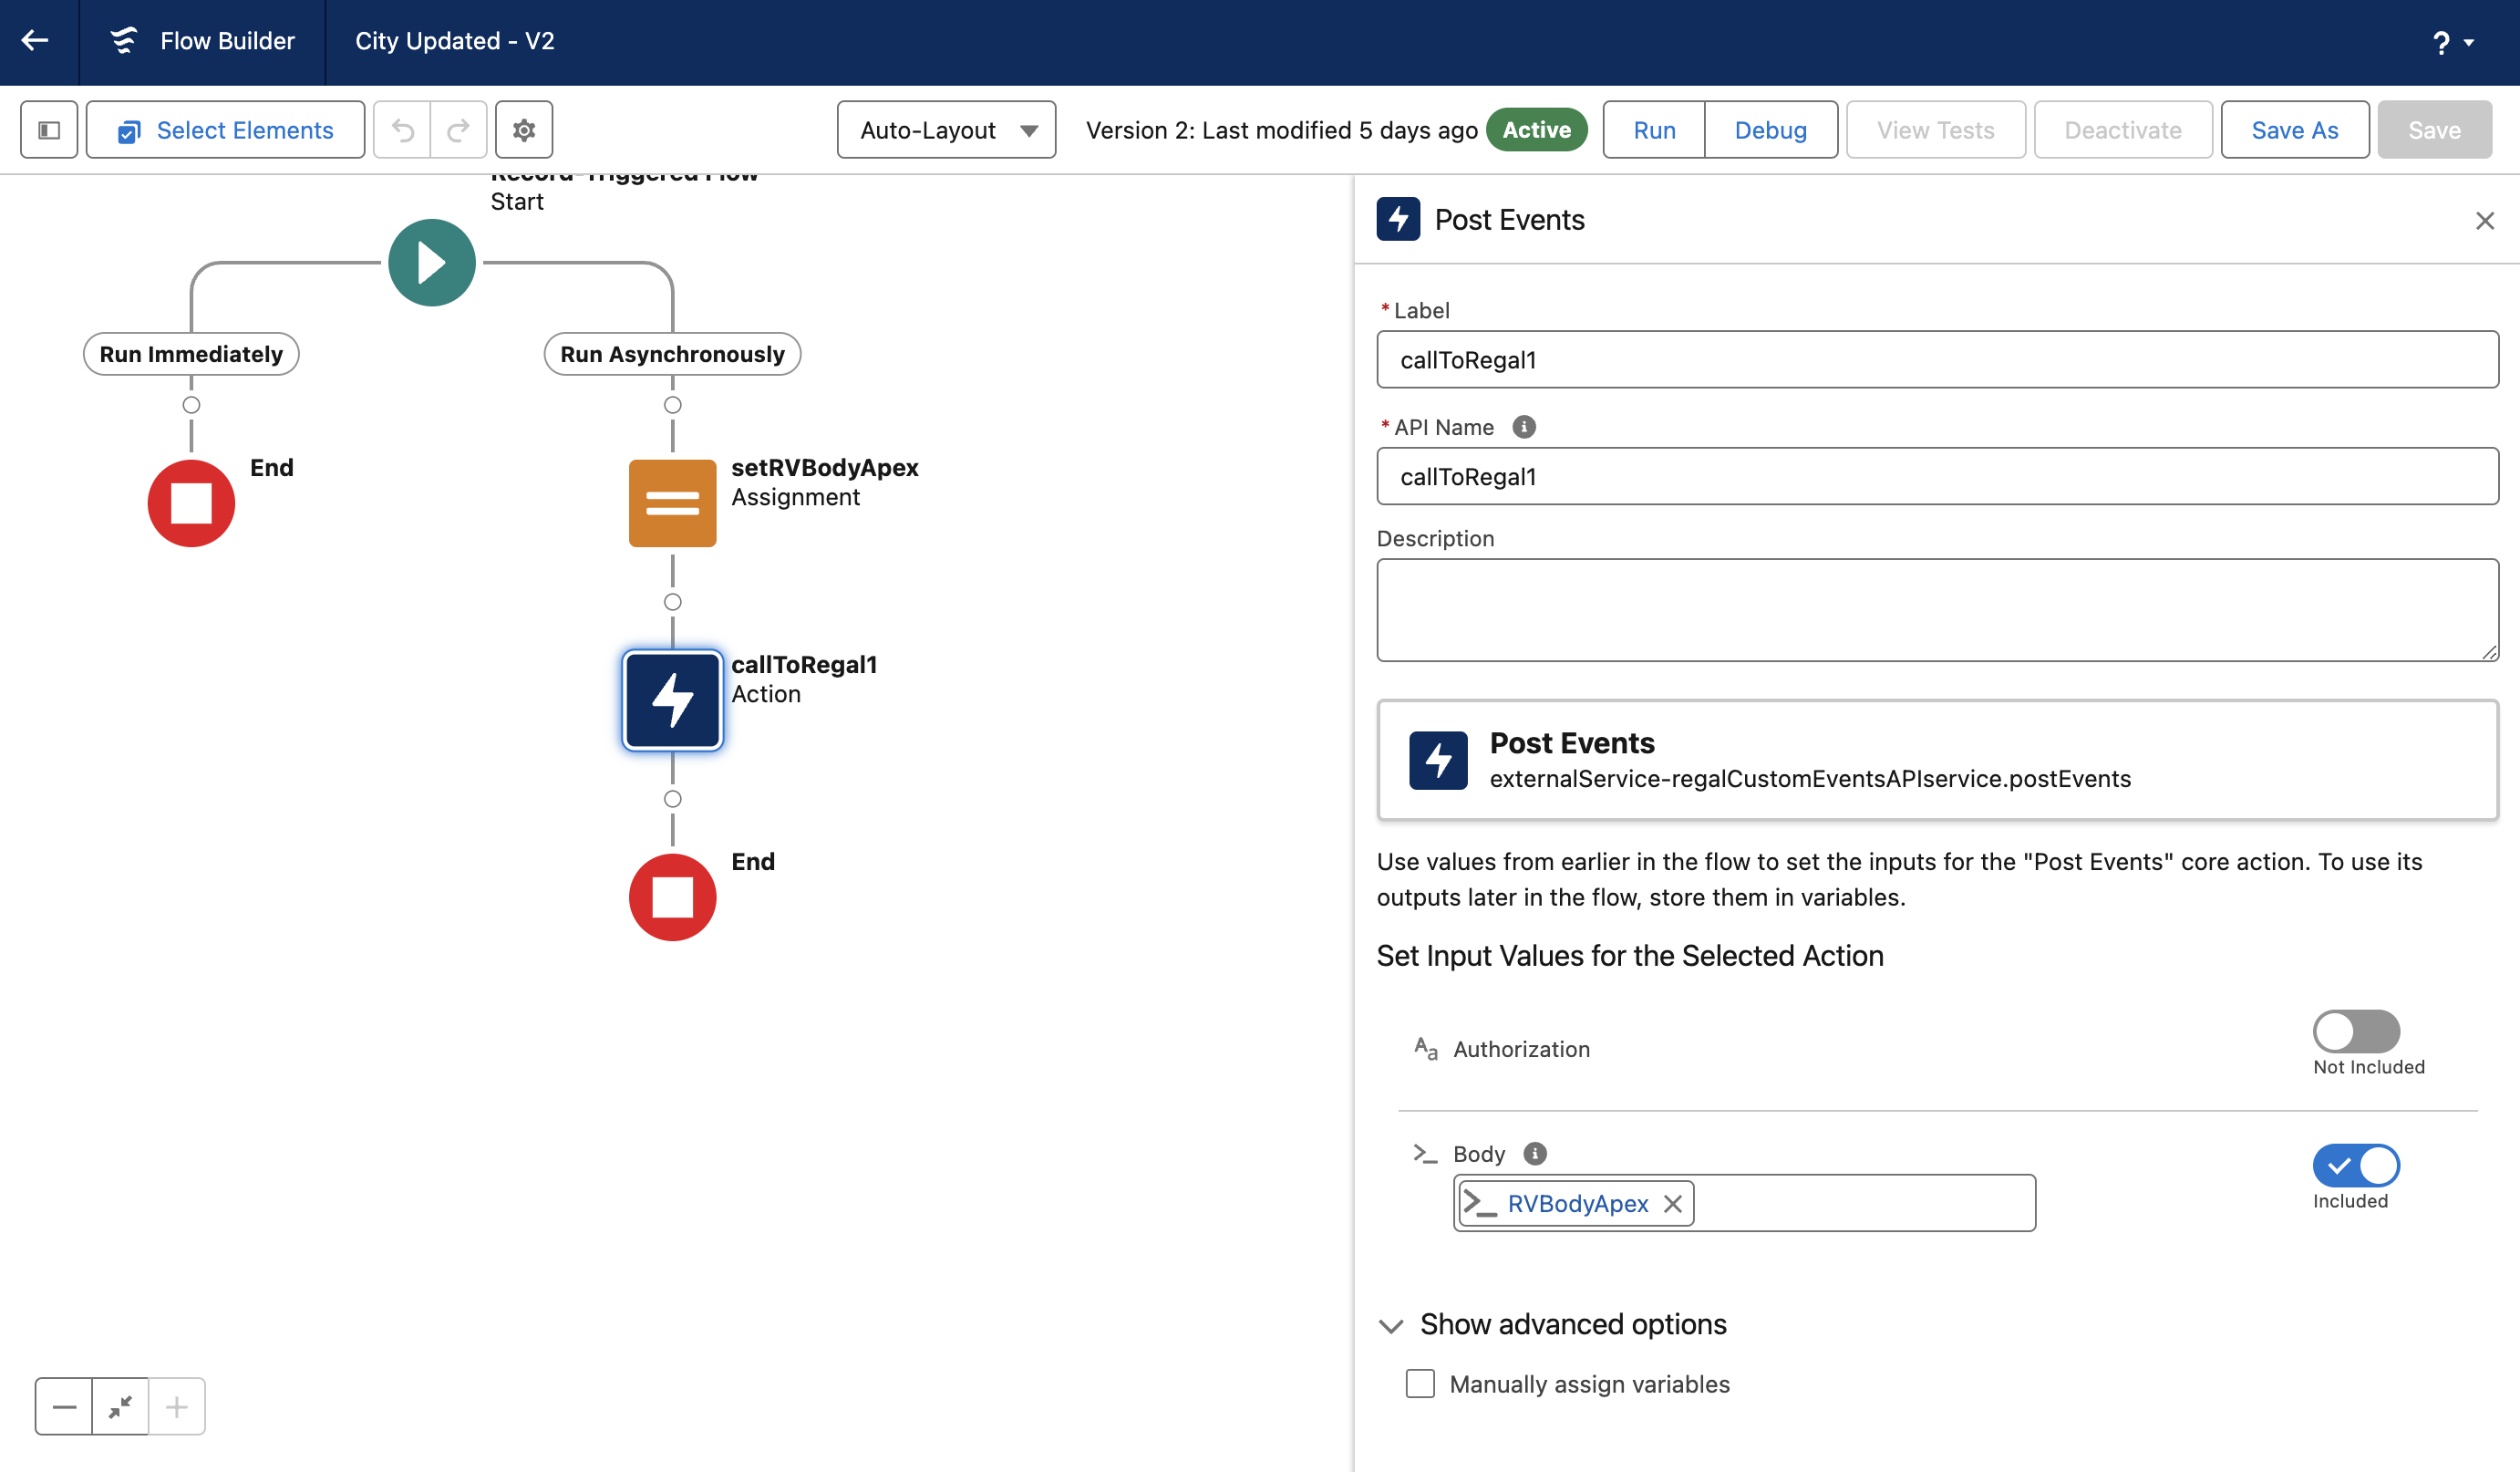
Below the 'Assignment' element, click the +
-
Choose the 'Action' element
-
Search for 'external' and you should see the external service that you set up earlier; choose it (postEvents)
- Label: callToRegal1
- API Name:
- Description:
- Set Input Values
- body - Include
- {!RVBodyApex}
- Advanced
- Unchecked 'Manually assign variables'
- Click "Done"
- Click "Save"
- Click "Activate"
-
Ensure you test your flow to verify that events are reaching Regal.
Updated 3 months ago
What’s Next
Ensure you have tested your integration End 2 End